I’ve helped a lot of people get into their router settings, and 192.168.100.1 is one of those addresses that trips people up — mostly because it doesn’t look like the more familiar 192.168.1.1 or 192.168.0.1. But if your router or modem-combo uses this address as its default gateway, you’re in the right place. This guide covers everything: how to log in from a PC or phone, what the default credentials are for major brands, what to do when the page refuses to load, and the handful of things you should actually change once you’re in.
192.168.100.1 – Router Login Admin Page
What Is 192.168.100.1?
192.168.100.1 is a private IP address — specifically, your router’s default gateway address. Think of it as the front door to your router’s control panel. Type it into a browser on your home network, and you’ll get a login page where you can change Wi-Fi settings, manage connected devices, update firmware, and a lot more.
The “private” part is important. This address exists in the range defined by RFC 1918, which sets aside certain IP blocks — including the entire 192.168.0.0/16 range — strictly for use inside local networks. That means 192.168.100.1 is completely unreachable from the public internet. Nobody outside your home or office can access it. It only works when you’re connected to that same network.
Most people don’t know this, but the “100” in the third octet is what makes this address a little unusual. It’s most commonly found on modem-router combos from cable ISPs and certain DSL gateways — not the typical standalone home router. So if your internet comes from a cable company and you have a single box handling both your modem and Wi-Fi, there’s a good chance 192.168.100.1 is your address.
Default Username and Password for 192.168.100.1
Before you try to log in, check the label on the bottom or back of your router. Manufacturers print the exact default credentials there, and they vary by model. That sticker is always more reliable than any generic list — but here are the most common defaults to try if you can’t find the label:
| Brand | Default Username | Default Password |
|---|---|---|
| TP-Link | admin | admin |
| Netgear | admin | password |
| Huawei | admin | admin |
| Motorola / Arris | admin | password |
| Zyxel | admin | 1234 |
| Tenda | admin | admin |
| D-Link | admin | (blank) |
| Cisco | cisco | cisco |
| Ubee | user | user |
| Askey | admin | admin |
ℹ️ Note: If none of these work, your credentials may have been changed previously — either by you or by your ISP’s technician. In that case, a factory reset is your only option, which we cover later in this guide.
How to Log In from a PC or Laptop
This works the same whether you’re using Chrome, Firefox, Edge, or Safari.
- Make sure your computer is connected to your home network — either over Wi-Fi or with an Ethernet cable plugged into the router.
- Open your browser.
- Click into the address bar at the top — not the search box in the middle of the screen. This is the single most common mistake people make.
- Type exactly:
192.168.100.1and press Enter. - The router’s login page should appear within a few seconds.
- Enter your username and password.
- Click Login or Sign In.
⚠️ Address bar, not search bar: If you type 192.168.100.1 into Google’s search box instead of your browser’s address bar, you’ll just get search results — not your router. Always click into the address bar at the very top of the browser window first.
How to Log In from a Mobile Device
Competitors barely mention this. Here’s a full breakdown for both iPhone and Android.
iPhone / iPad (iOS)
- Go to Settings → Wi-Fi and confirm you’re connected to your home network. (Turn off mobile data temporarily if the page won’t load — your phone might be routing through cellular instead.)
- Open Safari (or Chrome for iOS).
- Tap the address bar at the top.
- Type
192.168.100.1and tap Go. - The login page will appear. Enter your username and password.
- Tap Login.
Android
- Pull down the notification shade and confirm Wi-Fi is on and connected to your home network.
- Go to Settings → Network & Internet → Wi-Fi → tap your network → verify the Gateway address shown is 192.168.100.1. (This also double-checks you have the right IP.)
- Open Chrome or your preferred browser.
- Tap the address bar and type
192.168.100.1, then tap Go. - Enter your credentials on the login page.
Troubleshooting — When 192.168.100.1 Won’t Load
Don’t panic if the page doesn’t come up on the first try. Here are the five most common reasons and exactly how to fix each one.
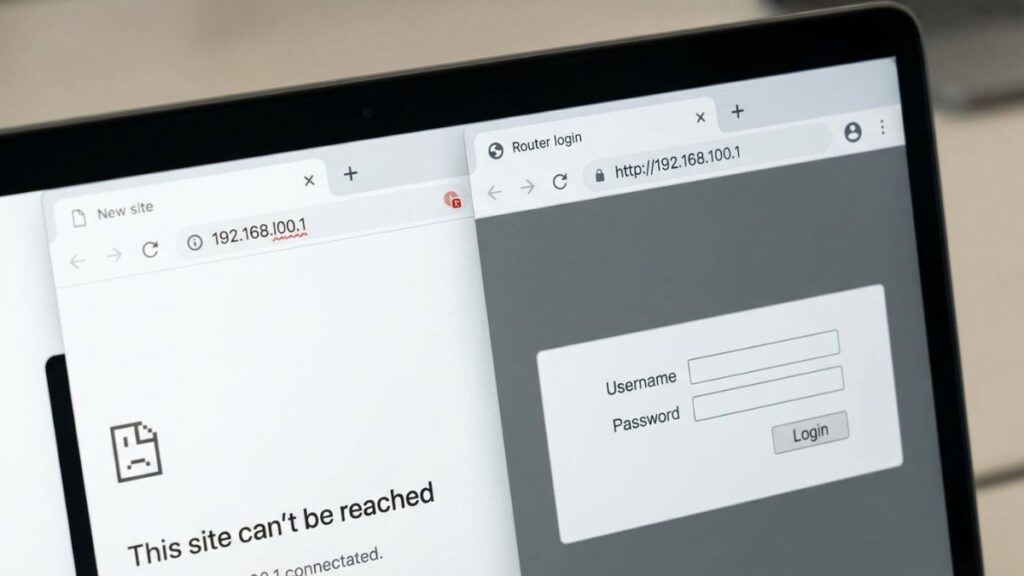
Problem 1: “This site can’t be reached” or Blank Page
Cause: Your device isn’t connected to the right network, or 192.168.100.1 isn’t actually your router’s IP address.
Fix: On Windows, open Command Prompt and type ipconfig. Look for the Default Gateway line under your active network adapter. On Mac, open Terminal and type netstat -nr | grep default. The IP listed next to “default” is your actual gateway. If it’s something other than 192.168.100.1 — like 192.168.1.1 or 10.0.0.1 — use that address instead.
You can also read more about what a default gateway actually is if you want to understand why this matters.
Problem 2: Login Page Loads but Password Is Wrong
Cause: Either you’re using the wrong default credentials, or someone (or an ISP technician) changed them at some point.
Fix: Check the sticker on the bottom of the router first. If it’s been peeled off or the credentials still don’t work, you’ll need to factory reset the router. See the reset section below. After a reset, the credentials go back to factory defaults.
Problem 3: Page Loads, Login Works, But Changes Don’t Save
Cause: Usually a browser caching issue or a double-NAT situation where you’re actually logged into an intermediate device, not your main router.
Fix: Try a different browser or open an incognito/private window. Clear your cache. If you have multiple networking devices (like a router connected to a modem-router), make sure you’re logged into the right one.
Problem 4: Getting Redirected to Your ISP’s Page Instead
Cause: Some ISPs — especially cable providers — lock down the modem-router combo they provide. When you hit 192.168.100.1, it sends you to their branded portal instead of a full admin page.
Fix: Contact your ISP and ask them to put the device in “bridge mode” or unlock admin access. Alternatively, you can add your own router behind their gateway and use that for your home network settings.
Problem 5: Page Loads Fine on One Device but Not Another
Cause: The device that can’t connect is likely on a different network — possibly a guest network or still connected to a mobile hotspot.
Fix: Check the Wi-Fi network name your device is connected to. Both devices need to be on the same network as the router. If you recently set up a guest network, any device on it won’t be able to reach the admin page — that’s actually a feature, not a bug.
How to Factory Reset Your Router
Before you reset anything, back up your current settings if you can. Log in, find the “Backup” or “Export Settings” option (usually under Administration or System Tools), and save the file. This saves you from reconfiguring everything from scratch if the reset doesn’t fix the problem.
To factory reset:
- Find the small Reset button on the back or bottom of the router. It’s usually recessed so you need a paperclip or pin to press it.
- With the router powered on, press and hold the Reset button.
- Most routers: hold for 10 seconds until the lights flash or change pattern
- Huawei devices: typically 5–8 seconds
- Arris/Motorola: often 10–15 seconds — the power light will blink
- Release the button and wait for the router to reboot (usually 60–90 seconds).
- Log in using the factory default credentials from the label on the device.
What gets wiped: Your Wi-Fi name and password, admin password, any port forwarding rules, DNS settings, parental controls, and all other custom configurations. The router goes back to factory default — like it just came out of the box.
What to Do After You Log In
Getting into the admin panel is step one. Here’s what to actually do once you’re in.
1. Change the Admin Password
This is the most important thing on this list. The default admin/admin combination is known to every hacker on the internet. Changing it takes 90 seconds.
- Look for Administration, System, or Management in the menu.
- Find Admin Password, Change Password, or Account Settings.
- Enter the current password, then your new password twice.
- Choose something at least 12 characters long — a passphrase like
BlueSky!Router9works great. - Click Save or Apply.
- You’ll be prompted to log back in with the new password.
2. Change Your Wi-Fi Password
Go to Wireless or Wi-Fi Settings. You’ll usually see sections for 2.4GHz and 5GHz separately. Update the WPA Pre-Shared Key or Wireless Password field on both bands. Click Apply. Every device on your network will need to reconnect with the new password.
3. Set Your Security Mode to WPA2 or WPA3
While you’re in the wireless settings, check the Security Mode or Encryption setting. Set it to WPA2-PSK (AES) at minimum. If your router supports WPA3, use that — Wi-Fi Alliance’s official WPA3 overview explains why it’s meaningfully better for home networks. Avoid WEP or WPA (the original version) — both are obsolete and easily broken.
4. Check Connected Devices
Most routers have a Connected Devices, DHCP Client List, or Device Map page. Take a look at everything connected to your network. If you see a MAC address or device name you don’t recognize, that’s worth investigating — it could be a neighbor using your Wi-Fi, or just an IoT device you forgot about.
5. Set Up a Guest Network
If you have visitors over regularly, a guest network is worth the five minutes it takes to set up. Guests get internet access, but they can’t see your devices or files. Our guest network is literally called “GuestWiFi” — simple names work fine. Look for Guest Network under Wireless settings.
6. Check for Firmware Updates
Go to Administration or System Tools and look for a Firmware Update or Software Update option. Keeping your router’s firmware current patches security holes and sometimes adds new features. Many modern routers can check for updates automatically — turn that on if it’s available.
7. Consider Port Forwarding
If you run a game server, NAS, or need remote access to a device at home, port forwarding is how you open specific traffic through the firewall. It’s in the Advanced or NAT section of most routers. It’s worth understanding how port forwarding works before you start poking holes in your firewall.
Common Misspellings of 192.168.100.1
Typos are the number one reason people can’t get the login page to load. Here’s every common mistake:
192.168.l00.1
192.168.100.l
192.168 100.1
192.168.1001
192.168.100.1/
1921681001
192.168.1.001
192 168 100 1
htlp://192.168.100.1
168.192.100.1
Always type the address directly, and copy-paste it if you keep getting errors.
Which Brands and ISPs Use 192.168.100.1?
Unlike 192.168.1.1 (which is used by a huge range of routers), 192.168.100.1 is a bit more specific. Here’s who uses it and when.
Commonly use 192.168.100.1 as default:
- Motorola / Arris modem-router combos (very common with cable ISPs)
- Zyxel DSL gateways
- Huawei home gateway devices (popular outside the US, and with IndiHome)
- TP-Link on select models (particularly older cable modem combos)
- Netgear modem-router combos (e.g., Nighthawk cable gateways)
- Ubee — commonly used by cable ISPs as OEM gateway hardware
Sometimes use 192.168.100.1:
- D-Link on certain DSL gateway models
- Askey and SmartRG (ISP-provided gateways, less common in the US)
- Tenda on a handful of models
Use a different address instead:
- Xfinity / Comcast — their XFi gateway typically uses
10.0.0.1 - AT&T — their BGW and NVG gateways use
192.168.1.254 - Verizon FiOS — uses
192.168.1.1(Fios router) or192.168.0.1(older models) - Spectrum — their Wave 2 gateway uses
192.168.1.1
If you’re on Xfinity, AT&T, or Verizon and 192.168.100.1 doesn’t work, check our guides for those specific gateways below.
Frequently Asked Questions
Is 192.168.100.1 the same as my Wi-Fi password?
No, not at all. There are two totally different passwords involved here. The admin password (which you use to log into the router’s settings at 192.168.100.1) controls who can configure the router. Your Wi-Fi password is what lets devices connect to your internet. They’re separate, and you should set them both to something unique.
Why does typing 192.168.100.1 take me to a page I don’t recognize?
A few possibilities: you might be on a different network than you think, your ISP has customized the admin interface with their own branding, or a previous user changed the login page settings. Double-check you’re connected to the right Wi-Fi network.
Can someone outside my home access my router through this IP?
No. 192.168.100.1 is a private address — it doesn’t exist on the public internet. It’s only reachable from inside your local network. Your neighbor sitting in their car can’t reach it. Someone on the other side of the world definitely can’t. The only risk is from devices already on your network.
I logged in and my router’s admin page looks totally different from screenshots online. Why?
Router admin interfaces vary a lot by brand and firmware version. Some are modern and clean; others look like they were designed in 2003. The underlying settings are usually the same — just in different places. If you can’t find something, check under “Advanced” settings or use the router’s search function if it has one.
My router’s label says a different IP address. Which one should I use?
Always use the one on the label — it’s specific to your model and more reliable than any generic guide. The label might say 192.168.1.1, 10.0.0.1, or something else entirely. Use that.
How do I find my router’s IP address without the label?
On Windows: open Command Prompt, type ipconfig, look for Default Gateway. On Mac: open Terminal, type netstat -nr | grep default. On iPhone: Settings → Wi-Fi → tap your network → scroll to Router. On Android: Settings → Wi-Fi → tap your network → Advanced → Gateway.
What’s the difference between the gateway IP and the router’s IP?
In home networking, they’re usually the same thing. Your “default gateway” is the device that routes traffic from your local network to the internet — and that’s your router. So when you type 192.168.100.1, you’re connecting to the same device that’s labeled as your gateway.
Should I change the default IP address of my router?
You don’t have to, but it’s a minor security step. Changing it from 192.168.100.1 to something less common (like 192.168.50.1) means automated scripts targeting default IPs have a harder time finding your admin panel. It’s not a major protection but takes about 30 seconds if you want to do it.