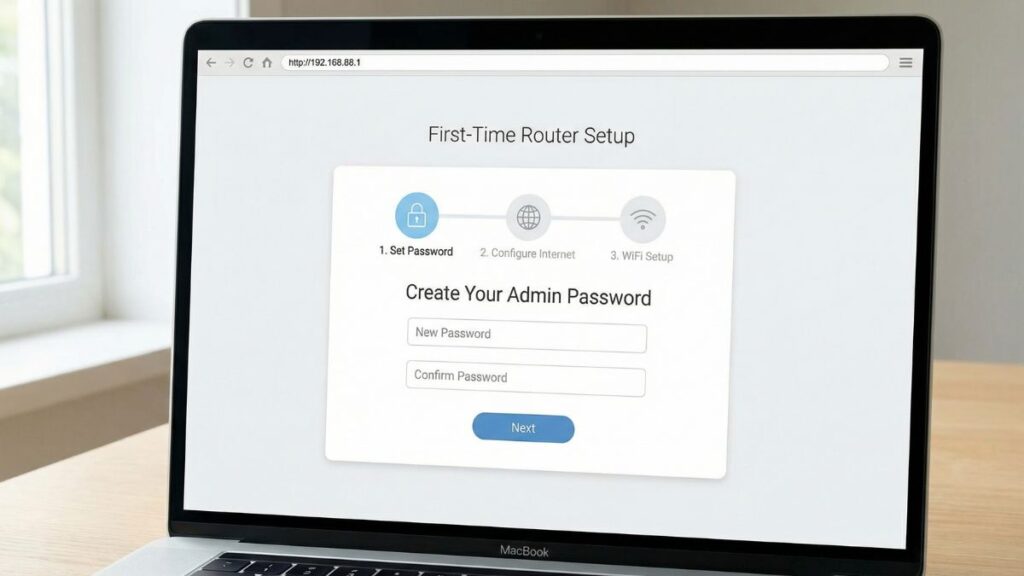
If 192.168.88.1 just pulled up a login screen you weren’t expecting — or if you’ve been trying to reach it and getting nothing — I’ve got you covered. This address is primarily the domain of MikroTik routers, and logging into one is a little different from a typical home router. I’ll walk you through everything: logging in on a PC or phone, fixing the most common problems, resetting it if you’re locked out, and actually making your network more secure once you’re in.
192.168.88.1 – Router Login Admin Page
What Is 192.168.88.1?
192.168.88.1 is a private IP address used by certain routers as their default gateway — the address you type into a browser to reach the router’s control panel. It doesn’t exist on the internet. It only works from inside your local network, on a device that’s already connected to that router.
This IP sits within the 192.168.0.0/16 private address block, one of the ranges set aside for local networks under the what is NAT framework that makes home networking work. In plain terms: your router uses this address internally, while your ISP gives it a completely different public address that the rest of the internet can see.
Here’s something that trips a lot of people up: 192.168.88.1 is not a common home router address. The two you hear about constantly — 192.168.1.1 and 192.168.0.1 — are used by TP-Link, Asus, Netgear, and most consumer brands. The .88. subnet is almost exclusively MikroTik territory. If you’ve got a MikroTik router (or a device based on MikroTik’s RouterOS software), you’re in the right place.
Default Login Credentials for 192.168.88.1
Before anything else, flip the router over and check the sticker on the bottom. MikroTik prints the login details there, and some newer models have a unique password rather than a blank one. That sticker is your most reliable source.
That said, here are the most common defaults by brand:
| Brand | Default Username | Default Password |
|---|---|---|
| MikroTik | admin | (leave blank — no password) |
| Netduma | admin | admin |
| TP-Link | admin | admin |
| Asus | admin | admin |
| Linksys | admin | admin |
| D-Link | admin | (blank) |
| Netgear | admin | password |
| Cisco | cisco | cisco |
| Tenda | admin | (blank) |
| Belkin | admin | (blank) |
The MikroTik default is the one that catches everyone off guard. You type admin in the username field and leave the password field completely empty — don’t type anything. Just click Login. If it asks you to set a new password on first login, go ahead and do it — and write it down somewhere safe immediately.
How to Log In on a PC or Mac
- Connect your computer to the router using an Ethernet cable if possible. MikroTik setups sometimes don’t broadcast Wi-Fi until they’re configured, so wired is more reliable for first-time access.
- Open any web browser — Chrome, Firefox, Edge, Safari all work.
- Click into the address bar at the top of the browser (where URLs appear).
⚠️ Critical: Type 192.168.88.1 into the address bar, not the search box. If you paste it into Google’s search field, you’ll get search results instead of your router. The address bar shows the current page’s URL — that’s where this goes.
- Type
192.168.88.1and press Enter. - The MikroTik login page (called WebFig) should appear.
- Enter
adminas the username. Leave the password field empty. Click Login. - If prompted to set a new password, do it now.
Alternatively, MikroTik routers can also be managed with WinBox, a dedicated Windows application available from MikroTik’s website. WinBox can connect to the router by MAC address even if IP connectivity isn’t set up yet — handy for advanced setups.
How to Log In on a Phone
iPhone (iOS)
- Open Settings → Wi-Fi → connect to your MikroTik network (often named “MikroTik” followed by a few characters).
- Tap the (i) next to the network name.
- Scroll to Router — confirm it says 192.168.88.1.
- Open Safari (other browsers on iOS sometimes redirect IP addresses to search).
- Tap the address bar, type
192.168.88.1, and tap Go. - On the login page, enter
adminand leave the password blank.
Android
- Go to Settings → Network & Internet → Wi-Fi.
- Tap the gear icon or long-press on your connected MikroTik network.
- Check Gateway — it should show 192.168.88.1.
- Open Chrome or another browser.
- Tap the address bar and type
http://192.168.88.1— include thehttp://part to prevent Chrome from treating it as a search. - Log in with username
adminand no password.
One heads-up for Android users: MikroTik’s WebFig interface is fairly dense on a small screen. It’s designed for desktop use. For mobile-friendly management, MikroTik has an app called The Dude and also supports management through WinBox on Windows — if you need to do serious configuration, a laptop is worth the extra step.
Troubleshooting: 5 Reasons 192.168.88.1 Isn’t Working
1. You’re Not Connected to the MikroTik Network
Cause: Your device connected to a different network — a neighbor’s Wi-Fi, a mobile hotspot, or another router in your building.
Fix: Check your Wi-Fi settings and make sure you’re on the right network. Better yet, plug in directly with an Ethernet cable. The router admin page is only reachable from inside its own network.
Fix: Check your Wi-Fi settings and make sure you’re on the right network. Better yet, plug in directly with an Ethernet cable. The router admin page is only reachable from inside its own network.
2. MikroTik Hasn’t Finished Booting
Cause: Routers need a minute or two to fully start up after being powered on or restarted.
Fix: Don’t panic if the page won’t load immediately after plugging in. Wait about 90 seconds after the lights stabilize, then try again. The WebFig interface won’t respond until RouterOS is fully loaded.
Fix: Don’t panic if the page won’t load immediately after plugging in. Wait about 90 seconds after the lights stabilize, then try again. The WebFig interface won’t respond until RouterOS is fully loaded.
3. Your Browser Is Treating the IP Like a Search Query
Cause: Modern browsers — especially Chrome — sometimes interpret bare IP addresses as search terms rather than URLs.
Fix: Type http://192.168.88.1 with the full http:// prefix. This tells the browser it’s a direct address. You can also try pressing Enter immediately after typing without any extra characters.
Fix: Type http://192.168.88.1 with the full http:// prefix. This tells the browser it’s a direct address. You can also try pressing Enter immediately after typing without any extra characters.
4. The Router’s IP Was Changed
Cause: A previous administrator or setup wizard changed the LAN IP from the default 192.168.88.1 to something else.
Fix: On Windows, open Command Prompt and run ipconfig. Look for Default Gateway — that’s your router’s actual current IP. On Mac, go to System Settings → Network → your connection → Details → TCP/IP tab. On the router itself, you can also how to find your router’s IP address through the OS network settings.
Fix: On Windows, open Command Prompt and run ipconfig. Look for Default Gateway — that’s your router’s actual current IP. On Mac, go to System Settings → Network → your connection → Details → TCP/IP tab. On the router itself, you can also how to find your router’s IP address through the OS network settings.
5. You’re Getting “Connection Refused” or a Blank Page
Cause: MikroTik’s web interface (WebFig) might be disabled on the WAN port by default on some models. If you’re plugged into ether1 (the WAN port), you may not be able to reach the admin page from there.
Fix: Make sure you’re connected to one of the LAN ports (usually ether2 through ether5, or the Wi-Fi), not the WAN/internet port. The WAN port is firewalled by default on most MikroTik configurations. Try a different port on the back of the router.
Fix: Make sure you’re connected to one of the LAN ports (usually ether2 through ether5, or the Wi-Fi), not the WAN/internet port. The WAN port is firewalled by default on most MikroTik configurations. Try a different port on the back of the router.
Factory Reset: When You’re Completely Locked Out
If you’ve forgotten the admin password and nothing else works, a factory reset will get you back in. Be warned: this erases all configuration — IP rules, firewall settings, Wi-Fi credentials, port forwarding, everything. You start from scratch.
Before you reset: If you can still reach any part of the router, export your config first. In the MikroTik terminal or WinBox, run /export file=backup to save a configuration file. You won’t be able to import it directly after a reset without reviewing it, but it’s a useful reference.
How to reset a MikroTik router:
- Find the Reset button — it’s typically a small pinhole on the back or side of the unit. Some MikroTik models have a physical button labeled “Reset” or “RES.”
- Power off the router.
- Hold down the Reset button and power the router back on while holding it.
- Keep holding for about 5 seconds until the LED starts flashing or changes behavior.
- Release and wait about 60–90 seconds for the router to reboot.
- Log in with username
adminand no password.
Some MikroTik models also support a Netinstall reset (more thorough, requires a Windows PC connected via Ethernet). If the pinhole reset doesn’t work, check MikroTik’s official documentation for your specific model.
What to Do After You Log In
Getting into 192.168.88.1 is step one. Here’s what to actually do once you’re inside:
1. Set an Admin Password — Right Now
MikroTik’s default of no password is a huge security risk on any network with more than one person. Anyone connected to your network can reach 192.168.88.1 and make changes without being challenged.
- In WebFig, go to System → Users.
- Click on the
adminuser. - Click Password and enter your new password twice.
- Click Change.
Follow the NIST password guidelines — at minimum, use something 12+ characters long that you don’t reuse elsewhere. Write it down in a secure spot immediately.
2. Change Your Wi-Fi Password and SSID
- Go to Wireless → Interfaces.
- Double-click your wireless interface.
- Change the SSID (network name) in the General tab.
- Go to Wireless → Security Profiles.
- Edit the active profile and update the WPA Pre-Shared Key (your Wi-Fi password).
- Click Apply and OK.
3. Set Your Wireless Security to WPA2 or WPA3
In the same Security Profiles area, make sure Authentication Types is set to WPA2 PSK at minimum — or WPA2/WPA3 mixed if your devices support it. The older WEP and WPA (original) protocols are crackable with modern tools. WPA2 vs WPA3 is worth reading if you’re curious about the differences — the short version is: use WPA3 if your devices support it, WPA2 if not, and avoid everything older.
4. Check Connected Devices
Go to IP → DHCP Server → Leases to see every device currently connected and getting an IP from your router. You’ll see device names, IP addresses, and what is a MAC address for each one. If something doesn’t look familiar, you can block it by adding it to an address list or changing your Wi-Fi password to kick it off.
5. Set Up a Guest Network
MikroTik supports virtual access points, which lets you create a second Wi-Fi network for guests or IoT devices that’s isolated from your main network. Look under Wireless → Interfaces → Add a Virtual AP. Pair it with a separate security profile and bridge configuration. It’s a bit more involved than consumer routers, but well worth doing if you have smart home devices or regular visitors — how to set up a guest network covers the general concept well.
6. Enable Port Forwarding and Update Firmware
For gaming, remote access, or running any service from home, you’ll need firewall NAT rules. In MikroTik, go to IP → Firewall → NAT to add destination NAT rules. how DNS works is worth reading if you’re also setting up local DNS resolution.
For firmware: go to System → Packages → Check For Updates to see if a newer RouterOS version is available. MikroTik releases updates regularly, and patching is one of the most effective things you can do to keep the router secure.
Common 192.168.8.1 Login Typos
Most frequent IP address misspellings that prevent router access.
192.168.8.1
192.168.88.l
192.168.88.11
192.168.88.10
192-168-88-1
192.168.888.1
192.168.8 8.1
http://www.192.168.88.1
19216888 1
Correct IP: 192.168.8.1
Which Brands and ISPs Use 192.168.88.1?
Routers That Use This IP
Primary brand:
- MikroTik — This is essentially MikroTik’s signature address. Every MikroTik RouterBOARD device ships with 192.168.88.1 as the default LAN gateway on the ether1 interface. MikroTik is a Latvian networking company popular with ISPs, small businesses, network enthusiasts, and IT professionals worldwide. Their hAP series, RB series, and Chateau models all use this IP by default.
Also uses this IP occasionally:
- Netduma — Gaming router brand whose earlier models used 192.168.88.1 (later models may differ).
- Some wireless CPE and outdoor access points — Particularly from smaller manufacturers building on RouterOS-licensed hardware.
- Custom-configured networks — Some network administrators manually set 192.168.88.1 as their LAN gateway even on non-MikroTik hardware.
If your ISP-supplied gateway shows 192.168.88.1, it’s likely a MikroTik-based unit — some ISPs, particularly smaller regional providers and international carriers, do deploy MikroTik CPE equipment to customers.
Frequently Asked Questions
Why does MikroTik have no default password?
MikroTik ships devices with a blank admin password by design — the idea is that you set your own password during initial configuration. In practice, a lot of people skip this step and leave it blank, which is a serious security risk. Always set a password before putting the router into service on a real network.
What’s the difference between my Wi-Fi password and my router admin password?
These are completely separate credentials. Your Wi-Fi password is what you enter to connect phones, laptops, and other devices to your wireless network. Your router admin password is what you enter at 192.168.88.1 to access the router’s configuration panel (WebFig). You should have different passwords for each, and neither should be left at the default.
What is MikroTik WebFig?
WebFig is MikroTik’s browser-based router management interface. When you navigate to 192.168.88.1, that’s what loads. It’s a full-featured but somewhat technical interface — if you find it confusing, MikroTik also offers WinBox (a Windows desktop app) and The Dude (a network management tool) as alternatives.
Can someone outside my home access 192.168.88.1?
No. It’s a private IP — the public internet can’t route traffic to it. However, MikroTik’s WAN port (ether1) is firewalled by default, meaning you also can’t access the admin panel through the internet-facing port even from inside the network. This is by design and is a good security feature.
I see a black terminal/console screen instead of a WebFig login page — what’s happening?
Some MikroTik models default to a terminal interface rather than WebFig in the browser. If you see a command-line prompt, WebFig may not be enabled. Try connecting with WinBox instead, or enable the www service from the terminal by typing /ip service enable www and pressing Enter.
How do I update RouterOS firmware on a MikroTik device?
Log into WebFig, go to System → Packages, then click Check For Updates. Select your update channel (stable is recommended for most users) and click Download & Install. The router will reboot after updating. how to update router firmware covers the general process well if you’re new to this.