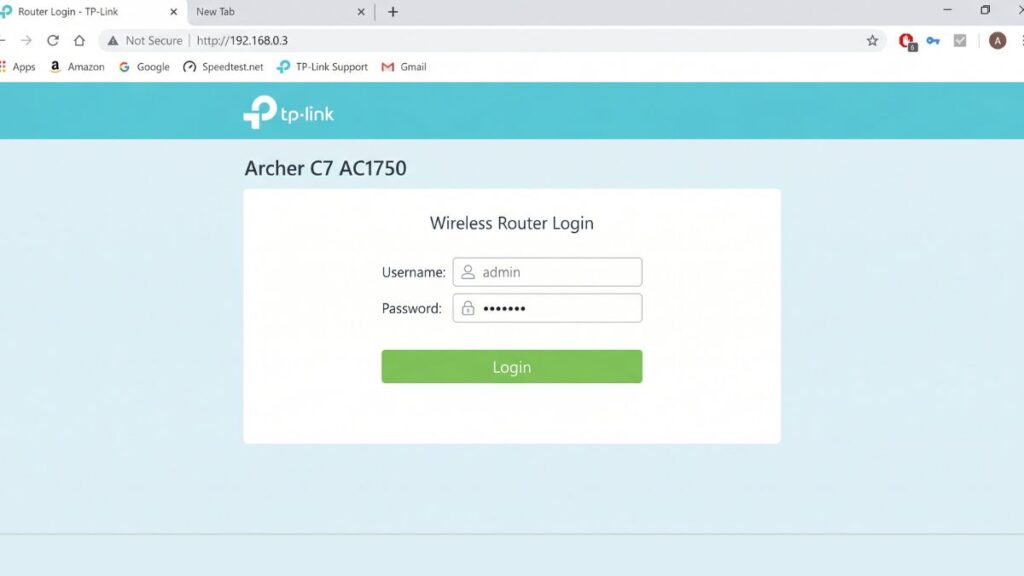
If you searched for 192.168.0.3 hoping to find a router login page, you’ve probably already figured out it didn’t work — or you’re about to try and want to know why. Here’s the honest answer upfront: 192.168.0.3 is not a router admin address. It’s a private IP assigned to a device on your network — a laptop, a phone, a printer, a smart TV — not to the router itself.
I’ve seen a lot of people land on this address after running a network scan, checking their device settings, or misreading their router label. It’s an easy mix-up. The good news is that getting to your actual router login page takes about 30 seconds once you know where to look.
Router Access Panel
Type
192.168.0.3
in your browser or click the link to access the router admin page.
It works only when you’re connected to the same Wi-Fi network.
It’s a private IP address — part of the 192.168.0.x subnet that millions of home routers in the US create for their local network. These private ranges are set aside by RFC 1918 private address ranges, which defines which blocks of IP space are reserved for internal use and never routed across the public internet.
Here’s how a typical 192.168.0.x home network divides up its addresses:
Devices on the network (PCs, phones, printers, etc.)
192.168.0.255
Broadcast address (reserved, not a device)
192.168.0.3 sits squarely in that middle range — assigned by the router’s DHCP server to whatever device connected third after the router booted up. Most of the time that’s a PC, phone, smart TV, or game console. It could be any device, and it changes every time devices connect and disconnect unless you’ve set a static IP.
Most people who end up searching for 192.168.0.3 fall into one of these situations:
They ran ipconfig or checked their network settings and grabbed the device IP instead of the gateway
They saw this address in a network scan and weren’t sure what owned it
Their router label has fine print and they read the wrong line
They’re troubleshooting a connection problem and were told to “check the IP”
In every case, the fix is the same: find your default gateway — that’s the router’s address — and use that to access the admin panel.
How to Find Your Router’s Actual IP Address
Don’t guess. Here’s the exact method for every device type.
How to Log In to 192.168.0.3 — PC Steps
Press Windows key + R, type cmd, press Enter
Type ipconfig and press Enter
Look for Default Gateway under your active adapter (Wi-Fi or Ethernet)
That number — likely 192.168.0.1 — is your router’s login address
You’ll also see your own device’s IP listed as IPv4 Address. That might be 192.168.0.3, or 192.168.1.5, or whatever number the router assigned you. Don’t use that one for logging in — use the Default Gateway line only.
On Mac
Open System Settings → Network
Select your active connection (Wi-Fi or Ethernet)
Click Details → find the Router field
That’s your gateway IP
On iPhone
Go to Settings → Wi-Fi
Tap the (i) icon next to your connected network
Scroll down — look for the Router row
That’s the login address
Android Steps
Open Settings → Wi-Fi (or Connections on Samsung)
Tap and hold your network name → tap the gear or Manage network
Once you have the right IP (almost certainly 192.168.0.1 on a 192.168.0.x network), you’ll need to log in. Here are the factory defaults for the major brands — but always check the sticker on your router first, since printed credentials are more reliable than any list.
Brand
Default Login IP
Username
Password
D-Link
192.168.0.1
admin
(blank)
Netgear
192.168.0.1
admin
password
TP-Link
192.168.0.1 or 192.168.1.1
admin
admin
Asus
192.168.1.1
admin
admin
Linksys
192.168.1.1 or 192.168.0.1
admin
admin
Cisco (home)
192.168.0.1 or 192.168.1.1
admin
admin
Tenda
192.168.0.1
admin
admin
Belkin
192.168.2.1
admin
(blank)
Note on D-Link: Many D-Link routers ship with a blank password field — leave it empty when logging in, don’t type the word “blank.”
Most people don’t know this: if none of the defaults work, the router label is always authoritative. Manufacturers sometimes update default credentials between firmware versions, so the printed sticker wins over any online list.
How to Log Into Your Router — Step by Step
On a PC or Laptop
Make sure you’re connected to your home network — Wi-Fi or Ethernet cable works
Open any browser: Chrome, Firefox, Edge, Safari
Click the address bar at the top — not Google’s search bar, not the omnibox in the middle of the page
⚠️ Address bar, not search bar. Typing 192.168.0.1 into the Google search box will return search results, not your router. You want the thin bar at the very top of the browser window where the URL appears.
Type 192.168.0.1 (or whatever your gateway showed) and press Enter
A login page should appear — enter your username and password
Click Login or press Enter
On iPhone (iOS)
Connect to your home Wi-Fi — you must be on the same network
Open Safari — it handles local network addresses more reliably than Chrome on iOS
Tap the address bar at the top and type 192.168.0.1
Tap Go on the keyboard
Enter your credentials on the login page that appears
On Android
Connect to your home Wi-Fi network
Open Chrome or any browser
Tap the address bar and type 192.168.0.1
Tap the go/enter button
Log in with your username and password
What Is the Device at 192.168.0.3 on My Network?
If you’re trying to figure out which device on your network has been assigned 192.168.0.3 — that’s a different question, and a useful one. Here’s how to find it.
Method 1 — From the router admin panel: Once you’re logged into your router (at 192.168.0.1), look for a section called DHCP Client List, Attached Devices, Connected Devices, or LAN Clients. It will show you a table with every device’s IP, MAC address, and sometimes a hostname. Find the row with 192.168.0.3 and you’ll see the device name.
Method 2 — From the device itself: If you suspect a specific device (say, your laptop), check its network settings. On Windows, run ipconfig and look at the IPv4 Address. On a phone, check Settings → Wi-Fi → network details. If it shows 192.168.0.3, that’s your device.
Understanding what is a MAC address helps a lot here — the MAC is a unique hardware identifier burned into every network card, and it’s how routers track which device is which even when IP addresses change.
Method 3 — Network scanner app: Free tools like Fing (available on iPhone and Android) scan your local network and show every connected device with its IP, hostname, and hardware manufacturer. It’s especially handy for identifying mystery devices.
5 Reasons Your Router Login Page Isn’t Loading
If you’re trying to access the 192.168.0.1 router login page, you’re not alone. Below are the most common issues users face and how to fix them quickly.
1. You’re using 192.168.0.3 instead of 192.168.0.1
Cause: This is the most common cause for people landing on this page. 192.168.0.3 is a client device address. The router listens for login connections at its own IP — use ipconfig / network settings to find your actual default gateway before trying anything else.
2. You’re on the wrong network
Cause: Your phone or laptop might be connected to a neighbor’s Wi‑Fi, a mobile hotspot, or a VPN — all of which would cut you off from your home router entirely.
Fix: Check that the Wi‑Fi name shown in your settings matches your home network. Don’t panic — it happens to everyone. Disconnect from the VPN or hotspot, reconnect to your home Wi‑Fi, and try again.
3. Browser is treating the IP as a search query
Cause: Some browsers, especially Chrome, will send bare IP addresses to the search engine if they don’t recognize them.
Fix: Try typing http://192.168.0.1 with the http:// prefix to force the browser to treat it as an address rather than a search. Or try a different browser like Firefox or Edge.
4. A browser extension is blocking the connection
Cause: Privacy extensions, ad blockers, and security tools occasionally interfere with local network pages.
Fix: Open a Private/Incognito window (which disables most extensions) and try logging in from there. If that works, the culprit is an extension.
5. Your router’s default gateway has been changed
Cause: If someone previously logged into the router and changed the LAN IP address from 192.168.0.1 to something else, the old address won’t work.
Fix: Run ipconfig to find the current gateway. If you can’t reach it at all, a factory reset (see below) will restore the original settings.
How to Factory Reset Your Router
A factory reset is the nuclear option — it wipes all your custom settings and restores everything to factory defaults, including the Wi-Fi name, Wi-Fi password, admin password, and the router’s IP address. Use this only when you’re locked out and have no other way in.
Before you reset: Check if your router has a settings backup option. Log in if you can, find Administration or Backup, and export a config file. A few minutes of backup can save you a lot of reconfiguration time.
To perform the reset:
Keep the router powered on
Locate the Reset button — usually a small pinhole on the back or bottom, labeled “Reset” or “RST”
Insert a straightened paperclip or pin and press and hold the button
Hold for the required time by brand:
D-Link: 10 seconds
Netgear: 7–10 seconds
TP-Link: 10 seconds
Asus: 10 seconds
Linksys: 15 seconds
Tenda: 8–10 seconds
Release when the router’s LEDs flash or the unit reboots
Wait 60–90 seconds for the router to fully restart
Connect to the default Wi-Fi network (shown on the router label)
Navigate to 192.168.0.1 (or your brand’s default) and log in with factory credentials
What to Do After Logging In
Now that you’re into the admin panel, here’s the priority list of things to actually do.
1. Change the Admin Password — Now
The default admin password (admin, password, or blank) is public knowledge. If you leave it unchanged, anyone who connects to your Wi-Fi can access your router settings. Here’s how to change it:
Find Administration, System, Management, or Advanced
Look for Admin Password, Router Password, or Login Password
Enter the current password, then your new one
Save the change
Pick something memorable but not obvious. Following NIST password guidelines — longer passphrases over short complex passwords — is the current gold standard. Something like BlueLake!Fence2025 beats P@$$w0rd every single time.
2. Change Your Wi-Fi Password
Go to Wireless or Wi-Fi Settings and find the Password, Passphrase, or Pre-Shared Key field. Update it to something strong. Note: this is separate from the admin password above — one controls network access, the other controls router settings.
3. Set Security Mode to WPA2 or WPA3
While you’re in wireless settings, check your security protocol. You want WPA2-Personal at minimum. If your router and devices support it, WPA2 vs WPA3 shows a clear improvement in protection against modern attacks — upgrade if you can. Avoid WEP and plain WPA — they’re outdated and easily cracked.
4. Check What’s Connected
Under DHCP Client List or Attached Devices, scan through every device on your network. If you see something you don’t recognize — an unknown hostname, a device you’ve never added — that’s worth investigating. You can block or kick devices from this panel on most routers. Also a good time to note which device landed at 192.168.0.3 if you were curious.
5. Set Up a Guest Network
If people visit your home regularly, a guest network is one of the smartest five-minute router settings you can enable. It gives visitors internet access without touching your primary network. Look for Guest Network under Wireless settings, create a separate name and password, and keep your main network for your own devices only. Knowing how to set up a guest network properly also lets you control bandwidth limits for guests on many routers.
6. Update the Firmware
Router firmware updates patch security vulnerabilities that could expose your entire network. Look for Firmware Update or Software Update in the Administration section. Some routers check automatically; others need a manual prompt. Check every few months — and never interrupt a firmware update by unplugging the router.
Common Misspellings of 192.168.0.3
If you’re here from a typo, here are the variants people commonly search:
192.168.o.3
192.168.0.03
192.168.0.3.
192-168-0-3
192.168.0.33
192.168.0.3/
19216803
192.168.l.3
Correct address:192.168.0.3
— None of these will open a router admin page, because 192.168.0.3 itself isn’t a router address — but if your actual gateway is 192.168.0.1, you can access it at
http://192.168.0.1.
Which Brands and ISPs Use the 192.168.0.x Subnet?
Not every router creates a 192.168.0.x network. Knowing which brands do — and which don’t — helps you know where to look.
Brands that commonly default to 192.168.0.x: D-Link and Netgear are the two biggest names that default to the 192.168.0.x range, with 192.168.0.1 as the gateway. Some TP-Link, Tenda, and Cisco models also use this range depending on the firmware version.
Brands that usually use a different subnet: Asus and Linksys typically default to 192.168.1.x, putting the router at 192.168.1.1. Belkin often uses 192.168.2.1. These routers would assign a device address like 192.168.1.3 or 192.168.2.3, not 192.168.0.3.
Major US ISPs and their default ranges:
Xfinity/Comcast — Uses 10.0.0.x, with the gateway at 10.0.0.1. If you have Xfinity gear, you won’t see a 192.168.0.x network by default.
AT&T — Gateway devices like the BGW320 typically create a 192.168.1.x network with the router at 192.168.1.254
Spectrum — Most Spectrum-provided routers default to 192.168.1.x with the gateway at 192.168.1.1
Verizon FiOS — Typically uses 192.168.1.x; some older models used 192.168.0.x
If you see a 192.168.0.3 address on your device, there’s a strong chance your network is running a D-Link or Netgear router with the default 192.168.0.x subnet.
Frequently Asked Questions
Why doesn’t 192.168.0.3 open a router admin page?
Because it’s a client device address, not a router address. On a standard 192.168.0.x network, the router sits at 192.168.0.1 and handles all login requests there. Addresses .2 through .254 are assigned by DHCP to devices like phones, laptops, and TVs — none of them host an admin panel.
What device has the IP address 192.168.0.3 on my network?
Log into your router at 192.168.0.1, find the DHCP client list, and look for the row showing 192.168.0.3. You’ll see the device’s hostname and MAC address. Alternatively, check your individual devices’ network settings to see which one has that IP.
Can I make 192.168.0.3 a static IP for a specific device?
Yes. Log into your router and look for Address Reservation or Static DHCP. You can bind a specific device’s MAC address to 192.168.0.3 so it always gets the same IP. This is useful for printers, game consoles, and home servers that need port forwarding.
What’s the difference between my device IP and my router IP?
Your device IP (like 192.168.0.3) is the address the router assigns your laptop or phone — it’s your address inside the home network. Your router IP (like 192.168.0.1) is the router’s own address and also the gateway through which your internet traffic flows. The router IP is what you type into a browser to access settings. Understanding how DHCP assigns IP addresses explains the whole process clearly.
My IP address changes every time I reconnect. Can I fix that?
Yes. DHCP assigns addresses dynamically, so your device might get 192.168.0.3 one day and 192.168.0.7 the next. Use the router’s Address Reservation feature to pin a specific IP to your device’s MAC address permanently.