If you’ve landed here, there’s a good chance you found 192.168.1.253 somewhere — on your router’s label, in a setup guide, or by running ipconfig on your PC — and you’re not entirely sure what to do with it. I get that a lot. This address isn’t one of the big-name defaults like 192.168.1.1, but it’s a legitimate private IP used by certain routers and network devices as their admin login gateway. This guide walks you through logging in from a desktop, iPhone, and Android separately, troubleshooting the five most common problems, doing a factory reset safely, and actually making your network more secure once you’re inside.
192.168.1.253 Router Login Admin Page
What Is 192.168.1.253?
192.168.1.253 is a private IP address — meaning it only exists and works inside your local network. You can’t reach it from outside your home, and nobody on the internet can type it into a browser to access your router. It’s completely invisible to the outside world.
This address belongs to the 192.168.0.0–192.168.255.255 block defined in the RFC 1918 private address ranges standard. These address ranges were specifically set aside for private networks — home LANs, office networks, and so on. That’s why the same 192.168.x.x addresses appear in millions of different homes without any conflict.
When a router assigns itself 192.168.1.253 as its default gateway (its own local address), it means that’s what you type in a browser to reach the admin control panel. From there you can manage Wi-Fi settings, passwords, connected devices, security configuration, and more.
Most people will know 192.168.1.1 as the “typical” router address. So if your router is at 192.168.1.253, it’s a less common default — either from a specific manufacturer, an ISP-issued device, or it was configured that way manually. The .253 addresses are often seen in networks where the main router has already claimed .1, and a secondary device (like a modem-router combo or a managed switch) gets assigned a high-numbered address to avoid conflict.
Here’s one thing most people don’t know: some ISPs configure their modem-router gateway devices to use high host numbers like .253 or .254 specifically to keep the lower addresses (.1 through .100) free for devices on the local network. It’s a deliberate design choice, not an accident.
To confirm 192.168.1.253 is actually your gateway:
- Windows: Open Command Prompt → type
ipconfig→ look for “Default Gateway” - Mac: System Settings → Network → your connection → Details → TCP/IP tab
- iPhone: Settings → Wi-Fi → tap the ⓘ next to your network → look for “Router”
- Android: Settings → Wi-Fi → tap your network → look for “Gateway”
If all those say 192.168.1.253, you’re in the right place.
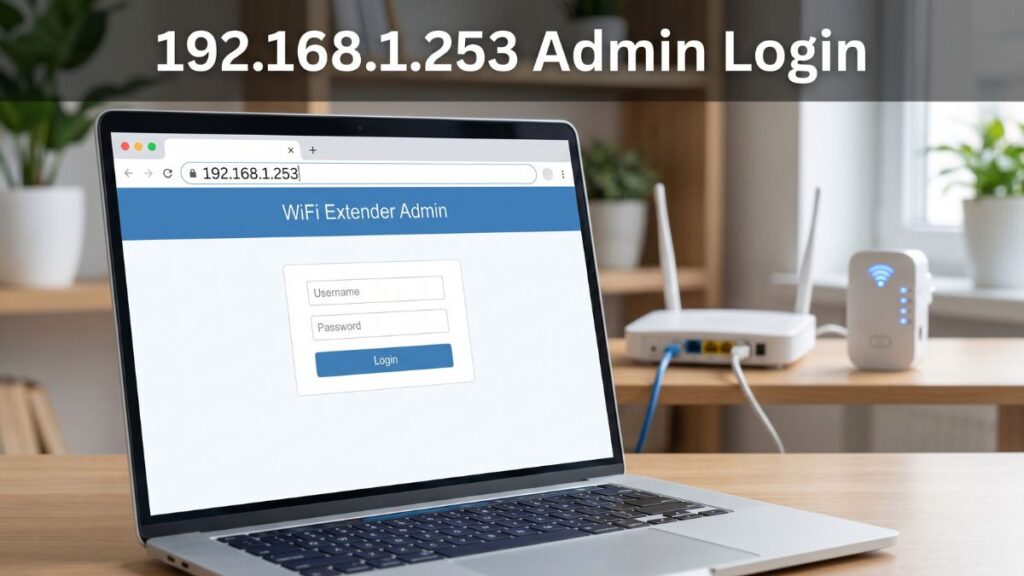
Default Login Credentials for 192.168.1.253
Most routers ship with a factory username and password. They vary by brand, so here are the most common ones:
| Brand | Default Username | Default Password |
|---|---|---|
| TP-Link | admin | admin |
| Asus | admin | admin |
| Linksys | admin | admin |
| D-Link | admin | (blank — leave empty) |
| Netgear | admin | password |
| Cisco | cisco | cisco |
| Tenda | admin | admin |
| Belkin | admin | (blank — leave empty) |
| Huawei | admin | admin |
| ZTE | admin | admin or 1234 |
| Arris | admin | password |
| Motorola | admin | motorola |
Best approach: flip your router over and check the sticker on the bottom or back. It’ll have the exact username, password, and IP address for that specific unit. The sticker is always more reliable than any table on the internet — including this one. Manufacturers update their defaults between firmware versions and model generations, and a label reflects what your actual device shipped with.
If you changed the credentials at some point and can’t remember them, the Factory Reset section below covers how to wipe and restore defaults.
How to Log Into 192.168.1.253 on a PC or Mac
These steps work on any browser — Chrome, Edge, Firefox, Safari — doesn’t matter which one.
- Connect your computer to the router’s network. Ethernet cable is best while you’re making changes — Wi-Fi works, but you could get briefly disconnected when you save settings, which can interrupt things mid-change.
- Open your web browser.
- Click in the address bar — the bar at the very top of the browser window where website URLs normally appear.
⚠️ Critical tip: Enter 192.168.1.253 into the address bar, not into Google or Bing’s search box. If you type it in the search bar, your browser searches for it. The address bar is where you’d normally see something like “https://google.com.”
- Type
http://192.168.1.253and press Enter. - A login screen should appear asking for a username and password.
- Enter your credentials and click Login or Sign In.
You’re in. If nothing loads or you get an error, jump straight to the Troubleshooting section.
How to Log Into 192.168.1.253 on iPhone
Logging in from an iPhone is handy when you don’t have a laptop nearby — works fine as long as you’re on the same Wi-Fi network.
- Open the Settings app on your iPhone.
- Tap Wi-Fi.
- Confirm you’re connected to your home network (not cellular).
- Tap the ⓘ icon next to your network name.
- Scroll down to find the Router field — confirm it shows 192.168.1.253.
- Open Safari (or any browser you prefer).
- Tap the address bar and type
192.168.1.253, then tap Go. - The router login page should appear. Enter your username and password and tap Login.
iPhone-specific tip: Safari sometimes tries to interpret IP addresses as search queries or autocorrects them. If the page doesn’t load right away, type the full address as http://192.168.1.253 with the http:// prefix included. That usually forces the browser to treat it as a URL rather than a search.
How to Log Into 192.168.1.253 on Android
- Open Settings and navigate to Network & Internet (on stock Android) or Connections (on Samsung devices).
- Tap Wi-Fi, then tap your connected network name.
- Look for Gateway or Router — confirm it shows 192.168.1.253.
- Open Chrome, Firefox, or whatever browser you use.
- Tap the address bar and type
192.168.1.253, then tap Go or press Enter on your keyboard. - Enter your username and password on the login screen that appears.
- Tap Login or Submit.
Android-specific tip: Some Android browser versions automatically prepend “https://” when you enter an IP address. Router admin pages typically run on plain http — not https — so if you get a certificate warning or a blank page, manually type http://192.168.1.253 with the http:// at the start. On some older Android models, you may also need to disable mobile data temporarily so the browser routes through your home Wi-Fi instead of the cellular connection.
Troubleshooting: 192.168.1.253 Not Working?
Don’t worry — login failures almost always come down to one of these five things.
If you’re unable to access the 192.168.1.253 router login page, you’re not alone. Below are the most common issues users face and how to fix them quickly. [web:58][web:61]
1. 192.168.1.253 Is Not Your Router’s IP Address
Cause: This is the single most common reason the page won’t load. The address only works if it’s actually your router’s gateway. If your router is really at 192.168.1.1 or 192.168.0.1, then 192.168.1.253 will just time out — it’s pointing at nothing. [web:59][web:61]
Fix: Run ipconfig on Windows or ifconfig on Mac and check “Default Gateway.” On mobile, use the steps above to check the Router or Gateway field in Wi‑Fi settings. Use whatever address that shows — not 192.168.1.253.
2. Device Is Not Connected to the Right Network
Cause: 192.168.1.253 is a private local address — it only responds to devices physically on the same network. If you’re on cellular data, a VPN, or accidentally connected to a neighbor’s Wi‑Fi, the request will never reach your router. [web:60][web:63]
Fix: Turn off any VPN apps. Check your Wi‑Fi settings and make sure you’re connected to your own home network. Then try again.
3. Wrong Username or Password
Cause: You’ve got the login page but credentials aren’t working. This happens either because you’re using the wrong brand’s defaults, or because someone changed the password at some point. [web:58][web:63]
Fix: Try each combination from the table earlier — especially admin/admin and admin/password. Then check the sticker on the router. If everything fails, a factory reset is the only way to get back in.
4. Browser Cache or Session Issues
Cause: Browsers sometimes store stale session data, old cookies, or cached versions of pages. This can cause the login page to look frozen or throw odd errors even when credentials are correct. [web:60][web:62]
Fix: Open a private/incognito window and try again — this bypasses cached data entirely. Alternatively, switch to a different browser. You can also clear your browser cache: in Chrome, go to Settings → Privacy and Security → Clear Browsing Data, and make sure “Cached images and files” is checked.
5. Router Needs a Reboot
Cause: Routers run 24/7 for weeks or months, and occasionally their admin interface becomes sluggish or completely unresponsive — even when internet is working fine. A simple restart clears it up. [web:60][web:63]
Fix: Unplug the router’s power cable from the wall. Wait 30 seconds. Plug it back in. Give it a full 1–2 minutes to finish booting before trying 192.168.1.253 again. This solves more problems than people expect.
Factory Reset Guide for 192.168.1.253 Routers
A factory reset wipes everything back to factory defaults: your custom Wi-Fi name, your Wi-Fi password, any port forwarding rules, parental controls, DNS settings, and the admin password all get erased. You start from scratch.
Back up your settings first if you can get in: Log into 192.168.1.253, find “Backup” or “Export Settings” under Administration or Advanced settings, and save the config file. Not every router has this, but it’s worth looking. If you can’t get in at all, skip straight to the reset.
How to factory reset:
- Find the Reset button on your router — it’s usually a small pinhole on the back or bottom. You’ll need a straightened paperclip or a pin to press it.
- Make sure the router is powered on.
- Press and hold the reset button. Hold times vary by brand:
- TP-Link: 10 seconds
- Asus: 10 seconds
- Netgear: 7–10 seconds
- D-Link: 10–20 seconds
- Linksys: 15–30 seconds
- Tenda: 10 seconds
- Arris: 15 seconds
- Motorola: 10–15 seconds
- The router’s LEDs will flash or change pattern — that signals the reset has started.
- Release the button and wait about 2 minutes for the router to fully reboot.
- Log in with the factory default credentials from the sticker or the table above.
After the reset, every device on your network will need to reconnect to Wi-Fi using the default network name and password — both are on the label.
What to Do After You Log Into 192.168.1.253
Getting into the admin panel is step one. Here’s what you should actually do once you’re in.
1. Change the Admin Password
This is the first thing worth doing, and most people skip it entirely. The admin password controls access to 192.168.1.253 — if it’s still set to “admin” or “password,” anyone on your network (or anyone who knows the default) can log in and change your settings.
- Look for Administration, Management, System, or Advanced in the menu.
- Find Admin Password, Router Password, or Login Password.
- Enter a new strong password. Use a long passphrase — three or four random words work great and are easier to remember than random characters. Following how to create a strong password best practices, aim for 12+ characters.
- Save the change. The router will log you out. Sign back in with your new password.
- Store it somewhere safe — a password manager works better than a sticky note on the router.
2. Change Your Wi-Fi Password
Your admin password and your Wi-Fi password are two completely separate things. The Wi-Fi password is what phones, laptops, and smart TVs use to connect to your network.
- Go to Wireless or Wi-Fi Settings.
- Find the field labeled Password, Passphrase, or WPA Key.
- Change it to something strong that you’ll actually remember. Something like a short phrase beats a random jumble of characters for everyday usability.
- Save and reconnect all your devices.
3. Set Your Security Mode to WPA2 or WPA3
While you’re in wireless settings, check your security mode. You want at minimum WPA2-Personal (AES). If your router supports WPA3, use it — the WPA2 vs WPA3 comparison shows WPA3 handles certain attacks that WPA2 can’t defend against.
Avoid WEP or the original WPA (sometimes shown as WPA-TKIP) — both are outdated and easily cracked with free tools. If those are your only options, you need a firmware update or a newer router.
4. Check Connected Devices
Most router admin panels include a list of every device currently connected to your network — phones, laptops, smart TVs, streaming sticks, smart home devices, all of it. It’s worth reviewing.
- Look for Connected Devices, Client List, Device Manager, or DHCP Client List.
- Look at device names and what is a MAC address — they’re hardware identifiers that can help you identify unknown devices.
- If you see something you don’t recognize, it could be a forgotten device — or it could be someone on your network who shouldn’t be.
5. Set Up a Guest Network
A guest network is genuinely one of the most useful things you can configure. It gives visitors internet access without putting them on the same network segment as your computers, NAS drives, or smart home devices.
- Look for Guest Network or Guest Wi-Fi in the menu.
- Enable it, set a separate name and password.
- Turn on AP Isolation or Guest Isolation — this prevents guest devices from communicating with each other or with your main devices.
How to set up a guest network walks through the full process if your router’s menu is confusing. It’s simpler than it sounds.
6. Port Forwarding
If you host a game server, run a security camera system, or need remote access to a home device, port forwarding is what makes it work. It tells the router to pass specific incoming traffic to a specific device inside your network.
- Find Port Forwarding, NAT, or Virtual Server in the menu.
- Create a rule: enter the device’s local IP address, the external port, the internal port, and the protocol (TCP, UDP, or both).
- Save and test.
If you’ve never done this before, knowing what network ports are first helps the process make a lot more sense.
7. Update the Firmware
Firmware updates patch security vulnerabilities and sometimes improve performance or add features. This is one of those things that’s easy to forget about for years — don’t let it slip.
- Go to Administration → Firmware Update or Software Update.
- Check for updates automatically if the option is available.
- If not, note your current firmware version and check your router brand’s support page to see if there’s a newer version available.
How DHCP assigns IP addresses to your devices is also worth understanding if you want to set up static IPs for devices like printers or cameras.
Common Misspellings of 192.168.1.253
Typos are more common than you’d think with IP addresses. Here are the ones that cause the most confusion:
192.168.l.253
192.168.1.253.
192.168.1 .253
192-168-1-253
192.168.1.52
192.168.1.2530
http//192.168.1.253
www.192.168.1.253
Correct address:
192.168.1.253
— If you copied the address from somewhere, double-check that you got all four numbers right. One wrong digit sends you to a completely different address.
Which Routers and ISPs Use 192.168.1.253?
192.168.1.253 is a less common default gateway compared to 192.168.1.1 or 192.168.0.1. Here’s where you’re most likely to encounter it:
Devices and scenarios that commonly use 192.168.1.253:
- ISP-issued modem-router combos — some providers (particularly regional US ISPs and cable companies) configure their gateway devices with .253 or .254 as the router’s own address, keeping the lower IP range open for connected devices
- Secondary network devices — access points, managed switches, and Wi-Fi extenders configured in a network where the primary router already uses .1 often get assigned a high-number address like .253 to avoid conflict
- Older Comtrend and SpeedTouch DSL modems — historically used .253 on some firmware versions
- Some ZTE and Huawei fiber gateway units — particularly those issued in certain ISP deployments
What major US ISPs actually default to:
- Xfinity/Comcast: 10.0.0.1 (Xfinity Gateway) or 192.168.0.1
- AT&T: 192.168.1.254 (BGW210, NVG589, and similar models)
- Verizon Fios: 192.168.1.1
- Spectrum: 192.168.0.1 or 192.168.100.1
- Cox: 192.168.0.1
If your ISP gave you the router and you’re in the US, 192.168.1.253 is less likely to be your gateway than the addresses listed above. Always verify by running ipconfig before troubleshooting.
Frequently Asked Questions
Why won’t 192.168.1.253 load in my browser?
Most likely it’s not your router’s actual gateway address. Run ipconfig on Windows or check your phone’s Wi-Fi details for “Default Gateway” or “Router.” Use that address. If you get any result at all, you’ll know 192.168.1.253 is correct — if it just times out, it’s the wrong address.
What’s the difference between the router admin password and the Wi-Fi password?
This trips up a lot of people — and they’re completely different things. Your Wi-Fi password is what you enter on your phone, laptop, or TV to connect to your network. Your router admin password is what you enter at the 192.168.1.253 login page to get into the settings dashboard. Changing one does not affect the other. You should secure both.
Is 192.168.1.253 the same as 192.168.1.1?
No. They’re separate IP addresses that route to different devices. 192.168.1.1 is one of the most common router defaults worldwide. 192.168.1.253 is much less common. If you’re not sure which your router uses, check with ipconfig.
Can I change 192.168.1.253 to a different IP address?
Yes, from inside the admin panel. Go to Network → LAN → IP Address, and change it to whatever private address you prefer (e.g., 192.168.1.1). Just note that after saving, you’ll need to use the new address to access the admin panel — the old one won’t work anymore.