If you’ve found yourself staring at 192.168.4.1 and wondering why it isn’t responding — or why you ended up at it in the first place — you’re not alone. This address shows up in a few distinct situations that most people don’t expect, and each one requires a slightly different approach. This guide walks through exactly what 192.168.4.1 is, who uses it, how to log in from a PC or phone, how to fix the most common problems, and what to actually do with the settings once you’re inside.
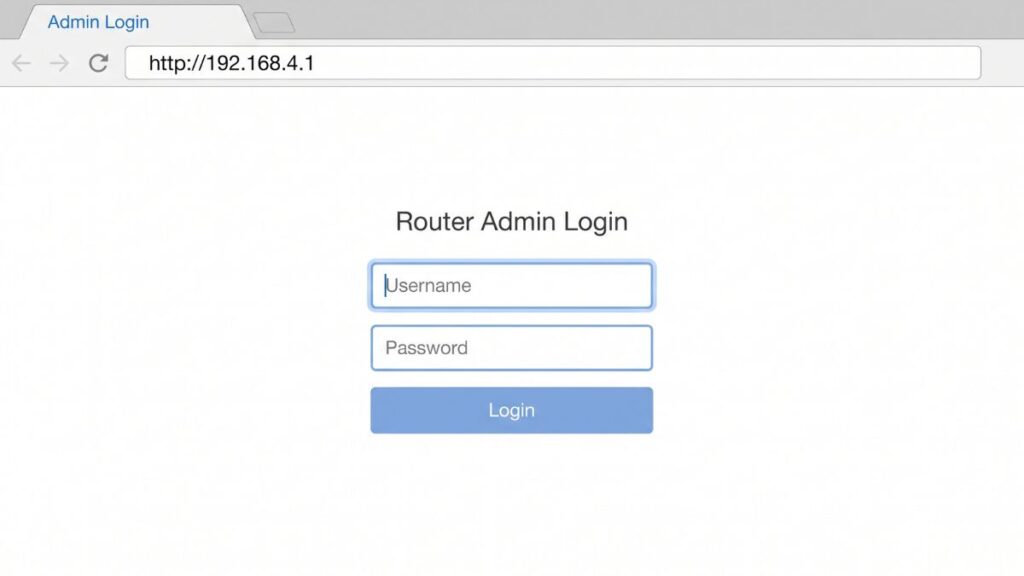
192.168.4.1 Router Login – Admin Page
What Is 192.168.4.1?
192.168.4.1 is a private IPv4 address in the 192.168.4.x subnet. Like all addresses in the 192.168.x.x range, it falls inside the private IP block defined by RFC 1918 private address ranges — meaning it’s reserved for use on internal local networks and is completely inaccessible from the public internet. You can only reach it from inside the local network it belongs to, whether that’s over Wi-Fi or a wired Ethernet connection.
What makes 192.168.4.1 a little different from the more common router addresses is who uses it. There are actually two distinct categories:
Traditional routers and access points: Certain home and small-business routers from brands like Tenda, Linksys, D-Link, and a few others use 192.168.4.1 as their default gateway. If you have one of these, typing 192.168.4.1 into your browser opens the standard router admin control panel where you manage Wi-Fi settings, passwords, port forwarding, and everything else.
ESP8266 and ESP32 IoT devices: Here’s something most people don’t know — 192.168.4.1 is the hardcoded default Access Point (AP) mode IP address for ESP8266 and ESP32 microcontrollers, two of the most popular Wi-Fi-enabled microchips in the world. These chips power millions of smart home gadgets, DIY electronics, sensor nodes, and consumer IoT devices. When an ESP device boots in AP mode (acting as its own Wi-Fi hotspot for configuration), it always creates a network and assigns itself the gateway address 192.168.4.1. If you just connected to a Wi-Fi network with a name like “ESP_XXXXXX” or a smart device’s setup hotspot, that’s almost certainly why you’re seeing this address.
Either way, the login process starts the same way.
Default Login Credentials for 192.168.4.1
The right credentials depend entirely on your device. Always check the sticker on the bottom or back of your router first — that label is more reliable than any default list.
Common factory defaults for routers and devices using 192.168.4.1:
| Brand / Device | Default Username | Default Password |
|---|---|---|
| Tenda | admin | admin |
| Linksys | admin | admin |
| D-Link | admin | (leave blank) |
| TP-Link | admin | admin |
| Asus | admin | admin |
| Netgear | admin | password |
| Cisco | cisco | cisco |
| Belkin | (leave blank) | (leave blank) |
| ESP8266 / ESP32 (IoT) | varies by firmware | varies by firmware |
ESP device note:If you’re connecting to an ESP8266 or ESP32 setup page, the login credentials — if any — are set by whoever wrote the device’s firmware. Smart home products powered by these chips typically show a branded setup wizard at 192.168.4.1 rather than a username/password prompt. Check your device’s manual or the manufacturer’s app for setup instructions.
General note: All passwords are case-sensitive. Admin with a capital A is not the same as admin. If none of these defaults work and you haven’t changed them yourself, a factory reset (see below) restores the originals.
How to Log In — Desktop or Laptop (PC & Mac)
Any modern browser works — Chrome, Firefox, Edge, Safari. No preference needed.
- Connect to the right network. If you’re accessing a router, connect to its Wi-Fi or plug in via Ethernet. If you’re accessing an ESP/IoT device in AP mode, connect your laptop to the device’s own Wi-Fi hotspot (it’ll show up as a new Wi-Fi network in your system).
- Open your browser.
- Click the address bar — the bar at the very top of the browser that shows the full current page URL.
⚠️ Don’t use the search bar. Typing 192.168.4.1 into Google or Bing will search the web for that number — it won’t open your router or device’s admin panel. You need the address bar specifically. On most browsers it’s the bar at the very top; clicking it should show the URL of your current page.
- Type:
http://192.168.4.1and press Enter. - A login page or setup wizard appears.
- Enter your username and password, then click Login, Sign In, or Submit.
If the page doesn’t load at all, jump to the troubleshooting section — the most likely reason is that 192.168.4.1 isn’t your router’s actual gateway address.
How to Log In — Mobile Phone
iPhone (iOS)
- Open Settings → Wi-Fi. Make sure you’re connected to the correct network — your router’s Wi-Fi, or the IoT device’s setup hotspot.
- Open Safari. It handles local IP admin pages more reliably on iOS than Chrome or other third-party browsers.
- Tap the address bar at the top and type:
192.168.4.1 - Tap Go.
- When the login or setup page loads, enter your credentials and tap Login.
iPhone tip:If Safari redirects you to a search engine instead of loading the page, type http://192.168.4.1 in full — the http:// prefix tells Safari this is a network address, not a search query. Also double-check that you haven’t accidentally switched back to cellular data while trying to connect.
Android
- Open Settings → Wi-Fi (or Connections → Wi-Fi on Samsung devices) and confirm you’re on the correct network.
- Open Chrome or your phone’s default browser.
- Tap the address bar and type:
http://192.168.4.1 - Tap Go or the enter arrow.
- Enter your credentials on the login page and tap Login or Submit.
💡 Android tip: If Chrome shows a “Did you mean to search?” banner, ignore it and tap Go, or type http://192.168.4.1 with the full prefix to suppress the prompt. Also note that some Android versions aggressively switch back to cellular data when a Wi-Fi network doesn’t have internet access — which is normal for IoT setup hotspots. If 192.168.4.1 stops responding, go to Wi-Fi settings and confirm your phone is still connected to that network.
Troubleshooting — 5 Reasons 192.168.4.1 Isn’t Working
If you’re trying to access 192.168.4.1 and the router login page won’t load, you’re not alone. Below are the most common issues and how to fix them quickly.
1. 192.168.4.1 Isn’t Your Router’s Gateway Address
Cause: Your router uses a different default gateway. This is the most common reason — you’re trying the right kind of address but for the wrong device.
Fix: Find your actual router gateway. On Windows, open Command Prompt and run ipconfig — look for Default Gateway under your active adapter. On Mac, go to System Settings → Network → Wi-Fi → Details → Router. On iPhone, tap the ⓘ next to your connected Wi-Fi network and look for Router. On Android, long-press your network → Manage network settings → expand Advanced → look for Gateway. Use that address to log in instead.
2. You’re Not Connected to the Right Network
Cause: Your device is on a different Wi-Fi network, on cellular data, or disconnected entirely. This is especially common when trying to reach an ESP/IoT device — phones often auto-switch back to cellular when a hotspot has no internet connection.
Fix: Go to Wi-Fi settings and confirm you’re connected to the correct network. For IoT device setup, you need to be connected to the device’s own hotspot (named something like “ESP_xxxxxx”, “Tasmota-xxxxx”, or a branded device hotspot). Disable cellular data temporarily if your phone keeps switching off Wi-Fi automatically.
3. The Address Bar vs. Search Bar Mix-Up
Cause: The address was typed into a search engine rather than the browser’s URL field. Browsers default to searching when input doesn’t look like a standard domain name.
Fix: Click the address bar at the top of the browser — the field that shows the full URL of the current page you’re on. Clear it completely, type http://192.168.4.1, and press Enter. The http:// prefix forces the browser to treat the input as a network address rather than a search query.
4. Wrong Credentials or Credentials Were Changed
Cause: The factory default credentials were updated at some point, or you’re entering them with incorrect capitalization.
Fix: Work through every combination in the table above carefully. Passwords are case-sensitive — admin and Admin are treated as different passwords. If nothing works and you’re locked out, don’t panic. A factory reset (see the section below) wipes the credentials and restores factory defaults. Write down your ISP login details before resetting if your connection uses PPPoE authentication.
5. A VPN or Proxy Is Blocking the Local Address
Cause: An active VPN on your computer or phone can intercept traffic intended for local IP addresses and route it through the VPN tunnel, where 192.168.4.1 either doesn’t exist or is blocked. This is a surprisingly common issue that many people overlook.
Fix: Disconnect or pause your VPN completely, then try 192.168.4.1 again. Most VPN clients have a pause or disconnect button. Once you’re done with the router admin changes, you can re-enable the VPN.
Factory Reset Guide
If you’re completely locked out of 192.168.4.1 and can’t recover the credentials, a factory reset is the path back in.
Before you reset: If you still have any access to the admin panel, export your settings or write down your ISP PPPoE credentials (username/password for your internet connection), any custom DNS settings, and port forwarding rules. A reset erases everything.
What gets deleted: Admin password, Wi-Fi name (SSID) and password, all port forwarding rules, custom DNS, guest network configuration, DHCP reservations, QoS settings — the device returns completely to factory state.
How to do it:
- Keep the device powered on — don’t unplug it during the process.
- Locate the Reset pinhole on the back or bottom of the device.
- Use a straightened paperclip, SIM ejector tool, or toothpick to press and hold the button firmly.
- Hold for the appropriate time by brand:
- Tenda: ~8–10 seconds until indicator lights flash
- Linksys: ~10 seconds until the power LED flashes
- D-Link: ~10 seconds until the status light changes
- TP-Link: ~10 seconds until LEDs rapidly blink
- Most other brands: 10–30 seconds
- Release the button and wait for the router to fully restart — typically 1–3 minutes.
- Log back in using the factory default credentials from the label on the device.
What to Do After Logging Into 192.168.4.1
You’re inside the admin panel. Here’s the order of operations that actually matters.
1. Change the Admin Password
This is the most important step and the one people most often skip. Default router credentials are publicly documented — admin/admin is literally the first thing anyone with basic networking knowledge would try. Leaving factory defaults in place means anyone on your network can access 192.168.4.1 and change your settings.
- Go to Administration, System Tools, Management, or Advanced in the main navigation.
- Find Change Password, Admin Password, or Login Password.
- Enter the current password when prompted.
- Set a new one — at least 12 characters, mixing uppercase, lowercase, numbers, and symbols. The NIST password guidelines are worth a quick read here — they’ve updated their recommendations significantly in recent years.
- Save the change. Write it somewhere safe, not on a note taped to the router.
2. Change Your Wi-Fi Name and Password
Go to Wireless or Wireless Settings. Change both the SSID (your network’s visible name) and the passphrase. Pick a Wi-Fi name that’s recognizable to you but doesn’t broadcast the brand of your router — “Tenda_4F2A” tells anyone nearby exactly what router you have. Your Wi-Fi password and admin password are completely separate — changing one doesn’t affect the other.
3. Set WPA2 or WPA3 Encryption
While you’re in Wireless Settings, look at the security protocol. If it shows WEP or original WPA (TKIP), change it immediately — both are outdated and can be cracked with freely available tools. Choose WPA2-PSK (AES) as your baseline. If your router supports it, checking WPA2 vs WPA3 is worth the five minutes — WPA3 offers meaningful improvements in protection against brute-force password attacks.
4. Check Connected Devices
Under DHCP Client List, Connected Devices, or Wireless Clients, you’ll see every device currently connected to your network with its assigned IP address. If anything looks unfamiliar — a device you can’t account for, or more connections than expected — your Wi-Fi password may have been shared or guessed. Changing the Wi-Fi password immediately kicks off all connected devices and forces reconnection. Understanding what is a MAC address helps when you need to identify specific devices by their hardware identifiers rather than just their display names.
5. Set Up a Guest Network
If your router supports it — and most Tenda and Linksys models do — a guest Wi-Fi network is one of the best practical security improvements you can make. Guests get internet access without visibility into your primary network or any device on it. Look for Guest Network or Guest Wi-Fi under Wireless Settings. Give it a separate password from your main network, and optionally limit bandwidth so a single guest device doesn’t crowd out everyone else.
6. Port Forwarding
If you run a home server, gaming setup, remote camera, or any service that needs to be accessible from outside your local network, port forwarding is how you open that path. Find it under NAT → Virtual Server, Port Forwarding, or Applications & Gaming. You’ll specify the internal IP of the device receiving traffic and the port number(s) to forward. If you’re new to the concept, how port forwarding works covers the fundamentals clearly before you start opening ports.
7. Update Router Firmware
Router firmware updates patch known security vulnerabilities. Under Administration or Advanced settings, look for Firmware Update or Software Update. Many current Tenda and Linksys routers check for updates automatically from within the panel. If your device is older and no longer receiving firmware updates, that’s important information — end-of-life devices stop getting security patches, which is worth factoring into whether it’s time for a replacement.
Common Misspellings of 192.168.4.1
These are the typos that break the address and prevent the page from loading:
192 168 4 1
192.168.41
192.168.4.l
192.168.I.4.1
192.1684.1
192.168.4.1.
192.168.1.4
http//192.168.4.1
www.192.168.4.1
192.168.4.10
Correct address:
192.168.4.1
— The most dangerous one is 192.168.1.4 — transposing the 4 and the 1 gives you a completely different IP. That address may exist on your network as a client device, but it’s not a router gateway. Always double-check the digit order before concluding the address isn’t working.
Which Brands and Devices Use 192.168.4.1?
Routers That Use 192.168.4.1 as Their Default Gateway
Tenda is the brand most commonly associated with 192.168.4.1. Several Tenda home router models use this as their factory gateway address, including some N-series and AC-series units. If you have a Tenda router and 192.168.4.1 isn’t loading, it’s worth confirming via ipconfig whether the gateway was changed during initial setup.
Linksys has used 192.168.4.1 on select models, particularly some older WRT-series units and budget range extenders. Most current Linksys routers default to 192.168.1.1 or 192.168.0.1, but 192.168.4.1 appears in their model history.
D-Link has deployed 192.168.4.1 on a handful of models, mainly in certain regional markets. Most D-Link routers in the US default to 192.168.0.1.
ESP8266 and ESP32 IoT Devices — The Biggest Reason People Find 192.168.4.1
This is the angle that almost nobody writing about this address covers, and it’s arguably the most important one for a large chunk of people searching for it.
The ESP8266 and ESP32 are Wi-Fi-enabled microcontrollers made by Espressif Systems. They power a massive range of consumer smart home devices, maker electronics, DIY sensors, and industrial IoT nodes — everything from smart plugs and light controllers to temperature sensors and custom home automation setups.
When an ESP8266 or ESP32 device boots in Access Point (AP) mode — where it creates its own Wi-Fi hotspot for initial configuration — it always assigns itself the IP address 192.168.4.1 by default. This is hardcoded in the ESP-IDF and Arduino ESP core libraries. When you connect to a device’s setup Wi-Fi network (something like “ESP_xxxxxx”, “Tasmota-xxxxx”, or a branded device hotspot), you’ll often be directed to 192.168.4.1 to complete configuration.
If you’re seeing 192.168.4.1 after connecting to a new smart home device’s setup network, this is exactly what’s happening — it’s not a router, it’s the device itself. The page at 192.168.4.1 will typically show a configuration wizard specific to that device rather than a generic router admin panel.
Major US ISPs and Their Default Gateway Addresses
For reference, none of the major US ISPs default to 192.168.4.1 on their provided equipment:
| ISP | Typical Default Gateway |
|---|---|
| Xfinity / Comcast | 10.0.0.1 |
| AT&T (fiber) | 192.168.1.254 |
| Verizon (FiOS) | 192.168.1.1 |
| Spectrum | 192.168.1.1 or 192.168.0.1 |
| Cox | 192.168.0.1 |
| T-Mobile Home Internet | 192.168.12.1 |
If you’re using ISP-provided gateway equipment exclusively, your admin address is almost certainly not 192.168.4.1. But if you added a personal router behind the ISP gateway — or picked up a Tenda unit — 192.168.4.1 may be exactly right.
Frequently Asked Questions
Why does 192.168.4.1 say “This site can’t be reached”?
Either no device on your current network is using 192.168.4.1 as its gateway, or you’re not connected to the correct network. Start by running ipconfig on Windows or checking the Router field in your Wi-Fi settings on iPhone to confirm your actual gateway address. Also make sure you’re not on cellular data or behind a VPN.
What’s the difference between my Wi-Fi password and my router admin password?
Two completely separate passwords. Your Wi-Fi password is what you enter on any device to join the wireless network. Your router admin password is what you enter at 192.168.4.1 to access the settings control panel. Changing one has no effect on the other. Most people only know their Wi-Fi password and have never changed — or even seen — the admin password.
Can I access 192.168.4.1 from my phone over cellular data?
No. Private IP addresses are only reachable from within the local network. The moment your phone is on LTE or 5G instead of Wi-Fi, 192.168.4.1 is completely unreachable. Connect to the router’s Wi-Fi (or the device’s setup hotspot) first, then try the address again.
Why do I see 192.168.4.1 when I connect to a smart device’s setup Wi-Fi?
Because the device is powered by an ESP8266 or ESP32 microcontroller running in Access Point mode. The 192.168.4.1 address is hardcoded as the default AP gateway for these chips. When you connect to the device’s setup hotspot and open a browser, 192.168.4.1 is where the configuration wizard lives. This is normal behavior, not a network issue.
Does a VPN affect access to 192.168.4.1?
Yes — some VPN clients intercept all network traffic, including requests to local IP addresses, routing them through the VPN tunnel where 192.168.4.1 doesn’t exist. If the address suddenly stopped working after you started using a VPN, pause or disconnect the VPN first, then try again.