Here’s the thing about 192.168.33.1 that every other guide misses: this IP address belongs to two completely different categories of devices, and which one you’re dealing with completely changes what you need to do.
The first is the one you might expect — certain routers (notably the Huawei WS323 and a handful of ISP-issued gateways) use 192.168.33.1 as their factory default gateway IP. Standard router stuff.
The second is far more common in 2026: 192.168.33.1 is the universal access point IP address for every Shelly smart home device ever made. Every Shelly plug, switch, relay, dimmer, sensor, and energy monitor — Gen1 through Gen4 — creates its own Wi-Fi network in AP mode and serves its configuration interface at exactly http://192.168.33.1. If you just unboxed a Shelly device, changed your router and need to reconfigure it, or are trying to troubleshoot a Shelly that went offline, that address is how you get in.
This guide covers both situations from top to bottom.
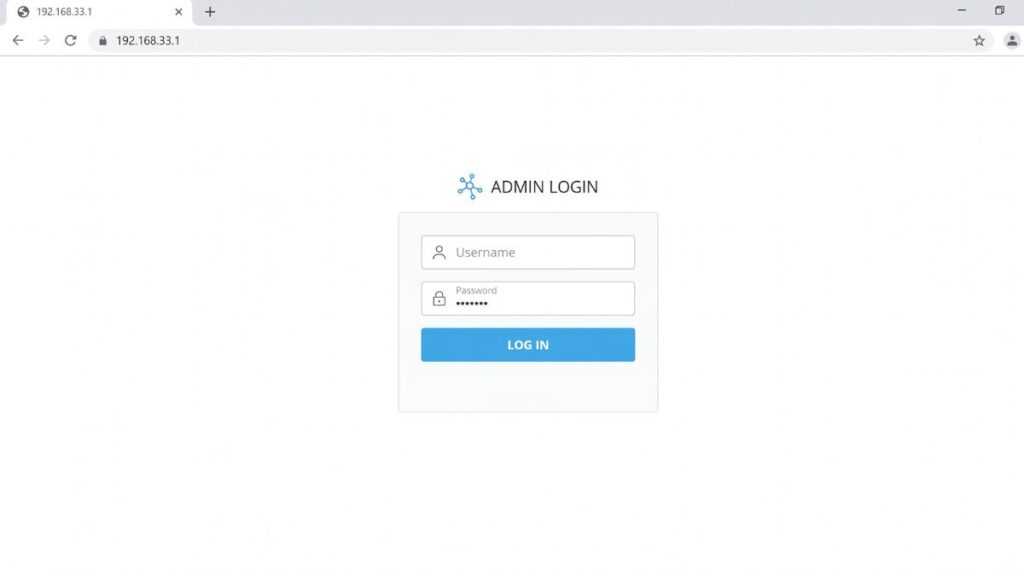
Router Access Panel
Type
192.168.33.1
in your browser or click the link to access the router admin page.
It works only when you’re connected to the same Wi-Fi network.
192.168.33.1 is a private IP address used as a local access point by smart home devices and certain routers. Like all private IPs in the 192.168.0.0/16 range, it only exists on the local network that uses it — you can’t reach it over the internet, through mobile data, or from any other network.
The key distinction from other IPs in this guide series is context. At 192.168.1.1 or 192.168.0.1, you’re almost always talking to a home router. At 192.168.33.1, you might be talking to a Shelly smart plug sitting in your living room. The browser experience looks similar — a web interface at a local IP — but the device, the purpose, and the login process are quite different.
Part 1: 192.168.33.1 for Shelly Smart Home Devices
Why Every Shelly Device Uses This IP
Shelly (made by Allterco Robotics) is one of the most popular smart home device brands among DIY home automation enthusiasts, electricians, and Home Assistant users. Their product line includes smart plugs, wall switches, relays for wiring into junction boxes, dimmers, energy monitors, temperature sensors, and more.
Every Shelly device — across all generations and product lines — has a built-in Wi-Fi chip that can run in two modes:
Client mode: The Shelly connects to your home Wi-Fi network as a normal device. You access it at whatever IP your router assigns (like 192.168.1.45).
Access Point (AP) mode: The Shelly creates its own Wi-Fi network with a unique SSID like ShellyPlug-ABC123 or ShellyPlus1PM-XXXX. When you connect to that network, the device’s configuration interface is always at http://192.168.33.1 — no exceptions, every model, every generation.
192.168.33.1 in AP mode is how you first set up a new Shelly device, reconnect one that lost its Wi-Fi credentials, or reconfigure one after changing routers.
When You’ll See 192.168.33.1 on a Shelly Device
You’ll need to access 192.168.33.1 on a Shelly in these situations:
First-time setup — fresh out of the box, the device broadcasts its AP network and waits at 192.168.33.1 to be configured
After a router change — if you replaced your router or changed your Wi-Fi password, your Shelly devices lose their connection and revert to AP mode temporarily
After a factory reset — resetting a Shelly returns it to AP mode, and 192.168.33.1 is how you reconfigure it
Troubleshooting offline devices — if a Shelly won’t reconnect to Wi-Fi, you can reach into its AP to diagnose and fix settings
How to Access a Shelly Device at 192.168.33.1
Step 1 — Trigger AP mode if needed. Brand-new Shelly devices are already in AP mode. If yours has been set up before and is offline, briefly press its reset button (usually 1–2 seconds, not a long hold — the long hold does a full factory reset). On Gen2+ devices, a short press opens the AP for a few minutes. On Gen1 devices, AP mode is active whenever the device isn’t connected to Wi-Fi.
Step 2 — Find the Shelly’s AP network. On your phone or laptop, open Wi-Fi settings and look for a network named something like:
shelly1-XXXX (Gen1 Shelly 1)
ShellyPlugS-XXXX (Gen1 Shelly Plug S)
ShellyPlus1PM-XXXX (Gen2 Shelly Plus 1PM)
ShellyPlusPlugUS-XXXX (Gen2 Shelly Plus Plug US)
ShellyPro4PM-XXXX (Gen2/Gen3 Pro devices)
The XXXX suffix is part of the device’s MAC address — unique to your specific device. Important: This is an open (unsecured) network by default. That’s normal — it’s only for local setup.
Step 3 — Connect to the Shelly’s AP network. Select it and connect. Your device will show “No internet” or “Connected without internet” — that’s expected. The Shelly’s AP doesn’t route internet traffic.
Step 4 — Open a browser and go to http://192.168.33.1. This always works on every Shelly device when connected to its AP. The device’s web configuration interface will load.
⚠️ Use http://, not https://. Shelly devices don’t use HTTPS on their local interface. Typing https://192.168.33.1 will either fail or show a certificate warning.
Step 5 — Configure Wi-Fi. In the web interface:
Go to Settings → Wi-Fi (Gen2+) or Internet & Security → Wi-Fi Mode – Client (Gen1)
Select your home network or type its SSID
Enter your Wi-Fi password
Hit Save — the device will attempt to connect and show you its new IP address if successful
Once connected to your home Wi-Fi, the Shelly leaves AP mode (on Gen1) or disables it by default (on Gen2+), and you’ll access it going forward at its assigned home network IP, not at 192.168.33.1 anymore.
Logging In: Does Shelly Require a Password at 192.168.33.1?
By default, the Shelly web interface at 192.168.33.1 has no login credentials — it loads directly into the configuration dashboard without asking for a username or password. This is by design for first-time setup ease.
You can (and should) add a password after setup:
Gen1: Settings → Login → enable authentication, set username and password
Gen2+: Settings → Authentication → enable and set a password
Once you enable authentication, future visits to 192.168.33.1 (while in AP mode) will prompt for those credentials.
What to Configure in the Shelly Web Interface at 192.168.33.1
Once you’re in, here’s what matters:
Wi-Fi credentials — the primary reason most people are here. Enter your router’s SSID and password.
Device name — rename it from the default (like “ShellyPlus1PM-XXXX”) to something meaningful (“Kitchen Light Switch” or “Living Room Plug”). This helps enormously when you have multiple Shelly devices.
Cloud connection — Shelly devices can connect to Shelly Cloud for remote access via the app. You can enable or disable this here. If you’re using Home Assistant or another local-only system, you may prefer to disable cloud.
Authentication — add a password to the web interface so it isn’t openly accessible to anyone who connects to the AP.
Firmware update — the interface will show if a newer firmware is available. Worth updating before you finalize the setup.
Static IP — for advanced users, setting a static IP for the device on your home network makes it easier to access directly (no need to look up what IP it was assigned).
Factory Resetting a Shelly Device
If you need to fully reset a Shelly device (wipes all settings including Wi-Fi credentials, passwords, and schedules):
Gen1 devices: Hold the physical button for 10 seconds until the LED flashes rapidly, then release
Gen2+ devices: Hold the button for 10 seconds until the LED goes off or changes pattern, then release
Alternatively, in the web interface at 192.168.33.1: Settings → Device Info → Factory Reset
After a reset, the device returns to AP mode and is accessible at 192.168.33.1 again.
Part 2: 192.168.33.1 as a Router Default Gateway
Which Routers Use This IP
While the Shelly use case is by far the most common reason people search for 192.168.33.1, some routers do use it as a factory default gateway:
Brand / Model
Default Username
Default Password
Huawei WS323
—
— (check label)
Some ISP-issued Huawei gateways
admin
admin
Certain OEM/regional routers
admin
admin
Custom-configured routers
admin
(set by admin)
The Huawei WS323 is the most documented consumer router using 192.168.33.1 as its default. As with all Huawei home routers, check the label on the device first — carrier variants sometimes have different default credentials.
How to Log In on a PC or Laptop (Router)
Connect to the router’s network via Ethernet cable or Wi-Fi
Open any web browser — Chrome, Firefox, Edge, or Safari
Click the address bar at the very top of the browser — not a search box
⚠️ Address bar, not search bar. Typing 192.168.33.1 into a Google search gives you search results. Click the URL bar at the top of the browser, type http://192.168.33.1, and press Enter.
The router login page loads. Enter your username and password from the table above or from the label on the device.
Click Login.
How to Log In on a Mobile Phone (Router)
iPhone (iOS)
Open Settings → tap Wi-Fi
Connect to the router’s network if not already connected
Tap the ⓘ next to your connected network
Scroll down to Router — confirm it shows 192.168.33.1
Open Safari, tap the address bar, type http://192.168.33.1, tap Go
Enter your login credentials
Android
Open Settings → Wi-Fi → tap your connected network
Look for Gateway — confirm it shows 192.168.33.1
Open Chrome, tap the address bar, type 192.168.33.1, tap Go
These apply whether you’re trying to reach a Shelly device or a router.
If you can’t reach 192.168.33.1 (often used by Shelly devices or certain routers), you’re not alone. Below are the most common issues and how to fix them quickly.
1. You’re Not Connected to the Right Network
Cause: Your phone or laptop is connected to your main home Wi‑Fi — not the Shelly’s AP network, or not the router’s network.
Fix: For a Shelly: connect explicitly to the Shelly‑XXXX AP network in your Wi‑Fi settings. For a router: confirm you’re on that router’s network, not a neighbor’s or a mobile hotspot. Disable mobile data on phones before trying.
2. You’re Using HTTPS Instead of HTTP
Cause: Browsers often auto‑upgrade to HTTPS, or you typed https:// instead of http://. Neither Shelly devices nor most home routers support HTTPS on their local interface.
Fix: Type the full address including the protocol: http://192.168.33.1 — with http://, not https://. This single change fixes a surprisingly large number of “page won’t load” reports for Shelly devices specifically.
3. The Shelly’s AP Window Has Closed
Cause: Gen2+ Shelly devices in AP mode close the access point after a few minutes of inactivity to conserve power and reduce exposure.
Fix: Briefly press the device’s physical button (1–2 seconds) to reopen the AP. Then reconnect to its Wi‑Fi network and try 192.168.33.1 again quickly — you have a few minutes.
4. Your Device’s IP Is Manually Configured on the Wrong Subnet
Cause: If your laptop or phone has a manually assigned static IP (e.g., 192.168.1.x), it won’t communicate with a device on the 192.168.33.x subnet.
Fix: Set your device to obtain its IP automatically (DHCP). On Windows: Network settings → IPv4 → Obtain automatically. On Mac: System Settings → Network → Advanced → TCP/IP → DHCP. After reconnecting to the Shelly’s AP or the router’s network, your device will receive a 192.168.33.x IP and reach 192.168.33.1.
5. Browser Cache or Extension Interference
Cause: Cached redirects, HTTPS‑forcing extensions, or ad blockers can prevent the page from loading.
Fix: Open a private/incognito window and try http://192.168.33.1 there. If it loads in incognito, a browser extension is blocking it in normal mode. Also try clearing your browser cache. For Shelly devices, Chrome in incognito is the most reliable option across both iOS and Android.
Common Misspellings of 192.168.33.1
Every typo below will fail to load:
192.168.33.l
192.168.3.1
192.168.33.1.
192.168 33.1
192,168,33,1
192.168.331
192.16833.1
168.192.33.1
https://192.168.33.1
http//192.168.33.1
Correct address:192.168.33.1
— The correct format:
http://192.168.33.1 — four numbers, three dots, http:// prefix, nothing else.
Important: 192.168.33.1 and 192.168.3.1 are two separate addresses used by completely different devices. Don’t confuse them.
Which Devices Use 192.168.33.1?
1. Shelly Smart Home Devices (All Generations)
192.168.33.1 is the fixed, hardcoded AP access address for every Shelly product ever made. This isn’t a coincidence or an occasional choice — Allterco Robotics (Shelly’s manufacturer) set this as a universal constant across the entire product lineup to make first-time setup and troubleshooting consistent.
Shelly products that use 192.168.33.1 in AP mode include (but aren’t limited to):
Smart Plugs: Shelly Plug S, Shelly Plug US, Shelly Plus Plug S (Gen2), Shelly Plus Plug US (Gen2), Shelly Plug S Gen3, Shelly Plus Plug IT
Wall Switches & Relays: Shelly 1, Shelly 1L, Shelly 1PM, Shelly Plus 1 (Gen2), Shelly Plus 1PM (Gen2), Shelly Pro 1, Shelly Pro 1PM, Shelly 1 Gen3
Multi-Channel: Shelly 2.5, Shelly Plus 2PM, Shelly Pro 2, Shelly Pro 4PM, Shelly Pro 3EM
If you’re trying to configure, reset, or troubleshoot any Shelly device, http://192.168.33.1 while connected to its AP is your access point.
2. Routers Using 192.168.33.1
Huawei WS323 — consumer Wi-Fi router, rare outside certain ISP deployment regions
Some regional ISP-provided gateways in certain Asian and Middle Eastern markets
3. US ISPs for Reference
Major US ISPs don’t use 192.168.33.1 for their provided routers:
Xfinity/Comcast → 10.0.0.1
AT&T → 192.168.1.254
Verizon Fios → 192.168.1.1
Spectrum → 192.168.0.1
Post-Login Checklist: What to Do After Accessing 192.168.33.1
For Shelly Devices
After accessing your Shelly at 192.168.33.1 and connecting it to Wi-Fi, do these before you’re done:
Set a device name — change the default name to something descriptive. You’ll thank yourself once you have six Shelly devices in the same home.
Enable authentication — set a username and password for the web interface. The default open access is fine for a 2-minute setup but shouldn’t stay that way permanently.
Connect to cloud or stay local — decide whether you want Shelly Cloud (remote app control) or local-only operation. If you use Home Assistant or another local automation platform, how DNS works explains why keeping Shelly devices fully local improves reliability.
Update firmware — newer firmware versions improve stability and add features. The web interface shows available updates under Settings → Firmware.
Note the device’s new local IP — once connected to your home Wi-Fi, the web interface shows the IP your router assigned. Note it down, or set a static IP, so you can access the device directly in the future without going through AP mode.
For Routers (Huawei WS323 and Similar)
Change the admin password — default admin/admin credentials are publicly documented. Change them under Administration or System settings immediately.
Update your Wi-Fi name and password — under Wireless settings, set a strong SSID and WPA2 or WPA3 password.
Set security mode to WPA2 or WPA3 — WPA3 security standard is the current best practice for home Wi-Fi encryption.
Review connected devices — check the DHCP client list to see every device on your network. Unfamiliar entries are worth investigating — how to see who’s on your network walks through this.
Enable a guest network — if visitors use your Wi-Fi, a guest network keeps them isolated from your main devices. How to set up a guest network covers the setup.
Check for firmware updates — router firmware patches security vulnerabilities. How to update router firmware explains both manual and automatic update methods.
Frequently Asked Questions
I connected to my Shelly’s AP network but 192.168.33.1 just shows a blank page or times out. What’s wrong?
Almost always one of two things: you’re using https:// (switch to http://), or the AP window has already closed. Press the device’s physical button briefly to reopen the AP, reconnect to its network immediately, and try again. Gen2+ devices close the AP after a few minutes by default.
Can I access 192.168.33.1 from my main Wi-Fi while my Shelly is on the same network?
No — 192.168.33.1 is only accessible when you’re directly connected to the Shelly’s own AP network. Once the Shelly is configured and joins your home Wi-Fi, you access it at its home network IP (like 192.168.1.45), not at 192.168.33.1.
Does every Shelly device use 192.168.33.1, or just some of them?
Every single one — Gen1, Gen2, Gen3, and Gen4. Allterco Robotics standardized this across the entire product line. The SSID name changes per device type, but the AP IP is always 192.168.33.1.
I have multiple Shelly devices. Can they all be at 192.168.33.1 at the same time?
Not simultaneously accessible from one device. You can only connect to one Shelly AP at a time (since connecting to one takes you off your main network). Set them up one at a time — connect to each device’s AP, configure it, let it join your home Wi-Fi, then move to the next.
Why doesn’t 192.168.33.1 work for my Shelly when I type it in Chrome on my phone?
The most common cause is that Chrome on Android auto-upgrades URLs to HTTPS. Type http://192.168.33.1 explicitly — the full address including http://. Also confirm your phone’s Wi-Fi is connected to the Shelly’s AP and not your home network. Turning off mobile data sometimes helps prevent the phone from routing traffic away from the local AP.