You’ve typed 192.168.20.1 into your browser and landed on either a login screen, a blank page, or an error. This guide covers all three. I’ll walk you through the full login process on PC, iPhone, and Android, explain five specific reasons this address won’t load and how to fix each one, cover the factory reset step by step, and tell you what to actually configure once you’re inside the admin panel.
192.168.20.1 shows up most often on NetComm, Exetel, and iPrimus equipment — all brands primarily associated with Australian broadband. If you’re in Australia on an NBN or ADSL connection and your router uses this address, you’re in exactly the right place.
Router Access Panel
Type
192.168.20.1
in your browser or click the link to access the router admin page.
It works only when you’re connected to the same Wi-Fi network.
192.168.20.1 is a private IP address that functions as a default gateway — the internal address your router uses to identify itself on your local network. Type it into a browser while connected to your home network and it opens your router’s admin dashboard. That’s the control center for everything: your Wi-Fi name and password, every device connected to the network, security settings, parental controls, port forwarding rules, and firmware updates.
The 192.168.20.x subnet is less common than 192.168.1.x or 192.168.0.x, which is exactly why it can be confusing when you encounter it. It’s a perfectly valid private address range — it belongs to the same reserved block of addresses set aside for local networks under how DHCP assigns IP addresses and private networking standards. Like all private IPs, it’s completely invisible to the public internet. You can’t reach it from mobile data, from a different Wi-Fi network, or from anywhere outside your own home. That’s intentional — it keeps your router settings protected.
Default Credentials for 192.168.20.1
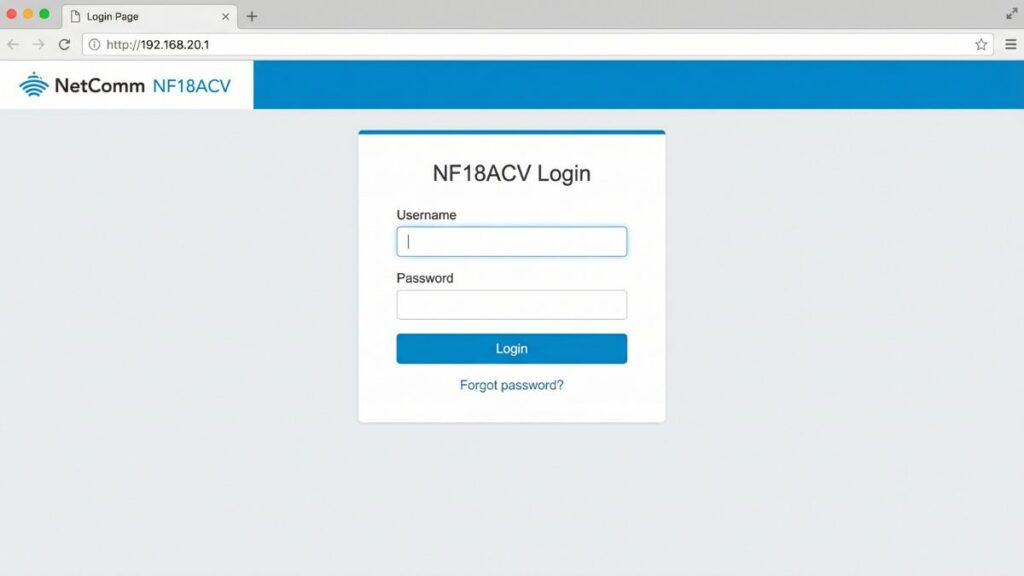
NetComm NF18ACV router login page at 192.168.20.1
You need a username and password to get past the login screen. If no one has changed the defaults since the router was set up, start with the table below. NetComm leads since it’s the primary hardware brand for this IP.
Brand
Default Username
Default Password
NetComm NF18ACV
admin
admin
NetComm NF10WV
admin
admin
NetComm (most models)
admin
admin
NetComm (some ISP models)
admin
(printed on router label)
Exetel-supplied routers
admin
admin
iPrimus-supplied routers
admin
admin
TP-Link
admin
admin
Asus
admin
admin
Linksys
admin
admin
D-Link
admin
(blank)
Netgear
admin
password
Cisco
admin
cisco
Tenda
admin
(blank)
Belkin
(blank)
(blank)
Huawei
admin
admin
Always check the label first. The sticker on the bottom or back of your router has the exact factory-default credentials for your specific model printed on it. That label overrides any table — some ISP-supplied NetComm units ship with a unique password rather than the universal admin.
ISP-supplied NetComm heads-up: If your router was supplied by Exetel, iPrimus, or another Australian ISP, the admin password may have been customized by the ISP during provisioning. If admin/admin doesn’t work, look for a sticker on the unit or contact your ISP’s support line for the correct credentials.
How to Log Into 192.168.20.1 on a PC
The most common failure before credentials are even tried: typing the IP address into the search bar instead of the address bar. The search bar sends your input to Google as a search query. The address bar navigates your browser directly to the page. They sit at the top of the browser window but do completely different things.
Connect your PC to your router — via Wi-Fi or with an Ethernet cable plugged in. Using Ethernet while making configuration changes is safer, since your Wi-Fi connection can drop mid-save.
Open any browser — Chrome, Firefox, Edge, or Safari all work fine.
Click into the address bar at the very top of the browser window — the strip where a URL normally appears (like https://google.com).
⚠️ Not the search bar. If pressing Enter takes you to a Google results page, you typed it in the wrong place. Click the address bar at the top, clear it out, and type the IP fresh.
Type 192.168.20.1 and press Enter.
A login page should appear. Enter your username and password.
Click Login or Sign In.
If you’re in — great. Head to the “What to Do After You Log In” section. If you got an error or a blank page, the troubleshooting section below covers exactly what to do.
How to Log Into 192.168.20.1 on a Phone
Competitors for this IP give zero mobile guidance. Here are dedicated steps for iPhone and Android, because the process is genuinely different on each platform.
On iPhone (Safari)
Connect your iPhone to the Wi-Fi network managed by your router. Make sure you’re on this router’s network — not a guest zone, not a neighbor’s hotspot, not any other network.
Open Safari. Specifically, tap the URL address bar at the top of the Safari browser — not Spotlight search, not the search field inside Safari’s start page.
Type 192.168.20.1 and tap Go.
The router login page should load. Enter your credentials and tap Login.
If Safari routes your input to a Google search instead of navigating to the page, try prefixing it: http://192.168.20.1. That signals to Safari that this is a direct URL, not a search term. If the page still won’t load, double-check that you’re actually on your router’s Wi-Fi network and not on mobile data.
On Android
Connect your Android phone to your router’s Wi-Fi network. Pay attention here — Android sometimes keeps mobile data active in the background even when Wi-Fi is connected, and routes your browser traffic through mobile data. Local addresses like 192.168.20.1 are only reachable through your local network, not through mobile data. If your phone is secretly using mobile data, this address will never respond.
Open Chrome or your preferred browser.
Tap the address bar at the top.
Type 192.168.20.1 and tap Go or press the enter key.
The router admin login screen should appear. Enter your credentials and tap Login.
If Chrome shows “This site can’t be reached,” pull down your notification panel and confirm mobile data is off and Wi-Fi is your active connection. Turn off mobile data temporarily and try again.
If you’re unable to access the 192.168.20.1 router login page, you’re not alone. Below are the most common issues users face and how to fix them quickly.
1. You’re not connected to the right network
Cause: 192.168.20.1 only responds to devices that are on the local network it manages. Your browser traffic has to travel through that specific router — not through a different Wi-Fi network, not through mobile data, and not through a VPN that tunnels your traffic somewhere else.
Fix: On Windows, open Command Prompt and type ipconfig. Find the Default Gateway line under your active network adapter. It should read 192.168.20.1. If it shows something else — 192.168.1.1, 192.168.0.1, or any other address — then that other address is your actual router gateway. On a Mac, go to System Preferences → Network → select your active connection → Advanced → TCP/IP tab → check the Router field. On your phone, disable mobile data and confirm Wi-Fi shows your router’s network as the active connection. Also check for an active VPN — VPNs route traffic away from your local network and will prevent access to any gateway address.
2. The router’s gateway IP was changed
Cause: In ISP-provisioned setups and enterprise environments, the default gateway IP is sometimes changed from 192.168.20.1 during installation. If a technician or admin changed it, this address no longer points to anything.
Fix: Use the Default Gateway method above (ipconfig on Windows, TCP/IP settings on Mac) to find the current gateway address. If you can’t access the router at all and believe the IP was changed, a factory reset (see below) will restore 192.168.20.1 as the default on NetComm and compatible hardware.
3. There’s a typo in the address
Cause: 192.168.20.1 gets mistyped in a few specific ways. People frequently write 192.168.2.01 (splitting the third octet incorrectly), 192.168.20.l (lowercase L for the digit 1 at the end), or 192.168.200.1 (an extra zero in the third octet that makes it a completely different subnet).
Fix: Type it carefully, one segment at a time: 192 . 168 . 20 . 1. The third octet is 20 — not 200, not 2, not 02. Double-check the address bar before pressing Enter. If you’re still unsure, run ipconfig to confirm your actual Default Gateway. You can also use the how to find your router’s IP address guide if you want a more visual walkthrough.
4. Your browser has cached a previous failure
Cause: Browsers remember failed requests and sometimes serve the cached error even after the underlying problem is fixed. Chrome is especially persistent about this with local network addresses.
Fix: Force a hard refresh — press Ctrl + Shift + R on Windows or Cmd + Shift + R on Mac. This bypasses the cache and reloads fresh. If that doesn’t work, open a new private or incognito window and try 192.168.20.1 from scratch. If it loads in incognito but not in your regular window, clear your browser cache and cookies.
5. The router needs a restart
Cause: Routers are computers, and like all computers they occasionally get into a frozen or degraded state — particularly after extended uptime. Your internet may still work perfectly while the admin panel becomes completely unresponsive. This happens more often with modem-routers (the combined units common in NBN and ADSL setups) than with standalone routers.
Fix: Unplug the router from power. Wait a full 30 seconds — not five, not ten, a full thirty. This lets the internal components completely discharge. Plug back in and wait 60–90 seconds for a complete boot. Then try 192.168.20.1 again. A power cycle is the single most reliable fix for an unresponsive admin panel, and it costs nothing to try first.
Factory Reset Guide for 192.168.20.1 Routers
If you’ve forgotten the admin password and can’t get in with any of the defaults, a factory reset is your last option. It wipes all custom configuration and returns the router to its original factory state — including restoring 192.168.20.1 as the gateway and reverting credentials to factory defaults.
Back up your settings first if you can still log in. Go to Administration, System Tools, or Maintenance in the admin panel and look for a Backup or Save Configuration option. Export that file — it means you can restore your settings afterward instead of rebuilding from scratch. Australian ISP users: note that some ISP-provisioned routers (especially those supplied by Exetel or iPrimus) have WAN settings baked in by the ISP. A factory reset may wipe those settings, requiring a call to your ISP to have them re-provisioned or a technician visit.
What gets wiped:
Admin username and password (reverted to factory defaults)
Wi-Fi name (SSID) and Wi-Fi password
All port forwarding rules
Parental controls and URL filters
Static IP / DHCP reservations
Custom DNS server settings
ISP-provisioned WAN settings (on some carrier-supplied units)
How to reset:
Keep the router powered on — don’t unplug it before starting the reset.
Find the Reset button — typically a small recessed pinhole on the back or bottom panel. On NetComm units it’s usually labeled.
Insert a straightened paperclip, SIM card ejector, or thin pen tip.
Press and hold firmly. Keep holding.
Watch the LED indicators — they’ll typically blink rapidly or change behavior to signal the reset has triggered. On NetComm routers, the Power LED usually flashes during the process.
Release and wait 60–90 seconds for the router to fully reboot.
Try 192.168.20.1 with factory-default credentials from your router’s label.
Reset hold times by brand:
Brand
Approx. Hold Time
NetComm
10–15 seconds
TP-Link
10 seconds
Netgear
7–10 seconds
Asus
10 seconds
D-Link
10 seconds
Cisco
10–15 seconds
Linksys
10–15 seconds
Huawei
10–15 seconds
What to Do After You Log In
Getting into the admin panel is just the beginning. Here’s what to configure once you have access, in order of importance.
1. Change Your Admin Password
Default admin credentials are publicly documented — they’re listed in manufacturer manuals, ISP support pages, and guides like this one. Anyone who gets onto your network and knows your router brand can look up the default and get in. Change the admin password as the very first thing you do after logging in.
Log into 192.168.20.1.
Find Administration, System Tools, Maintenance, or Security in the navigation. On NetComm routers, look for Advanced → Administration or Management.
Find Admin Password, Change Password, or Account Settings.
Enter your current password, then your new one twice to confirm.
Pick something long and memorable. A passphrase — three or four random words strung together — is both easier to remember and harder to crack than a short character string. The NIST password guidelines offer a solid framework: length is more important than complexity.
Save the change and log back in with the new credentials.
2. Change Your Wi-Fi Name and Password
Navigate to Wireless Settings or WLAN Settings. Change the SSID (the visible network name) to something that doesn’t reveal your ISP or router brand — “NetComm_NF18ACV_A3B2” tells nearby strangers exactly what hardware you’re running. Set a strong, unique Password or Passphrase. After saving, all connected devices will need to reconnect.
3. Set Encryption to WPA2 or WPA3
While in wireless settings, check the Security Mode or Encryption Type field. If it shows WEP — change it now. WEP is a dangerously outdated standard that can be broken in seconds with freely available tools. WPA2-Personal is the current minimum. If your firmware supports WPA2 vs WPA3, go with WPA3 — newer NetComm NBN-grade routers support it, and it offers meaningfully stronger protection against modern password attacks.
4. Review Connected Devices
Go to DHCP Client List, Connected Devices, Device Manager, or Network Map. You’ll see every device currently on your network, each with a device name, local IP address, and what is a MAC address — a unique hardware identifier. Look for anything unfamiliar. An unrecognized device is a potential security issue. Most routers let you block unknown devices by MAC address directly from this screen.
5. Set Up a Guest Network
A guest network lets visitors get internet access without touching your main network. They’re on a separate, isolated segment — they can browse the internet but can’t see your computers, smart TVs, NAS drives, or other devices on your primary network. On NetComm routers, look for Guest Network or Multiple SSIDs in the wireless settings. See how to set up a guest network for a detailed walkthrough if your interface isn’t obvious about it.
6. Port Forwarding
If you need something on your network to be reachable from the internet — a game server, NAS, remote desktop, IP camera system — configure it under Port Forwarding, Virtual Server, or NAT in your router’s menu. Understanding how port forwarding works before you start prevents the most common setup mistakes. For NetComm users on Australian NBN connections, note that some NBN connection types (particularly FTTC and HFC) may involve CGNAT — if port forwarding isn’t working, your ISP can tell you whether your connection has a public IP assigned.
7. Update Your Firmware
Find Firmware Update or Software Upgrade under Administration or Maintenance. NetComm periodically releases firmware updates for its NBN-grade routers that address security vulnerabilities and sometimes improve stability. Install any available update, then set a reminder to check again every few months. Some NetComm models support automatic update checks — enable that if it’s available.
Common Misspellings of 192.168.20.1
The 192.168.20.1 address is short and simple, but it still gets mistyped in predictable ways. Here are the most common ones:
192.168.200.1
192.168.2.01
192.168.20.l
192.168.20.10
192.168.20.
192.168.20
19216820.1
192.168.20.1.
http//192.168.20.1
www.192.168.20.1
192 168 20 1
The correct address:192.168.20.1
— four numbers, three dots, the third group is 20, nothing else
Which Brands and ISPs Use 192.168.20.1?
Primary Australian Brands and ISPs
NetComm — an Australian networking brand that produces NBN-compatible modem-routers widely deployed by Australian ISPs. Several NetComm models — including the NF18ACV, NF10WV, and other NBN-grade units — use 192.168.20.1 as their default gateway
Exetel — an Australian ISP that has supplied NetComm and compatible hardware to residential broadband subscribers using the 192.168.20.x subnet
iPrimus — another Australian broadband provider whose gateway equipment sometimes defaults to this IP
Enterprise and VLAN Environments
The 192.168.20.x subnet is also commonly chosen by network administrators in office and enterprise environments for VLAN configurations. If you’re in a workplace and see this address, an IT team assigned it — either for general LAN use or as a dedicated VLAN segment. In that case, the credentials and configuration will be managed by your IT department.
Frequently Asked Questions
What is 192.168.20.1 used for?
It’s a private IP address that serves as the default gateway for certain router and modem-router hardware — primarily NetComm devices deployed by Australian ISPs like Exetel and iPrimus. Typing it into a browser while connected to your local network opens the router’s admin panel.
Why does 192.168.20.1 say “This site can’t be reached”?
Most likely you’re not on the right network, or there’s a typo. Run ipconfig on Windows or check Network settings on Mac and look at the Default Gateway. If it shows something other than 192.168.20.1, that different address is your actual router IP. Also check for an active VPN — VPNs route traffic away from your local network.
My Exetel or iPrimus router says admin/admin doesn’t work. What next?
Some ISP-provisioned routers ship with customized credentials. Check the label on the back or bottom of the unit — the ISP sometimes prints the admin password there. If there’s nothing on the label, contact Exetel or iPrimus support directly and ask for the admin password for your gateway model.
What’s the difference between my Wi-Fi password and my admin password?
Two separate passwords for two separate things. Your Wi-Fi password is what your phone or laptop enters to connect to the network. Your admin password is what you enter at 192.168.20.1 to access the router’s settings panel. Changing one has no effect on the other.