Seeing 192.168.1.2 as your router’s IP address and not sure what to do with it? You’re not alone. Most guides focus on 192.168.1.1 — the more common gateway — so when 192.168.1.2 shows up, it throws people off. I’ll explain what this address is, why your network uses it instead of .1, and then walk you through logging in from a PC, an iPhone, and an Android phone. I’ll also cover the five most common access problems and exactly what settings to change once you’re inside the admin panel.
192.168.1.2 – Router Login Admin Page
What Is 192.168.1.2?
192.168.1.2 is a private IP address in the 192.168.1.x subnet — the same block used by millions of home and small office routers across the US. What makes this address a little unusual is that it ends in .2 rather than the .1 that most people expect. Here’s why that matters.
In a typical home network, the router sits at the .1 address (192.168.1.1) and acts as the default gateway. The .2 address is normally assigned to the first device that connects to that network — a computer, a switch, or another device. So if you’re seeing 192.168.1.2 as your router’s admin address, one of a few things is going on:
- Your router was manually configured to use .2. Some network admins do this deliberately to reduce the chance of IP conflicts with cascaded routers or specific equipment.
- Your ISP provisioned your modem/router combo to use .2. Some ISP-supplied gateway devices ship with a .2 default instead of .1.
- You have two routers on the same network. If a second router is behind the main one, it sometimes gets assigned .2 to avoid clashing with the primary at .1.
- Someone changed the router’s LAN IP from the factory default at some point.
Here’s something most people don’t know: the IP address you use to reach the admin panel doesn’t have to be .1. Any address in the private range works — the router just needs to be configured to listen on that specific IP. Understanding how DHCP assigns IP addresses helps explain why: the router controls that whole pool, so it can claim any address for itself and dish out the rest to connected devices.
Like all 192.168.x.x addresses, 192.168.1.2 is completely private. It only exists on your local network — nobody on the internet can reach it, and you can only access it when your device is connected to the same network as the router.
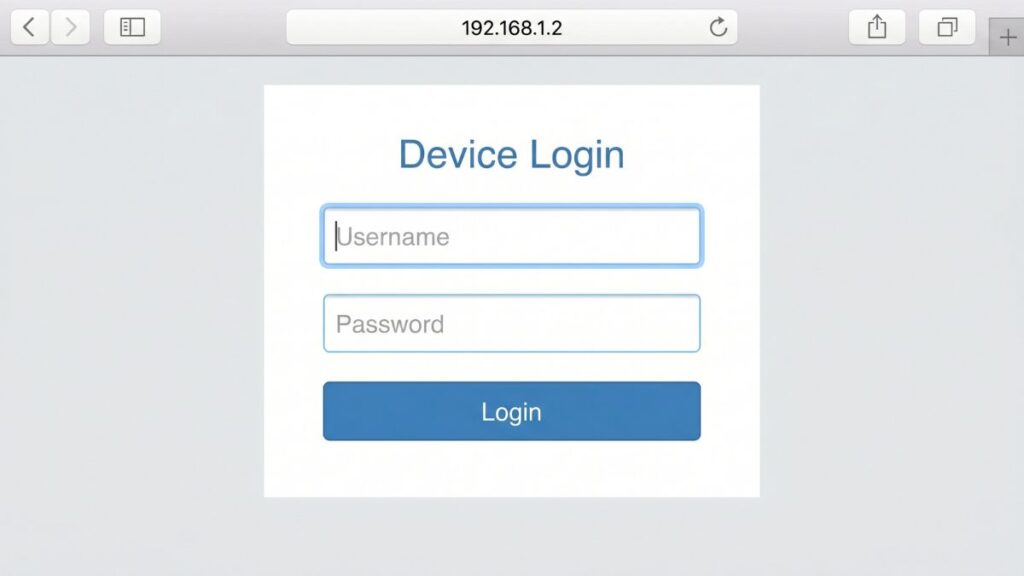
Default Login Credentials for 192.168.1.2
Because 192.168.1.2 is often a manually configured address or appears on ISP-provisioned equipment, the credentials vary more widely than they do for common factory-default IPs. That said, these are the most frequently encountered combinations. The sticker on the back or bottom of the physical device is always your most reliable source.
| Brand | Default Username | Default Password |
|---|---|---|
| TP-Link | admin | admin |
| Asus | admin | admin |
| Linksys | admin | admin |
| D-Link | admin | (blank — leave empty) |
| Netgear | admin | password |
| Cisco | cisco | cisco |
| Tenda | admin | admin |
| Belkin | admin | (blank — leave empty) |
| Huawei | admin | admin |
| ZTE | admin | admin |
| Technicolor / Thomson | admin | admin |
About “blank” passwords: When the table shows a blank, don’t type the word “blank” — leave the field completely empty and hit Login. Some routers ship with no password required for initial setup.
ISP-provisioned equipment: If your gateway came from your internet provider (Xfinity, AT&T, Spectrum, etc.), the credentials are almost always printed on the label. ISP devices often use a unique password per unit rather than a universal default.
How to Log In to 192.168.1.2 on a PC or Mac
- Connect your computer to the router. A wired Ethernet cable is strongly recommended for admin work — if you’re on Wi-Fi and you save wireless settings, the router may drop your connection before the changes apply.
- Open any web browser: Chrome, Firefox, Edge, or Safari all work fine.
- Click in the address bar at the very top of the browser window.
⚠️ Address bar, not the search box. This is the number one mistake. If you type 192.168.1.2 into Google’s search field, you’ll get search results — not your router. The address bar is where you normally see a URL like “https://google.com.” Click there, clear it out, and type the IP directly.
- Type
http://192.168.1.2and press Enter. - A login screen should appear. Enter your username and password (from the label on your router or the table above).
- If you get an HTTPS warning or the page doesn’t load with
https://, try the plainhttp://version explicitly — most router admin panels don’t support SSL. - Click Login or OK.
You’re in. If the page won’t load, jump to the Troubleshooting section — there are specific fixes for each common failure mode.
How to Log In to 192.168.1.2 on a Mobile Device
Most competitor pages skip mobile instructions entirely. Here’s how to do it on both iPhone and Android — they’re different enough to walk through separately.
On iPhone (iOS)
- Open Settings and tap Wi-Fi.
- Make sure you’re connected to the Wi-Fi network from the router you want to access. Mobile data won’t work — private IP addresses are only reachable on a local Wi-Fi connection.
- Tap the (i) icon next to your connected network name.
- Scroll down and look at the Router field — it should show 192.168.1.2 if that’s your gateway address.
- Open Safari or Chrome for iOS.
- Tap the address bar at the top, type
192.168.1.2, then tap Go. - Enter your credentials on the login page that appears.
On Android
- Go to Settings → Network & Internet (some phones label this Connections or Wi-Fi & Network).
- Tap Wi-Fi, then tap your connected network name or the gear/info icon next to it.
- Look for Gateway or Router — confirm it reads 192.168.1.2.
- Open Chrome or your default Android browser.
- Tap the address bar, type
192.168.1.2, and hit the go key. - If the browser searches instead of navigating, prepend
http://— typehttp://192.168.1.2in full. - Log in with your username and password.
Samsung phone users: Samsung’s default browser sometimes auto-searches IP addresses. Chrome is more reliable for accessing router admin pages on Android.
Troubleshooting: 5 Common Problems and How to Fix Them
If you’re trying to access 192.168.1.2 and the router login page won’t load or behaves oddly, you’re not alone. Below are the most common issues and how to fix them quickly.
1. The Page Refuses to Load
Cause: Your device isn’t connected to the right network, or 192.168.1.2 isn’t actually your router’s current gateway IP.
Fix: Confirm your real gateway. On Windows, press Windows key + R, type cmd, press Enter, and run ipconfig. Look for Default Gateway. On a Mac, go to System Preferences → Network → Wi-Fi → Advanced → TCP/IP and find Router. If the gateway shows 192.168.1.1 or something else, use that address instead. You can also read more about how to find your router’s IP address if you want a full walkthrough.
2. Browser Searches Google Instead of Loading the Admin Page
Cause: The IP was typed into the search box, or the browser is treating it as a search query.
Fix: Click the address bar at the very top of the browser (not the Google search bar on the homepage). Type http://192.168.1.2 — the http:// prefix tells the browser explicitly to navigate rather than search. Some browsers (especially on Android) need that prefix to recognize it as an address.
3. Login Page Appears But Credentials Don’t Work
Cause: The default password was changed at some point — by you, a previous user, or an ISP technician during setup.
Fix: Check the physical label on the router first. If the label’s credentials don’t work, a factory reset is your only option (see below). Don’t panic — this is one of the most common router problems and the fix is straightforward. You won’t lose your internet service, just your current configuration.
4. Page Loads Briefly Then Freezes or Gives an Error
Cause: Browser cache or extensions are interfering with the router’s admin interface.
Fix: Clear your browser cache (Ctrl+Shift+Delete on Windows, Cmd+Shift+Delete on Mac) and try again. If that doesn’t work, open an incognito/private window — it loads without extensions and cached data. Some older router admin panels also work better in Firefox than in Chrome, so switching browsers is worth trying.
5. You Log In But Keep Getting Disconnected Mid-Session
Cause: You’re on Wi-Fi, and certain changes — especially to wireless settings — trigger the router to briefly restart its radio, dropping your connection.
Fix: Plug an Ethernet cable from your laptop or desktop directly into one of the router’s LAN ports. A wired connection stays live even when the Wi-Fi resets. Every time I’m making more than one or two changes in the admin panel, I grab a cable first — saves a lot of re‑logging in.
Factory Reset Guide
A factory reset wipes all custom settings: your Wi-Fi name and password, admin password, port forwarding rules, parental controls, custom DNS — everything. Your ISP service doesn’t get disconnected permanently, but you’ll need to reconfigure from scratch.
Before you reset: Take 5 minutes to write down (or photograph) your current Wi-Fi name, password, and any custom settings you’ve made. It’s much easier to rebuild from notes than from memory.
How to reset:
- Make sure the router is powered on.
- Find the reset button — usually a small recessed pinhole on the back or bottom of the unit. You’ll need a straightened paperclip, a SIM ejector tool, or a toothpick to press it.
- Press and hold it for the following time depending on your brand:
- TP-Link: 10 seconds (until LED flashes)
- Asus: 10 seconds (until power light blinks)
- Netgear: 7 seconds, release, then wait 30 seconds
- D-Link: 10 seconds
- Linksys: 10–15 seconds
- Cisco: 10–15 seconds
- Huawei: 10 seconds
- Release and wait 60–90 seconds for the router to finish rebooting.
- Navigate to
http://192.168.1.2and log in with the default credentials from the label or the table above.
What to Do After You Log In
Getting in is just the start. Here’s what actually matters once you’re in the admin panel.
1. Change Your Admin Password
The default credentials — “admin/admin,” “admin/password,” or whatever shipped with your device — are publicly documented. Leaving them unchanged means anyone on your network can access your router settings. Change this first.
- Log into the admin panel at 192.168.1.2.
- Find the menu labeled Administration, System Tools, Management, or Security — the name varies by brand.
- Look for Admin Password, Router Password, or Login Password.
- Enter the current password, then set a new one.
- Use something strong: at least 12 characters, mixing uppercase, lowercase, numbers, and symbols. Following NIST password guidelines is the right approach — long passphrases beat short complex strings every time.
- Save and log back in with the new credentials.
Write it down somewhere physical. If you forget the admin password, factory reset is the only way back in.
2. Change Your Wi-Fi Password
Go to Wireless or Wi-Fi Settings in the admin panel and update your network password. While you’re there, check your SSID (network name) too — if it still shows the router brand or model number, changing it removes a small but real piece of information from anyone scanning nearby networks. Keep the name something recognizable to you without being personally identifiable (your street address or last name is not a great Wi-Fi name).
One thing that trips people up constantly: your Wi-Fi password — what your phone uses to connect — and your admin password — what gets you into 192.168.1.2 — are two completely separate things. They don’t sync, they don’t have to match, and they should probably be different.
3. Set WPA2 or WPA3 Security Mode
In your Wireless settings, find the Security Mode or Authentication Type dropdown. Choose WPA3 if your router supports it — it’s the current standard and significantly more resistant to brute-force attacks. If WPA3 isn’t listed, WPA2-AES is solid and widely supported. The WPA3 security standard is worth reading about if you want to understand what the upgrade actually protects against. Avoid WEP and plain WPA (without the “2” or “3”) at all costs — those encryption schemes are considered completely broken.
4. Check Connected Devices
Look for DHCP Client List, Connected Devices, or Device Management in the menu. This lists every device on your network — each one with a hostname, assigned IP, and what is a MAC address identifier. It’s one of the most useful views in the whole admin panel. If you see an unfamiliar device name or one you can’t account for, change your Wi-Fi password immediately. That boots every device off the network, and only the ones with the new password can reconnect.
One thing to note with a .2 gateway: your DHCP pool probably starts at .3 or higher. Some routers configured at 192.168.1.2 will assign device addresses starting at 192.168.1.3, 192.168.1.4, and so on. This is normal — the .2 is just reserved for the router itself.
5. Set Up a Guest Network
If your router supports it (most modern ones do), a guest network is worth setting up. It gives visitors a separate Wi-Fi connection that can’t see your main network’s devices — your computers, printers, smart home gear, and NAS drives all stay isolated. Find Guest Network or Guest Zone in the Wireless settings. Our guest network is named something completely boring and that’s exactly the point — guests connect without hassle and without touching the main network. Getting how to set up a guest network right takes about five minutes.
6. Port Forwarding
If you’re running anything that needs to be reachable from the internet — a game server, a home camera system, a remote desktop setup — you’ll need to configure port forwarding. Go to Advanced → Port Forwarding (or Virtual Server on some interfaces). You’ll enter the internal IP of the target device, the port number, and the protocol. Understanding how DNS works alongside port forwarding gives you a much clearer picture of how traffic actually flows through your network, which helps you configure things correctly the first time.
7. Update Firmware
This is the setting most people never touch and should. Go to Administration → Firmware Update (or Software Update). Check for updates and install any available ones. Router firmware patches fix real, documented security vulnerabilities — and outdated firmware is one of the most common ways home networks get quietly compromised. Checking for how to update router firmware is worth doing every few months.
Common Misspellings of 192.168.1.2
The address is short, but even short addresses get mistyped. None of these will reach your router:
192.168.l.2
192.168.1.2.
192.168.12
192.168.1,2
192.168.1 .2
192.168.1.21
192.168.1.12
192.168.1.1
192.168.2.1
http //192.168.1.2
192-168-1-2
192.168.o.2
Correct address:
192.168.1.2
— A single wrong character is enough to send the browser elsewhere. Type it fresh in the address bar.
Which Brands and ISPs Use 192.168.1.2?
Unlike 192.168.1.1, the .2 address isn’t a universal factory default for any single major brand. It shows up in a few specific scenarios:
Common reasons a router ends up at 192.168.1.2:
- Double-NAT / cascaded router setups — When a second router is plugged in behind a primary one, it sometimes auto-assigns itself .2 to avoid a conflict with the .1 upstream gateway. This is especially common when someone adds a new router behind an ISP-supplied modem.
- ISP-configured gateway devices — Some ISPs configure their supplied equipment at .2, particularly in small business or enterprise installs, to keep .1 reserved for their own management use.
- Manual reconfiguration — A previous user or IT person changed the router’s LAN IP from .1 to .2 for network organization purposes.
- Specific firmware builds — Certain Huawei, ZTE, and Technicolor/Thomson devices have shipped with .2 as a default in some regional configurations.
Frequently Asked Questions
Why is my router at 192.168.1.2 instead of 192.168.1.1?
Several reasons are possible — a second router behind a primary one, an ISP-configured gateway, or a manual IP change at some point. It doesn’t indicate anything is wrong. The admin login process is exactly the same as any other private IP address.
What are the default username and password for 192.168.1.2?
It depends on the router brand and how it was configured. Common defaults are admin/admin, admin/password, or admin/(blank). The most reliable source is always the label on the physical device — it shows exactly what the router shipped with.
My Wi-Fi is working fine but 192.168.1.2 won’t load in my browser. Why?
Working internet doesn’t mean your gateway is 192.168.1.2. Run ipconfig on Windows or check Wi-Fi details on your phone to find your actual Default Gateway. If it shows 192.168.1.1 or something else, use that address instead. Also make sure you’re typing in the browser address bar — not a search engine.
I forgot the admin password. What now?
Factory reset is the only option — there’s no “forgot password” recovery on router admin pages. Follow the steps in the Factory Reset section above. It restores default credentials but wipes all custom settings, so do it only when you have no other choice.