If you typed 192.168.1.100 into your browser expecting to reach your router’s admin page and got nothing — or if your device is showing this as your gateway address and you’re not sure what to do with it — you’re in exactly the right place. This address is a bit unusual compared to the more familiar 192.168.1.1, and most guides either ignore it or mix it up with the completely different 192.168.100.1. I’ll explain what 192.168.1.100 actually is, why it might be your admin address, and walk you through logging in from a PC, iPhone, or Android phone — plus how to fix the most common access problems and what to change once you’re inside.
192.168.1.100 Router Login – Admin Page
What Is 192.168.1.100?
192.168.1.100 is a private IP address in the 192.168.1.x subnet — the same block used by the majority of home and small office routers in the US. What makes this one worth paying attention to is where the .100 comes from.
In a standard home network, the router sits at 192.168.1.1 as the gateway, and connected devices (phones, laptops, TVs) get addresses starting somewhere around 192.168.1.2 or higher — usually assigned automatically by DHCP. The .100 address specifically is a common DHCP starting point. Many router brands — Linksys being the most well-known — configure their DHCP pool to begin at .100 by default instead of .2. That means the first device that connects gets 192.168.1.100, the second gets .101, and so on.
So if you’re seeing 192.168.1.100 as your router’s admin address, one of these is most likely true:
- Your router was manually set to use .100 as its LAN IP. Some IT administrators and advanced users do this deliberately to keep the gateway address outside the normal DHCP pool range, reducing the chance of IP conflicts.
- Your ISP provisioned equipment is configured this way. Some ISP-supplied gateway devices in certain regions ship with .100 as the admin IP.
- You have a Linksys or similar router where .100 is significant. On Linksys routers, even though the gateway is typically 192.168.1.1, the DHCP pool starts at .100 — so a computer might display 192.168.1.100 as its own address, which sometimes confuses people into thinking it’s the router IP.
Here’s the key distinction that trips people up: 192.168.1.100 the router admin IP and 192.168.1.100 a device’s assigned IP are two completely different things. If your computer has been given the address 192.168.1.100 by DHCP, your actual router gateway is likely still at 192.168.1.1. Run ipconfig on Windows (or check your Wi-Fi settings on your phone) and look for Default Gateway to find the right address to use. Understanding what is a subnet mask and how IP ranges work makes this a lot clearer if you want to dig deeper.
Like all 192.168.x.x addresses, 192.168.1.100 is fully private — it can’t be reached from the internet and only works when your device is on the same local network.
Don’t Confuse 192.168.1.100 with 192.168.100.1
This is worth calling out clearly because the confusion is extremely common. These are two completely different IP addresses on two different subnets:
- 192.168.1.100 — an address in the 192.168.1.x network, typically used by Linksys and some ISP-provisioned devices
- 192.168.100.1 — an address in the 192.168.100.x network, used by TP-Link, Huawei, Arris, Zyxel, and Starlink as a default gateway
If you type one when you need the other, you’ll get a connection error — they’re as different as two separate street addresses. Double-check which one you actually need before proceeding.
Default Login Credentials for 192.168.1.100
The brands most commonly associated with 192.168.1.100 as a gateway address include Linksys, certain Cisco devices, and ISP-provisioned equipment configured to use this subnet. Default credentials vary by brand — the label on the back or bottom of the physical device is always your most reliable source.
| Brand | Default Username | Default Password |
|---|---|---|
| Linksys | admin | admin |
| Cisco | cisco | cisco |
| TP-Link | admin | admin |
| Asus | admin | admin |
| D-Link | admin | (blank — leave empty) |
| Netgear | admin | password |
| Tenda | admin | admin |
| Belkin | admin | (blank — leave empty) |
| Huawei | admin | admin |
| ZTE | admin | admin |
About blank passwords: If the table shows blank, don’t type “blank” — leave the field completely empty and hit Login. Some routers require no password on first login.
ISP-provisioned equipment: If your gateway came from your internet provider, the credentials are almost always printed on the label affixed to the device. ISP equipment often uses a unique password per unit rather than a universal default.
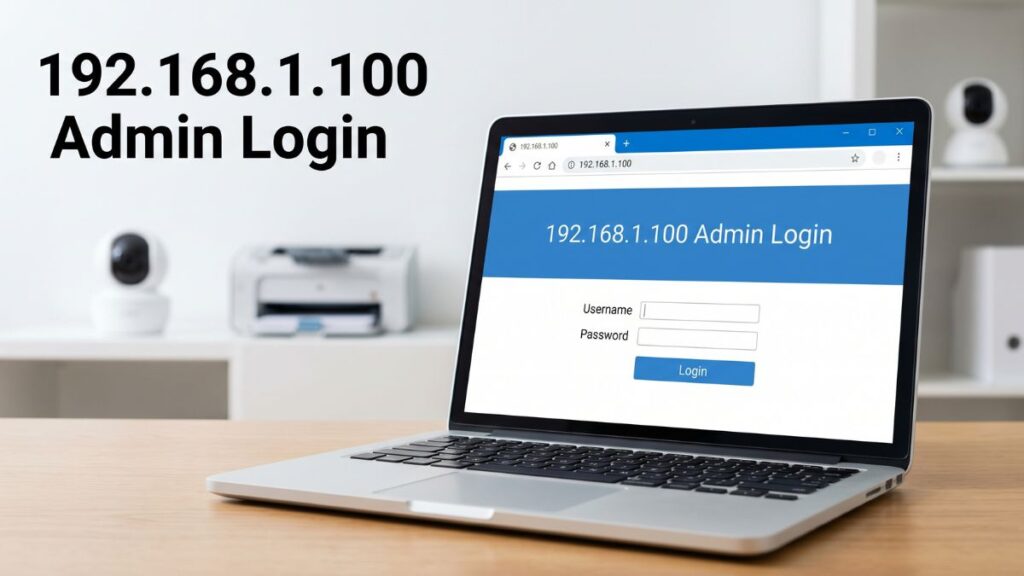
How to Log In to 192.168.1.100 on a PC or Mac
- Make sure your computer is connected to the router — via Wi-Fi or Ethernet cable. For admin work, Ethernet is strongly preferred. Changing wireless settings over Wi-Fi can drop your connection mid-save, which is frustrating every time it happens.
- Open any web browser: Chrome, Firefox, Edge, or Safari all work fine.
- Click the address bar at the very top of the browser window.
⚠️ Address bar, not the search box. Typing an IP address into Google’s search field just returns search results. The address bar is where you normally see a URL like “https://google.com.” Click there, clear whatever’s in it, and type the IP directly.
- Type
http://192.168.1.100and press Enter. - A login screen should appear. Enter your credentials from the router’s label or the table above.
- If you see an HTTPS certificate warning or a blank page, try the plain
http://version explicitly — most router admin panels don’t run SSL. - Click Login or OK.
You’re in. If the page won’t load at all, the Troubleshooting section below has specific fixes for each common failure mode.
How to Log In to 192.168.1.100 on a Mobile Device
Most guide pages for this IP give no mobile instructions whatsoever. Here’s how to do it properly on both iPhone and Android.
IPhone (iOS)
- Open Settings → tap Wi-Fi.
- Make sure you’re connected to the Wi-Fi from the router you want to access. Mobile data won’t work — private IPs like 192.168.1.100 only exist on your local network.
- Tap the (i) icon next to your network name.
- Scroll down to the Router field. Confirm it shows 192.168.1.100. If it shows something else (like 192.168.1.1), use that address instead.
- Open Safari or Chrome.
- Tap the address bar at the top, type
192.168.1.100, and tap Go. - Enter your username and password at the login page.
Android
- Open Settings → Network & Internet (some phones call this Connections or Wi-Fi & Network).
- Tap Wi-Fi, then tap your connected network name or the info/gear icon beside it.
- Look for Gateway or Router and confirm it reads 192.168.1.100.
- Open Chrome or your default browser.
- Tap the address bar, type
192.168.1.100, and press the go/enter key. - If it searches instead of navigating, try typing
http://192.168.1.100with the full prefix — that forces the browser to treat it as an address. - Log in with your credentials.
For Samsung users: Samsung’s default browser sometimes auto-searches IP addresses rather than navigating to them. Chrome is more reliable for router admin access on Android devices.
Troubleshooting: 5 Problems and How to Fix Them
If you’re unable to access the 192.168.1.100 router login page, you’re not alone. Below are the most common issues users face and how to fix them quickly.
1. The Page Doesn’t Load — at All
Cause: Your device isn’t connected to the right network, or 192.168.1.100 isn’t actually your router’s gateway IP. Remember: on Linksys and some other routers, .100 is a device IP assigned by DHCP — not the router itself, which is usually still at 192.168.1.1.
Fix: Check your actual gateway. On Windows: press Windows key + R, type cmd, press Enter, then run ipconfig. Look for the Default Gateway line. On Mac: go to System Preferences → Network → Wi-Fi → Advanced → TCP/IP and find Router. Use whatever IP is listed there — not what you assumed. You can also follow the full guide on how to find your router’s IP address for more methods.
2. Browser Searches Google Instead of Opening the Admin Page
Cause: The IP was typed into a search box, or the browser is treating it as a query rather than a navigation target.
Fix: Click the address bar at the very top of your browser (not the Google search bar on the homepage), and type http://192.168.1.100 — including the http:// prefix. That tells the browser explicitly to navigate rather than search. This is especially important on mobile browsers, which are more aggressive about auto-searching.
3. Login Page Loads But Credentials Don’t Work
Cause: Default credentials were changed at some point — possibly by a previous user, a family member, or an ISP technician during setup.
Fix: Check the physical label on your router first. If those credentials don’t work either, a factory reset is the path forward (see below). Don’t worry — this is one of the most common issues out there and the fix is completely routine. You won’t permanently lose your internet access.
4. Page Loads Slowly, Freezes, or Gives an Error After Login
Cause: Browser cache, cookies, or extensions are conflicting with the router’s admin interface. Many router admin panels are basic HTML and don’t play nicely with modern browser extensions.
Fix: Clear your browser cache (Ctrl+Shift+Delete on Windows, Cmd+Shift+Delete on Mac) and reload. Better yet, try an incognito/private window — it loads without extensions and cached data. If it works in incognito but not normal mode, a browser extension is the culprit. Firefox also tends to work better than Chrome for older router interfaces.
5. You Log In Fine But Keep Getting Disconnected While Making Changes
Cause: You’re on Wi‑Fi, and saving certain settings — especially anything related to wireless — causes the router to briefly restart its radio and drop your connection before changes apply.
Fix: Connect a physical Ethernet cable from your laptop or desktop into one of the router’s LAN ports. Wired connections stay live even when the Wi‑Fi radio resets. It’s genuinely the single best thing you can do before a round of router configuration. I keep a short patch cable near my router just for this reason.
Factory Reset Guide
A factory reset wipes everything: your custom Wi-Fi name and password, admin credentials, port forwarding rules, parental controls, static IP assignments, any DNS changes. Your ISP connection doesn’t get permanently cut — but you’ll need to reconfigure everything from scratch.
Before you reset: Spend five minutes writing down (or photographing) your Wi-Fi name, password, and any important settings. It’s much faster to rebuild from notes than from memory.
How to do it:
- Confirm the router is powered on. Don’t reset while it’s off — many routers won’t fully restore defaults that way.
- Locate the Reset button on the back or bottom of the unit. It’s typically a recessed pinhole — you’ll need a straightened paperclip, a SIM-card ejector tool, or a toothpick to reach it.
- Press and hold for the following time based on your brand:
- Linksys: 10–15 seconds (until the power light flashes)
- TP-Link: 10 seconds
- Asus: 10 seconds (until power LED blinks)
- Netgear: 7 seconds, release, then wait 30 more
- D-Link: 10 seconds
- Cisco: 10–15 seconds
- Tenda: 8–10 seconds
- Release and wait 60–90 seconds for the full reboot to complete.
- Navigate to
http://192.168.1.100and log in with the factory default credentials from your router’s label or the table above.
What to Do After You Log In
Getting in is the first step. Here’s what actually matters once you’re inside the admin panel.
1. Change Your Admin Password
The default admin credentials are publicly documented for every major router brand. Leaving them unchanged means anyone on your network — a guest, a neighbor who knows your Wi-Fi password, anyone — can potentially get into your router settings. Change this first, before anything else.
- Log into the admin panel at 192.168.1.100.
- Navigate to Administration, System Tools, Management, or Security — the label varies by brand.
- Find Admin Password, Router Password, or Login Password.
- Enter the current password, then set a strong new one: 12+ characters, mixing uppercase, lowercase, numbers, and symbols. Longer passphrases tend to be both more secure and easier to remember — this follows how to create a strong password that actually holds up.
- Save and log back in with the new password.
Write it somewhere physical. There’s no “forgot password” recovery on router admin pages — the only way back in if you forget it is a factory reset.
2. Change Your Wi-Fi Password
Go to Wireless or Wi-Fi Settings in the menu. Update the network password to something strong. While you’re there, take a look at the SSID (your network’s visible name). If it still shows the router brand or model — something like “LINKSYS” or “TP-Link_2G” — change it. That name broadcasts what hardware you’re running, which is a small but unnecessary piece of information to hand out to anyone nearby with a phone.
And just to be clear, since this trips people up constantly: your Wi-Fi password (what phones use to join the network) and your admin password (what gets you into 192.168.1.100) are completely separate. Changing one doesn’t affect the other. They should both be strong, and they shouldn’t be the same password.
3. Set WPA2 or WPA3 Security Mode
In your Wireless settings, find Security Mode or Authentication Type and set it to WPA3 if your router supports it. WPA3 is the current standard and handles brute-force attacks significantly better than older protocols. If WPA3 isn’t an option, WPA2-AES is solid. The full picture on WPA2 vs WPA3 is worth a read if you want to understand what you’re actually protecting against. Avoid WEP and plain WPA (without the “2” or “3”) — both are considered thoroughly broken and shouldn’t be used.
4. Review Connected Devices
Find DHCP Client List, Connected Devices, or Device Manager in the menu. This shows every device currently on your network, each with a hostname, assigned IP address, and MAC address identifier. Learning how to see who’s on your network is one of the most practical things you can do for network security. If you see something unfamiliar — an unknown device name, a hostname you don’t recognize — change your Wi-Fi password immediately. That forces all devices to re-authenticate, and only the ones with the new password come back.
A note specific to 192.168.1.100 setups: If your router’s gateway is at .100, your DHCP pool likely starts at .101 or higher. Devices you see in the list with addresses like 192.168.1.101, .102, .103 are expected. The .100 address itself should only belong to the router.
5. Set Up a Guest Network
If your router supports it — most modern ones do — a guest network is worth taking five minutes to configure. It gives visitors their own separate Wi-Fi that can’t see or touch your main network’s devices: your computers, printers, NAS drives, smart home gear, everything. It also means you never have to hand out your main Wi-Fi password. Find Guest Network or Guest Zone in the Wireless settings. PCMag’s guide to how to set up a guest network walks through it if you need a hand with the steps.
6. Port Forwarding
If you’re hosting anything that needs inbound connections from the internet — a game server, home security cameras, a Plex or NAS media server, remote desktop — port forwarding is what makes that work. Go to Advanced → Port Forwarding (or Virtual Server on some interfaces). You’ll specify the internal IP of the target device, the external port number, and the protocol (TCP, UDP, or both). If you need a refresher on the concept first, the guide on how port forwarding works is practical and clear.
7. Update Firmware
This gets skipped more than anything else and it really shouldn’t. Go to Administration → Firmware Update (or Software Update) and check for available updates. Router firmware patches fix real, documented security holes — the kind that get actively exploited in home networks. Staying current is low effort and high impact. The walkthrough on how to update router firmware covers the process for all major brands.
Common Misspellings of 192.168.1.100
The three-digit last octet is where most typos happen. None of these will reach your router:
192.168.1.100.
192.168.1.10 0
192.168.1.10
192.168.1.1000
192.168.1,100
192.168.l.100
192.168.1.100/
192.168.100.1
192.168.1.001
http //192.168.1.100
www.192.168.1.100
192-168-1-100
192.168.o.100
Correct address:
192.168.1.100
— The most dangerous mix-up is confusing 192.168.1.100 with 192.168.100.1. Type fresh in the address bar.
Which Brands and ISPs Use 192.168.1.100?
Unlike the major factory-default gateway IPs (192.168.1.1, 192.168.0.1), the .100 address shows up in more specific circumstances:
Where 192.168.1.100 is commonly seen:
- Linksys routers — Linksys historically configured DHCP pools starting at .100, making it the first address assigned to a connected device. The gateway itself is still 192.168.1.1, but .100 shows up as a device address so frequently it gets searched constantly. If your Linksys is showing .100, your router admin is almost certainly at 192.168.1.1.
- Manually configured enterprise and SMB equipment — Network admins sometimes put the gateway at .100 to keep it outside the normal device IP range (which might run from .1–.99 or .101–.254 depending on the DHCP config).
- Some ISP-provisioned gateway devices — Certain ISP equipment in regional configurations uses .100 as the admin address, particularly where the ISP wants to reserve .1 through .99 for their own management.
- Secondary routers in cascaded setups — When a second router is added behind a primary, it sometimes gets assigned .100 as its IP on the upstream network.
US ISPs and their typical default gateway IPs (for reference):
| ISP | Typical Default Gateway |
|---|---|
| Xfinity (Comcast) | 10.0.0.1 |
| AT&T (residential) | 192.168.1.254 |
| Verizon FiOS | 192.168.1.1 |
| Spectrum (Charter) | 192.168.0.1 or 192.168.1.1 |
| CenturyLink / Lumen | 192.168.0.1 |
| Cox | 192.168.0.1 |
| Starlink | 192.168.100.1 (note: different subnet) |
If your ISP is in this list and your gateway shows 192.168.1.100, the most likely explanation is a manually configured device, a cascaded router setup, or ISP equipment with a non-standard configuration. The login process is the same regardless of how it got there.
Frequently Asked Questions
Is 192.168.1.100 the same as 192.168.100.1?
No — they’re completely different IP addresses. 192.168.1.100 is in the 192.168.1.x subnet; 192.168.100.1 is in the 192.168.100.x subnet. Typing one when you need the other will give you a connection error. Check your Default Gateway in your network settings to confirm which one is correct for your device.
My Linksys router shows 192.168.1.100 on my computer. Is that the router’s IP?
Almost certainly not. On Linksys routers, 192.168.1.100 is typically the first IP address assigned to your computer by the router’s DHCP pool — not the router’s own address. The router itself is almost always at 192.168.1.1. Try navigating to http://192.168.1.1 instead.
What are the default credentials for 192.168.1.100?
It depends on the brand. Common defaults are admin/admin, admin/password, or admin/(blank). The label on the physical device is always the most reliable source. If your device came from an ISP, the label almost always has the exact credentials printed on it.
I forgot the admin password. What do I do?
Factory reset is the only recovery option — there’s no “forgot password” feature. Hold the reset button for 10–15 seconds (see the factory reset section above) to restore factory defaults, then log in with the credentials on the label or from the table above.