If you’ve landed here, you’re probably staring at a browser that isn’t loading — or you just found 192.168.1.200 on a sticker, in your network settings, or while troubleshooting something on your home network. Here’s the thing: 192.168.1.200 sits in an interesting spot in the IP address universe. It’s used by certain router brands as a default admin address, but it’s also one of the most common IPs manually assigned to network devices like NAS drives, network printers, IP cameras, and Wi-Fi access points. This guide covers all of it — login steps on PC and phone, troubleshooting, and what to do once you’re in.
192.168.1.200 Router Login – Admin Page
What Is 192.168.1.200?
192.168.1.200 is a private IPv4 address that lives inside the 192.168.x.x range — a block reserved for local networks under the RFC 1918 private address ranges standard. It’s invisible to the public internet. Anyone outside your home or office network can’t reach it, and typing it into a browser on a mobile data connection won’t do a thing.
In a typical home network, your router acts as the gateway — usually sitting at 192.168.1.1 or a similar address — and hands out IP addresses to connected devices automatically via DHCP. Those addresses usually start around 192.168.1.2 and count upward. So 192.168.1.200 is well into the upper range of the standard 192.168.1.x subnet.
Here’s what makes 192.168.1.200 different from lower addresses like 192.168.1.2 or 192.168.1.3:
It’s often intentionally chosen. Most network administrators, IT professionals, and experienced home users assign addresses in the upper range (192.168.1.150 through 192.168.1.254) to static devices that need a permanent, predictable IP — things like network printers, NAS drives, smart home hubs, IP cameras, managed switches, and Wi-Fi access points. The lower range gets used by everyday devices like phones and laptops that connect and disconnect constantly. Keeping them separated avoids IP conflicts and makes network management much cleaner.
So when you see 192.168.1.200, you could be looking at:
- A router using this as its default admin IP — certain Netgear, UBIQCOM, and configured enterprise devices use it as a gateway
- A network device with a static IP assignment — a NAS, printer, access point, or IP camera set to always live at .200
- A DHCP-assigned address — less common at .200, but possible if a router’s DHCP pool is configured to hand out addresses in this range
How to Find Out What’s Actually at 192.168.1.200
Before logging in, it helps to know what device you’re actually dealing with.
On Windows:
- Press
Windows + R, typecmd, hit Enter. - Type
ping 192.168.1.200and press Enter. If you get replies back, something is active at that address. - Type
arp -aand look for 192.168.1.200 in the list. The MAC address shown next to it can help identify the manufacturer.
On Mac:
- Open Terminal (Applications → Utilities → Terminal).
- Type
ping 192.168.1.200and hit Enter. - Run
arp -afor device detail.
Tip iPhone or Android: A free app called Fing scans your entire network in under a minute and shows every device, its IP, manufacturer name, and device type. If you want to know what’s sitting at 192.168.1.200, this is the fastest way to find out.
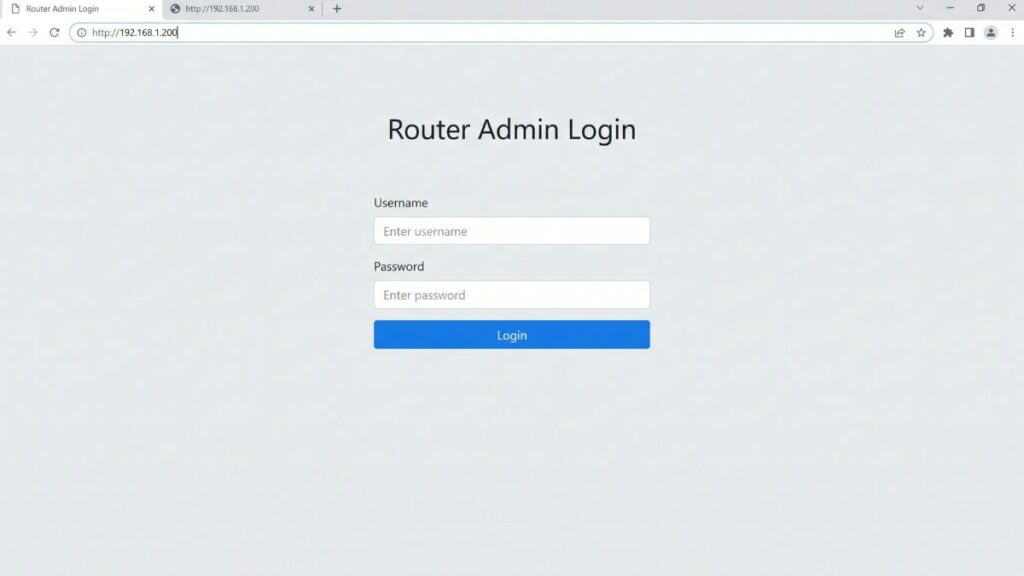
Default Credentials for Routers That Use 192.168.1.200
If 192.168.1.200 is your router’s gateway, here are the default login credentials by brand. That said — always check the sticker on the back or bottom of your router first. Manufacturers sometimes print device-specific credentials there, and those override the general defaults listed in any table.
| Brand | Default Username | Default Password |
|---|---|---|
| Netgear | admin | password |
| TP-Link | admin | admin |
| Asus | admin | admin |
| Linksys | admin | admin |
| D-Link | admin | (blank) |
| Cisco | cisco | cisco |
| Tenda | admin | admin |
| Belkin | admin | (blank) |
| Huawei | admin | admin |
| UBIQCOM | admin | admin |
| Zyxel | admin | 1234 |
Note on Netgear: Some Netgear Nighthawk and Orbi models use 192.168.1.200 as the default gateway, while others use 192.168.0.1 or routerlogin.net. If you’re on a Netgear device and 192.168.1.200 isn’t working, try http://routerlogin.net or http://routerlogin.com in the address bar — those are Netgear’s fallback login URLs.
How to Log In on a PC or Mac
Works in any modern browser — Chrome, Firefox, Safari, Edge, all fine.
- Make sure your computer is connected to the network, either via Wi-Fi or an Ethernet cable plugged into one of the router’s LAN ports.
- Open your browser and click the address bar at the very top of the window — where you normally see the website URL.
⚠️ Important: Type 192.168.1.200 into the address bar, not a search engine. If you type it into Google or Bing’s search box, you’ll get search results, not your router. The address bar is the long bar at the top where it shows things like “youtube.com” or “google.com.”
- Type
192.168.1.200exactly and press Enter. - A login page should appear. Enter your username and password.
- Click Login or Sign In to access the admin dashboard.
If the page doesn’t load, jump to the troubleshooting section — it usually means either the wrong IP, the wrong network, or nothing is configured at that address.
How to Log In on Mobile
Here’s the platform-specific breakdown competitors skip.
iPhone (iOS)
- Open Settings → tap Wi-Fi → confirm you’re connected to your home network (not mobile data).
- Open Safari — Safari handles local IP addresses more reliably on iOS than Chrome.
- Tap the address bar at the top and type
192.168.1.200, then tap Go. - If the page doesn’t load, try the full URL:
http://192.168.1.200 - Enter your credentials when the login page appears.
Android
- Swipe down from the top and confirm Wi-Fi is enabled and connected to your home network.
- Open Chrome or your preferred browser.
- Tap the address bar, type
192.168.1.200, and tap Go or the Enter key. - Log in with your username and password.
💡 On both platforms: If you’re on mobile data (LTE/5G) instead of Wi-Fi, 192.168.1.200 won’t be reachable — it’s a local address. Temporarily disable mobile data if the page won’t load.
Troubleshooting: 5 Common Problems and How to Fix Them
If you’re trying to access 192.168.1.200 and the page won’t load or doesn’t behave as expected, you’re not alone. Below are the most common issues and how to fix them quickly.
1. “This site can’t be reached” — the page won’t load at all
Cause: Your device isn’t on the same network as the router or device you’re trying to reach, or nothing is configured to use 192.168.1.200.
Fix: Confirm your device is connected to your home Wi‑Fi (not a hotspot). Then verify the actual gateway IP: on Windows, open Command Prompt and type ipconfig — look for “Default Gateway.” On Mac, go to System Settings → Network → your connection. If the gateway shows 192.168.1.1 instead of 192.168.1.200, your router is at 192.168.1.1. Something else on your network may be at 192.168.1.200, or nothing is. Also worth knowing: how to find your router’s IP address is a separate step from knowing what’s at any specific address.
2. Login page loads, but the password doesn’t work
Cause: The credentials were changed previously, the device uses ISP‑custom or brand‑specific credentials, or you’re reaching a non‑router device with different default passwords.
Fix: Try all the combinations from the table above. If you’re trying to access a NAS, printer, or IP camera, look up its specific default credentials — they’re very different from router defaults. If it’s definitely a router and nothing works, a factory reset is your next move (see below).
3. Page loads but shows a completely different interface than expected
Cause: A device on your network has been assigned 192.168.1.200, and it’s not the device you were expecting. A printer, camera, or access point admin panel looks nothing like a router interface.
Fix: This is normal behavior — you’re reaching whatever device holds that IP. Use arp -a in Command Prompt or a Fing scan to identify the device. If you need your router’s settings, find your actual Default Gateway IP (usually 192.168.1.1) and use that instead.
4. The page loads but nothing saves — changes don’t stick
Cause: Multiple browser tabs open on the same login session cause conflicts. Some older firmware also has a bug where saving settings times out silently.
Fix: Log out completely, close all browser tabs, reopen a fresh single tab, and log back in. Try a different browser. If it still won’t save, check if a firmware update is available — this bug is patched in most modern firmware versions.
5. Used to work fine, now it doesn’t
Cause: DHCP lease expired and the address was reassigned to a different device. Or the device at 192.168.1.200 is powered off. Or someone changed the gateway IP.
Fix: Run ping 192.168.1.200 in Command Prompt — if there’s no reply, the device is offline or the address is unoccupied. If you need a device to always stay at 192.168.1.200, set a DHCP reservation in your router’s admin panel (more on that below).
How to Factory Reset a Router Using 192.168.1.200
Only do this as a last resort — a factory reset wipes your Wi-Fi name, password, port forwarding rules, custom DNS settings, and everything else you’ve configured.
Back up first if you can: Most router admin panels have a Backup Settings or Export Configuration option under Advanced or Administration. If you can still access the panel, use it before resetting.
To reset:
- Find the Reset button on the back or bottom of the router. It’s usually recessed in a pinhole — you’ll need a paperclip or straightened pin.
- With the router powered on, press and hold:
- Netgear: Hold 7–10 seconds until the power LED blinks amber
- TP-Link: Hold 10 seconds until LEDs flash
- Asus: Hold 10 seconds until power LED flashes
- Linksys: Hold 10–15 seconds
- D-Link: Hold 10–30 seconds until all LEDs light up
- Cisco: Hold 10–15 seconds until the LED flashes
- Release and wait 2–3 minutes for the router to fully reboot.
- Log back in at 192.168.1.200 using the factory default credentials from the table above, or from the sticker on the device.
What to Do After You Log In
Getting logged in is the easy part. Here’s what actually matters for security and performance.
1. Change the Admin Password
Default credentials for every router brand are publicly known and easily searchable. Don’t leave them as-is.
- Go to Administration, System, Management, or Account Settings (varies by brand — look around the menu).
- Find Admin Password, Change Password, or Set Password.
- Choose something strong. NIST password guidelines recommend length over complexity — a passphrase like
PurpleDesk22Mountain!beats@dM1n#9in both security and memorability. - Save it somewhere secure and log back in with the new password.
2. Change Your Wi-Fi Password
Navigate to Wireless or Wi-Fi Settings, find your network’s security settings, and update the WPA Pre-Shared Key or Password field. If you have both 2.4GHz and 5GHz bands, update each separately — they’re independent settings.
3. Set WPA2 or WPA3 Security Mode
Under Wireless Security settings, select WPA2-PSK (AES) at minimum. If your router hardware supports it, enabling WPA3 security standard gives you meaningfully stronger protection — particularly against brute-force attacks on your Wi-Fi password. WEP and original WPA are outdated and shouldn’t be used on any modern network.
4. Set a DHCP Reservation for 192.168.1.200
If you have a device — printer, NAS, IP camera, access point — that you want to permanently live at 192.168.1.200, the cleanest approach is a DHCP reservation rather than a static IP configured on the device itself.
- In your router’s admin panel, find LAN Settings, DHCP Settings, or Address Reservation.
- Look for “Add Reservation” or “Static DHCP.”
- Enter the device’s MAC address (you can find this in the Connected Devices list, or on the device’s label) — this is what is a MAC address useful for.
- Assign it 192.168.1.200.
- Save. Going forward, that device will always get the same IP address every time it connects.
This is why .200 and other high-range addresses are popular for static assignments — they’re far enough from the start of the DHCP pool that conflicts are extremely unlikely.
5. Check Connected Devices
Under DHCP Client List or Connected Devices, you’ll see every device on your network with its current IP, MAC address, and sometimes a device name. It’s worth doing this periodically — if you see how to see who’s on your network, you can spot anything unfamiliar and kick it off by changing your Wi-Fi password.
6. Set Up a Guest Network
If people visit and connect to your Wi-Fi, a guest network keeps them isolated from your main devices. Your smart home gadgets, NAS, printers, and work computers stay on the primary network — guests get internet-only access. Look for Guest Network or Guest SSID under Wireless Settings. It takes about five minutes to configure.
7. Update Your Router Firmware
Find Firmware Update under Advanced or Administration. Some routers check automatically, but many need a manual nudge. How to update router firmware varies slightly by brand, but it’s usually a one-click process once you’re in the admin panel. Doing it once or twice a year keeps your router patched against known security vulnerabilities.
Common Misspellings of 192.168.1.200
Every one of these will fail to load:
192.168.1.2OO
192.168.1.200.
192.168 1.200
192.168.1.20O
192.168.1,200
192.168.12.00
192.168.1.2000
1921681200
192.168.l.200
192.168.1.200/
Correct address:
192.168.1.200
— Type it clean: four numbers, three dots, nothing extra.
Which Brands and Devices Use 192.168.1.200?
As a router gateway address:
- Netgear — certain Nighthawk (R7000, R8000, RAX series) and Orbi mesh models use 192.168.1.200 as the default gateway. Others in the Netgear lineup default to 192.168.0.1 or routerlogin.net, so check the label on your specific unit.
- UBIQCOM — uses 192.168.1.200 on several DSL and fiber gateway models
- Configured enterprise/prosumer equipment — IT administrators often assign .200 as the gateway on managed networks to keep it out of the standard DHCP range
As a static device IP (very common):
Any network device that needs a permanent, predictable address might live at 192.168.1.200. Common examples include:
- NAS drives (Synology, QNAP, Western Digital My Cloud)
- Network printers (HP, Canon, Brother models with web admin interfaces)
- IP cameras and NVRs (Reolink, Hikvision, Dahua, Amcrest)
- Wi-Fi access points (Ubiquiti UniFi, TP-Link EAP, Netgear WAX series)
- Managed network switches (Cisco, Netgear, TP-Link TL-SG series)
- Smart home hubs (Home Assistant, Hubitat)
ISP context for US users:
None of the major US ISPs use 192.168.1.200 as a default gateway on their issued hardware. Xfinity defaults to 10.0.0.1, AT&T to 192.168.1.254, Spectrum to 192.168.0.1, and Verizon Fios to 192.168.1.1. If your ISP-issued router has a gateway of 192.168.1.200, it was almost certainly configured manually by a technician or previous owner.
Frequently Asked Questions
Is 192.168.1.200 a router address or a device address?
It can be either. Some Netgear and UBIQCOM routers use it as the default gateway. More commonly, it’s a static IP assigned to a network device like a printer, NAS, access point, or IP camera. To know which situation you’re in, run ipconfig on Windows (or check System Settings → Network on Mac) and look for the “Default Gateway” value. If it says 192.168.1.200, that’s your router. If it says something else, a different device has been assigned .200.
What’s the difference between my Wi-Fi password and my router admin password?
They’re completely separate, and mixing them up is one of the most common mistakes. Your Wi-Fi password (WPA passphrase or network key) is what your phone and laptop use to join the wireless network. Your admin password is what you enter at the router’s IP address to access and change settings. Changing one has zero effect on the other.
Why do people use 192.168.1.200 specifically for static devices?
The .200 address is popular for static assignments because it sits in the upper portion of the 192.168.1.x subnet, well away from where most routers start handing out DHCP addresses (usually starting at .2 or .100). Keeping static devices in the high range and DHCP-assigned devices in the low range prevents IP conflicts without requiring you to carefully manage which addresses are in use.
My Netgear router used to work at 192.168.1.200, but now it doesn’t respond. What happened?
A few possibilities: the router was reset to a different default IP, or someone changed the gateway IP in the LAN settings. Try routerlogin.net or routerlogin.com in your browser — Netgear’s fallback hostname works regardless of what the current gateway IP is. If that doesn’t work either, a factory reset will restore the original IP.