Quick answer: Open a browser and go to tplinkwifi.net or 192.168.0.1. Enter username admin and password admin (or the one printed on your router’s label). Click Login. You’re in. If the page won’t load, try 192.168.1.1 as a fallback.
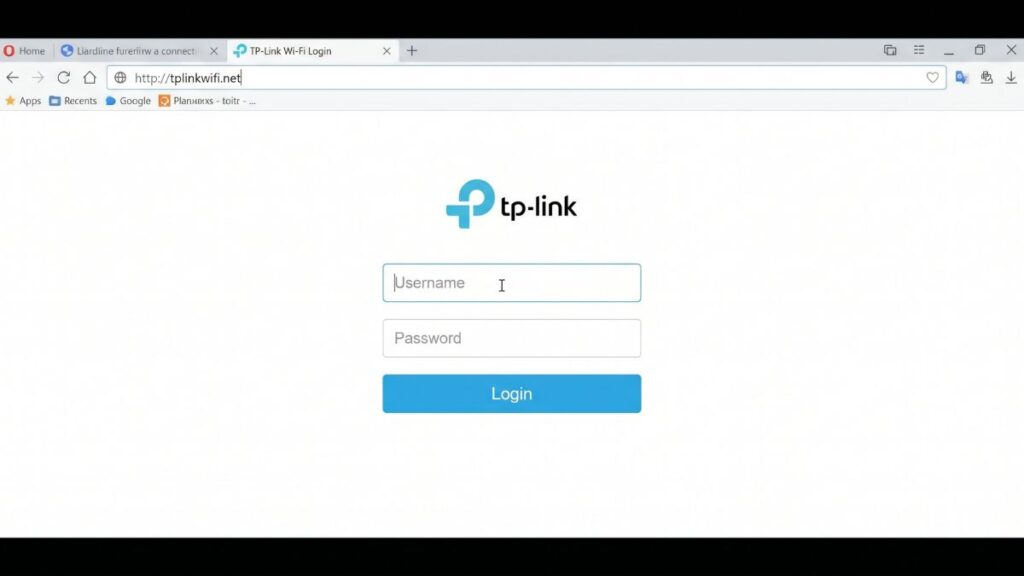
The TP-Link Router Login process is something most people only deal with when something goes wrong — the Wi-Fi name needs changing, a new device won’t connect, or the internet’s slow and you want to check for a firmware update. The good news: TP-Link keeps it simple. You just need a browser, your router’s address, and the credentials from the label on the back of the device.
The steps below cover every device — PC, Mac, iPhone, and Android — plus the Tether app if you’d rather skip the browser entirely.
What Is the TP-Link Router Login Page?
The TP-Link router login page is a local web interface built into your router. You reach it by typing tplinkwifi.net or 192.168.0.1 into a browser while you’re connected to that router’s network. No internet needed — it works entirely on your local connection.
Once you log in, you can change your Wi-Fi name and password, update firmware, block devices, set up a guest network, and more. The address only works from inside your home network because 192.168.0.1 is a private IP address — it’s invisible to the outside internet by design.
TP-Link Default Login Credentials — All Models
← Scroll to see full table →
| Model / Series | Default Login URL | Default IP | Username | Password |
|---|---|---|---|---|
| Archer AX series AX10, AX20, AX55, AX90 | tplinkwifi.net |
192.168.0.1 |
admin | admin |
| Archer A series A6, A7, A9 | tplinkwifi.net |
192.168.0.1 |
admin | admin |
| Archer C series C6, C7, C9, C1200, C2300 | tplinkwifi.net |
192.168.0.1 |
admin | admin |
| TL-WR series WR840N, WR850N, WR940N | tplinkwifi.net |
192.168.0.1 |
admin | admin |
| Deco mesh system M4, M5, X20, XE75 | Deco app only | 192.168.68.1 |
— | — |
| TL-WR series (older ISP) Older ISP variants | 192.168.1.1 |
192.168.1.1 |
admin | admin |
| Virgin Media Super Hub TP-Link based | 192.168.0.1 |
192.168.0.1 |
admin | changeme |
| Sky Hub TP-Link based | 192.168.1.254 |
192.168.1.254 |
admin | sky |
Tip: The label on the back or bottom of your router shows the real credentials — including any non-default passwords set at the factory. Use the table above only if the label is missing or unreadable.
Note on Deco systems: Deco mesh routers don’t have a traditional browser-based login page. You manage them entirely through the Deco app. If you have a Deco, skip to the Tether/Deco app section below.
How to Log In to Your TP-Link Router — PC
Windows
- Connect your PC to the TP-Link router via Ethernet cable or Wi-Fi
- Open Chrome, Firefox, or Edge
- Click the address bar at the top — not the search bar. This trips a lot of people up. If you type the IP in the search bar, Google opens instead of your router
- Type tplinkwifi.net and press Enter
- If that doesn’t load, try 192.168.0.1 instead
- Enter username admin and password admin (or the credentials from your router label)
- Click Login
You’ll land on the TP-Link dashboard. Newer firmware versions show a “Basic” and “Advanced” tab at the top — most everyday settings live under Basic.
macOS
The steps are the same. Use Safari, Chrome, or Firefox — your choice. One thing to know: Safari may flag the page as “not secure” with a grey padlock. That’s normal. TP-Link’s admin panel uses HTTP, not HTTPS. The connection is only happening on your local network, so there’s nothing to worry about.
How to Log In to Your TP-Link Router — iPhone
This is where most guides leave you stranded. Here’s the full process:
- Go to Settings > Wi-Fi and connect to your TP-Link network. Make sure you’re on Wi-Fi, not mobile data
- Open Safari — it handles local IP addresses more reliably than Chrome on iOS
- Tap the address bar at the top of the screen
- Type tplinkwifi.net or 192.168.0.1 and tap Go
- If Safari shows “This Connection Is Not Private” — tap Show Details, then Visit Website
- Enter your credentials and tap Login
One iOS-specific gotcha: even when you’re connected to Wi-Fi, iOS sometimes routes traffic through cellular if the Wi-Fi doesn’t have internet access. If the page won’t load at all, go to Settings > Wi-Fi > tap your TP-Link network > turn off “Use Mobile Data for this Wi-Fi”. That forces Safari to stay on the local network.
How to Log In to Your TP-Link Router — Android
- Connect your Android phone to the TP-Link router’s Wi-Fi
- Open Chrome
- Tap the address bar
- Type tplinkwifi.net or 192.168.0.1 and tap Go
- If Chrome shows “Connection is not private” — tap Advanced, then Proceed to 192.168.0.1 (unsafe). The “(unsafe)” label sounds alarming but it just means the site uses HTTP. You’re on your own network — it’s fine
- Enter your credentials and tap Login
Android users: if the page refuses to load, check Settings > Network & Internet > Wi-Fi > tap your network > Advanced > disable “Auto-switch to mobile data”. Android has the same habit as iOS of quietly switching to cellular when a Wi-Fi network has no internet.
Logging In with the TP-Link Tether App (and Deco App)
TP-Link has two apps. Tether is for standard routers (Archer, TL-WR series). Deco is for mesh systems. Both are free.
- iOS: Search “TP-Link Tether” or “TP-Link Deco” in the App Store
- Android: Same names on Google Play
To use Tether:
- Download and open the app
- Tap the + button to add a router
- Connect your phone to the TP-Link Wi-Fi network when prompted
- The app auto-detects your router model
- Sign in with your TP-Link ID (free to create) or skip cloud features and use local mode
- You’re in — full dashboard access from your phone
Tether vs browser panel: The Tether app is faster for everyday things like changing your Wi-Fi password, checking connected devices, or rebooting the router remotely. For anything advanced — firmware updates, port forwarding, firewall rules — the browser panel gives you more control. Use whichever fits the task.
What to Do After You Log In
Getting into your router is step one. Here’s what’s worth doing while you’re in there.
1. Change Your Admin Password
The default admin / admin credentials are public knowledge. Anyone connected to your network can try them. Change the admin password as soon as you get in.
Go to Advanced > System > Administration > Account Management. Enter a new password. Make it something you’d actually remember — or use a password manager. Our guide on how to find your router’s IP address is also handy if you ever get locked out.
2. Change Your Wi-Fi Name and Password
Go to Basic > Wireless. Edit the network name (SSID) and password for both your 2.4GHz and 5GHz bands. A quick tip: don’t include your name, apartment number, or address in the network name. It makes it easier for someone to associate the network with your specific unit.
3. Switch to WPA3 or WPA2-AES
WPA3 is the current Wi-Fi security standard — it’s more resistant to brute-force attacks than the older WPA2-TKIP. To enable it, go to Advanced > Wireless > Wireless Settings > Security. Select WPA3-Personal if it’s available, or WPA2-PSK + AES if not. See our WPA2 vs WPA3 comparison for a plain-English breakdown of the difference. Older models top out at WPA2 — that’s still fine as long as you’re using AES, not TKIP.
4. See Which Devices Are Connected
Go to Basic > Network Map or Advanced > Network > Connected Clients. You’ll see every device using your network. If you spot something you don’t recognize, that’s worth investigating — it could be a neighbor or an old device you forgot about. Our guide on how to see who’s on your network walks you through identifying and blocking unknown devices.
5. Set Up a Guest Network
A guest network keeps visitors and IoT devices (smart bulbs, thermostats, cameras) off your main network. Go to Advanced > Wireless > Guest Network. Enable it for 2.4GHz or 5GHz, set a separate password, and turn on “Access Local Resources” only if you want guests to reach printers or NAS drives. Most people leave that off. Here’s more on how to set up a guest network if you want to go deeper.
6. Update Your Firmware
Firmware updates fix security vulnerabilities and often improve speed and stability. Most people never do this, which is a shame — it takes about 4 minutes.
- Log into the admin panel
- Go to Advanced > System > Firmware Upgrade
- Click Check for Updates (TP-Link calls this “Online Upgrade” on some models)
- If an update is available, click Upgrade
- Wait 3-5 minutes. Do not unplug the router — a failed update mid-process can brick the device
- The router reboots automatically
- Log back in and check Advanced > System > About to confirm the new version
If you want a deeper look at why this matters, our guide on how to update router firmware covers the reasoning well.
7. Disable Remote Management
Remote management lets you access the admin panel from outside your home network. If you don’t use it, it’s an unnecessary risk. Go to Advanced > Security > Remote Management and make sure it’s off. Most home users have no reason to keep it on.
TP-Link Router Login Troubleshooting
1. Login Page Won’t Load
Three likely causes: you’re not connected to the right network, you used the search bar instead of the address bar, or your browser has a cached DNS entry pointing somewhere else.
Fix: confirm you’re on the TP-Link Wi-Fi (not a neighbor’s network). Open a new browser tab, click the address bar, and type 192.168.0.1 directly. If that still doesn’t work, try 192.168.1.1 — some older TP-Link models use that address. Still nothing? Clear your browser cache or try a different browser entirely.
2. Forgot Your Admin Password
Don’t panic — this is one of the most common router problems. First try the default: admin / admin. If that doesn’t work and you never wrote down your custom password, you have two options: use TP-Link’s password recovery feature (available on some models under the login screen — look for “Forget password?”) or do a factory reset.
Try the recovery tool first. The factory reset option is below — it wipes everything.
3. tplinkwifi.net Says “Server Not Found”
This is a DNS issue. The hostname tplinkwifi.net only works when your device is connected to a TP-Link router. If it’s not resolving, your browser is trying to look it up on the internet instead of locally.
Fix: use the IP address directly — 192.168.0.1. That bypasses DNS entirely and goes straight to the router. Our explainer on what is a default gateway covers why the IP always works when the hostname doesn’t.
4. Browser Shows “Connection Is Not Private”
This is expected. TP-Link’s admin panel uses HTTP, not HTTPS. Your browser flags any HTTP connection as “not secure” — including your own router’s local interface.
On Chrome: click Advanced > Proceed to 192.168.0.1 (unsafe).
On Safari: click Show Details > Visit Website.
You’re not sending anything to the internet. It’s safe to proceed.
5. Page Loads But Won’t Accept My Password
Check two things. First, caps lock — passwords are case-sensitive. Second, double-check which credentials apply to your specific model. ISP-branded TP-Link routers (Virgin Media, Sky) often use different default passwords. Refer to the credentials table above.
If you’re confident you’re entering the right password and it’s still rejecting it, the password was changed at some point. See the factory reset section below.
6. VPN Is Blocking the Login Page
If you have a VPN running on your PC or phone, it routes traffic through a remote server instead of your local network. The router’s admin page (192.168.0.1) is on your local network — your VPN can’t see it.
Fix: temporarily disconnect your VPN, log into the router, make your changes, and re-enable the VPN after. Some VPN apps have a “split tunneling” option that lets local traffic bypass the VPN — that’s a cleaner long-term solution.
How to Factory Reset Your TP-Link Router
A factory reset is the last option — use it only after everything else fails or if you’ve forgotten your admin password and the recovery tool didn’t help.
What a reset erases: every custom setting you’ve ever made — Wi-Fi name and password, admin password, port forwarding rules, parental controls, guest networks, firmware settings. You’ll be starting from scratch.
Before you reset: if you can still log in, go to Advanced > System > Backup & Restore and download a config backup. More importantly, write down your ISP’s WAN connection settings (PPPoE username/password if your ISP requires it) — you’ll need those to get internet back after the reset.
How to do it:
- Keep the router powered on
- Find the Reset pinhole on the back of the router
- Insert a straightened paperclip or SIM ejector tool
- Hold for 10 seconds until the LED flashes rapidly, then release
- Wait 2 minutes for the router to finish rebooting
- The router is back to factory defaults — reconnect using admin / admin
After the reset, run the Quick Setup wizard from the admin panel to reconfigure your internet connection and Wi-Fi settings.
TP-Link Router Login — Frequently Asked Questions
On Windows, open Command Prompt and type ipconfig. Look for the Default Gateway under your active network adapter — that’s your router’s IP. On Mac, go to System Settings > Network > your connection > Details > TCP/IP > Router. On iPhone: Settings > Wi-Fi > tap your network > Router. That IP is what you type in your browser.
They’re two separate passwords. Your Wi-Fi password (also called the network key or wireless password) is what you enter when connecting a phone, laptop, or TV to the internet. Your router admin password is what you enter at tplinkwifi.net to access the router’s settings dashboard. Changing one doesn’t change the other.
Not through the standard admin panel — 192.168.0.1 is a local address that only works on your home network. To manage your router from elsewhere, you’d need to enable Remote Management under Advanced > Security and set up a TP-Link ID with cloud access through the Tether app. Be careful with remote management — it opens a port to the outside internet, so only enable it if you actually need it.
TP-Link has changed the admin panel layout significantly across firmware versions. Older Archer models use a navy-blue interface. Newer AX-series firmware uses a lighter design with Basic and Advanced tabs. The settings are all there — they’re just in slightly different spots. If you’re lost, the Advanced tab usually contains everything.
First, try every default credential from the table above — different models have slight variations. Then try the TP-Link password recovery feature on the login screen. If neither works, check if the router has a physical admin reset button on the back (separate from the Wi-Fi WPS button). As a last resort, a 10-second pinhole reset restores factory defaults. If your older model uses 192.168.1.1 as its default IP, check that address after the reset.