If you’re trying to reach 192.168.10.1, there’s a decent chance you’re on a CenturyLink or Lumen DSL connection — Comtrend routers, which CenturyLink has historically bundled with their service, are one of the main devices that default to this address. TP-Link’s Deco mesh systems also use it, and it shows up in a number of small business router configs too. Whatever brought you here, this guide has the complete login walkthrough for PC, iPhone, and Android, a full troubleshooting section for when things go sideways, and a clear checklist of what to lock down once you’re inside the admin panel.
192.168.10.1 – Router Login Admin Page
What Is 192.168.10.1?
192.168.10.1 is a private IPv4 gateway address — the local address your browser uses to reach your router’s admin control panel. Type it into your browser while connected to the right network, and you’ll land on the login page where you can change passwords, adjust Wi-Fi settings, manage connected devices, and configure network security.
It belongs to the private IP address space defined in RFC 1918 private address ranges. That means it only works inside your local network — it can’t be reached from the internet, and nobody outside your home or office can access it. Your router handles the translation between this private address and your public IP using NAT (Network Address Translation).
What makes 192.168.10.1 a little different from the most common gateways like 192.168.0.1 or 192.168.1.1 is its brand mix. The 192.168.10.x subnet tends to appear in two contexts: ISP-provided DSL routers (particularly Comtrend units shipped with CenturyLink service) and TP-Link Deco mesh Wi-Fi systems. It also pops up in small business and office environments where a network admin has manually configured the 192.168.10.x range to keep equipment on a separate subnet from other devices. If any of those sound like your setup, you’re in the right place.
Default Login Credentials for 192.168.10.1 Routers
You’ll need a username and password to get into the admin panel. The table below covers the most common factory defaults by brand. That said — always check the label on the bottom or back of your specific device first. Manufacturers vary defaults by model, and the sticker beats any table online.
| Brand | Default Username | Default Password |
|---|---|---|
| Comtrend | admin | admin |
| Comtrend (some models) | root | root |
| TP-Link Deco | (none — uses app) | Set via Tether app |
| TP-Link (non-Deco) | admin | admin |
| D-Link | admin | (blank) |
| Cisco | cisco | cisco |
| Linksys | admin | admin |
| ZyXEL | admin | 1234 |
| Motorola / Arris | admin | password |
| Netgear | admin | password |
| Asus | admin | admin |
| Tenda | admin | (blank) |
ℹ️ Note: TP-Link Deco note: Deco mesh systems are managed primarily through the TP-Link Tether app on your phone, not through a traditional browser-based admin panel. Typing 192.168.10.1 into a browser may pull up a basic status page, but full configuration is handled in the app. If you’re setting up a Deco system for the first time, download the Tether app and follow the in-app setup wizard.
ℹ️ Note: Comtrend / CenturyLink note: If you received your router from CenturyLink (now Lumen), your Comtrend device may have a customized login page with CenturyLink branding. The default credentials are typically admin / admin, but some models use a unique password printed on the router label. Check the sticker first.
How to Log Into 192.168.10.1 — PC Steps (Windows & Mac)
Works in any browser — Chrome, Firefox, Edge, Safari. No specific browser required.
- Make sure your computer is connected to the router — either by Wi-Fi or by plugging an Ethernet cable directly into one of the router’s LAN ports. An Ethernet connection is more reliable if you’re making configuration changes.
- Open your browser.
- Click in the address bar at the top of the browser window — not the Google search box. This is the single most common mistake. Typing an IP address into the search bar sends it to Google rather than loading your router.
- Type exactly:
192.168.10.1and press Enter. - A login page should appear. Enter your username and password from the table above, or from the sticker on your device.
- Click Login, Sign In, or Submit — the label varies by router brand.
- You should now see the admin dashboard.
⚠️ Address bar vs. search bar: The address bar is at the very top of the browser and shows the current page’s URL. The Google search bar is the big box in the middle of the Google homepage. Always use the address bar for router IPs — if you type 192.168.10.1 into the search bar, Google will run a search and your router won’t load.
🔍 Note: If you get a “This site can’t be reached” or timeout error: Before troubleshooting further, double-check that 192.168.10.1 is actually your router’s address. On Windows, open Command Prompt and type ipconfig — look for “Default Gateway.” On Mac, go to System Preferences → Network → your active connection → look for the “Router” field. Use whatever IP shows up there.
How to Log Into 192.168.10.1 — Mobile Steps
No competitor page for this IP covers mobile login. Here are clear steps for both platforms.
iPhone (Safari or Chrome)
- Open Settings → Wi-Fi and confirm your iPhone is connected to your home or office network — the one your router broadcasts. You can’t reach a local IP over mobile data.
- Open Safari (or Chrome if Safari gives you trouble).
- Tap the address bar at the top.
- Type
192.168.10.1and tap Go. - When the login page appears, enter your username and password.
- Tap Login or Submit.
iPhone tip: If the page spins but never loads, check whether Wi-Fi Assist is on. Go to Settings → Mobile Data → scroll down to find Wi-Fi Assist and toggle it off. Wi-Fi Assist silently switches you to cellular when it thinks Wi-Fi is slow, which breaks access to local addresses like 192.168.10.1 without any warning.
Android
- Pull down the notification shade and confirm Wi-Fi is on and actively connected to your network. Also turn off mobile data — Android can route traffic over LTE even when Wi-Fi is connected, which prevents access to local IPs.
- Open Chrome or your preferred browser.
- Tap the address bar.
- Type
192.168.10.1and tap Go or press Enter. - Enter your credentials when the login page loads.
- Tap Login.
Android tip: If the page loads but looks broken or missing elements, tap the three-dot menu in Chrome and select Request Desktop Site. Some older router admin interfaces weren’t built for mobile viewports and render much better in desktop mode.
Troubleshooting: 192.168.10.1 Not Working?
These are the five issues that come up most often with this address. Work through them in order.
1. “This site can’t be reached” — the page won’t load at all
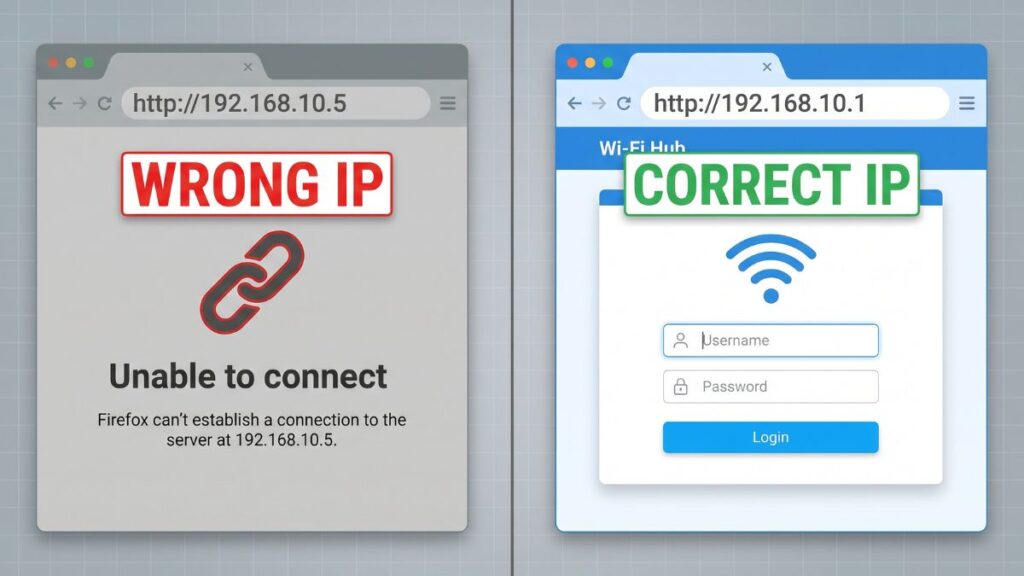
Cause: Either you’re not connected to the router that uses this IP, or 192.168.10.1 isn’t your router’s address to begin with. This is the most common issue.
Fix: First, confirm your connection. Windows, open Command Prompt and type ipconfig — look for “Default Gateway” under your active adapter. On Mac, go to System Preferences → Network → active connection → check the “Router” field. On iPhone: Settings → Wi-Fi → tap the (i) next to your network → look for “Router.” Whatever IP shows up there is the one you should be typing in your browser.
2. The login page loads but credentials are rejected
Cause: The admin password has been changed from the factory default, or — very commonly — you’re entering your Wi-Fi password instead of the router admin password. These are two completely separate passwords.
Fix: Check the label on the bottom or back of your router for the default credentials. For Comtrend devices, try admin / admin or root / root. For TP-Link non-Deco models, try admin / admin. If the password was changed and you don’t know it, a factory reset is the only way to regain access — see the section below.
3. Login page loads but keeps looping or won’t submit
Cause: A stale browser session or cached cookies are conflicting with the router’s login system. Chrome is particularly prone to this with router admin pages if you’ve visited before.
Fix: Open an incognito/private window and try again at 192.168.10.1. If it works in private mode, clear your browser’s cache and cookies normally and try again. This resolves login loops the majority of the time without needing any other changes.
4. Connected to Wi-Fi but still timing out
Cause: Some routers — particularly in business environments — restrict admin panel access to wired connections only. This is a deliberate security setting that blocks web UI access over Wi-Fi.
Fix: Plug your laptop directly into one of the router’s LAN ports using an Ethernet cable and try 192.168.10.1 again. If this works, you can log into the admin panel and re-enable wireless admin access from inside the settings (usually under Administration → Management or Access Control).
5. VPN or proxy is blocking local network access
Cause: If you have an active VPN connection on your computer or phone, it may be routing all traffic — including local network traffic — through the VPN tunnel. This makes your device unable to see local addresses like 192.168.10.1. Understanding what is a subnet mask can help you grasp why VPNs break local network access.
Fix: Disconnect from your VPN completely, then try loading 192.168.10.1 again. Most VPN clients have a “split tunneling” setting that lets you exclude local network traffic — you can use that if you need the VPN running while also accessing your router admin page.
Factory Reset Guide for 192.168.10.1 Routers
A factory reset wipes everything back to out-of-the-box defaults — admin password, Wi-Fi name, Wi-Fi password, port forwarding rules, all custom configurations. Use this only when you’re locked out and have no other option.
Before you reset: If you can still log in, export your router settings first. Most routers have a Backup or Save Configuration option somewhere in the Administration section. Keep that file — it can save you a lot of reconfiguration time after the reset.
How to reset:
- Locate the Reset button on your router — it’s almost always a small pinhole on the back or bottom. You’ll need a straightened paperclip or a SIM card ejector pin to press it.
- Make sure the router is powered on.
- Press and hold the reset button for the recommended duration for your brand:
- Comtrend: 15–20 seconds — hold until the power LED blinks or all LEDs cycle
- TP-Link (non-Deco): 10 seconds — hold until the LEDs flash
- TP-Link Deco: 10 seconds — the LED will change from solid to flashing
- D-Link: 10 seconds
- Linksys: 10 seconds
- Cisco: 10–15 seconds
- ZyXEL: 10 seconds
- Netgear: 10–15 seconds (hold until the Power LED blinks amber)
- Arris / Motorola: 15–20 seconds
- Release and wait 60–90 seconds for the device to fully reboot.
- Reconnect to the router’s default Wi-Fi network (the name and password will be on the device label) and log in at 192.168.10.1 with factory default credentials.
What gets wiped: Admin username and password, Wi-Fi name (SSID), Wi-Fi password, port forwarding rules, guest network settings, parental controls, QoS configurations, and any custom DNS entries. If you have a DSL connection through CenturyLink, your PPPoE username and password (your ISP credentials) may also be cleared — have those handy before you reset.
What to Do After You Log In
Here’s what actually matters once you’re inside the admin panel. Most people skip all of this and leave their network running on factory defaults indefinitely — which is a real security problem.
1. Change the Admin Password First
The factory default credentials for most routers — admin/admin, admin/password — are posted on every router database site online. Anyone on your network can look them up in seconds and get full access to your router settings. Changing this takes about two minutes and closes a significant vulnerability.
Here’s how:
- Find Administration, System, Management, or Advanced Settings in your dashboard. The label varies by brand.
- Look for Change Password, Admin Password, or Security.
- Enter your current password, then type a new one.
- Use at least 12 characters. A mix of letters, numbers, and symbols is best — following NIST password guidelines is a good baseline. Length matters more than complexity.
- Save the change and log back in with the new password.
For Comtrend routers: the password change is usually under Management → Access Control → Passwords.
2. Update Your Wi-Fi Name and Password
Your Wi-Fi password is completely separate from the admin password — changing one doesn’t affect the other. Head to Wireless or Wi-Fi Settings in your dashboard and update both the network name (SSID) and Wi-Fi password. Pick a Wi-Fi name that doesn’t broadcast your address or last name — something neutral works fine. For TP-Link Deco users, do this in the Tether app under Network → Wi-Fi.
3. Set the Right Wireless Security Mode
Navigate to Wireless Security or Security Mode and check what encryption standard you’re running. If it says WEP or WPA (without the “2”), your network is using outdated encryption that can be cracked. Switch to WPA2-Personal (AES) at minimum. If your hardware supports WPA3, enable it — WPA2 vs WPA3 explained breaks down the difference clearly. Newer Deco units and recent Comtrend models support WPA3.
4. Check Your Connected Devices List
Your router’s admin panel has a section — typically called Connected Devices, DHCP Clients, Attached Devices, or Network Map — that shows every device currently on your network with its name, IP, and MAC address. Scroll through it occasionally. If you spot device names you don’t recognize, someone may have joined your network without permission.
Most people don’t realize this: how to find devices on your network goes into detail on how to use MAC addresses to identify unknown devices. You can usually block specific devices directly from this screen too.
5. Set Up a Guest Network
If guests or clients regularly connect to your Wi-Fi — whether at home or in a small office — a guest network keeps them isolated from your main network. They get internet access, but they can’t see your computers, printers, or NAS devices. Find Guest Network or Guest Wi-Fi in your dashboard, give it a name and password, and turn it on. For Comtrend devices, look under Wireless → Guest/Virtual Access Point. It’s a five-minute setup that genuinely improves your network security.
6. Update the Firmware
Firmware updates patch security vulnerabilities, fix known bugs, and sometimes improve performance. Look for Firmware Update, Software Update, or System → Upgrade in your admin panel. Most modern Deco units update automatically through the Tether app. Comtrend and older routers typically need a manual check. How to set up a guest network is another useful reference while you’re inside your admin panel.
7. Port Forwarding (For Advanced Users)
If you need any service at your home or office to be reachable from the internet — a security camera, a home server, a game server, remote desktop — you’ll need to configure port forwarding. It tells your router to direct incoming traffic on specific ports to a specific local device. Look for Port Forwarding, Virtual Server, or NAT → Port Mapping in your admin panel. For Comtrend DSL routers, port forwarding is typically under Advanced Setup → NAT → Virtual Servers. For TP-Link Deco, it’s available in the Tether app under Advanced → NAT Forwarding.
Common Misspellings of 192.168.10.1
The “10” in this address causes more typos than you’d expect — people confuse it with 192.168.1.0 or accidentally drop digits. Here are all the common variants:
192.168.10.1
192.168.10.l
192.168.1.01
192.168.10.0
192.168.101
192.168.10.1 login
192.168.10.1 admin
192.168.10.1 admin login
19216810
1921681001
http //192.168.10.1
www.192.168.10.1
192.168.l0.1
If one of these brought you here, no problem — just type the correct version in your browser’s address bar: 192.168.10.1 with no spaces, no www, and no extra characters.
Which Router Brands and ISPs Use 192.168.10.1?
Brands that consistently use 192.168.10.1 as their default gateway:
Comtrend is the most notable name here for US users. Comtrend manufactures DSL gateway routers that CenturyLink (now Lumen Technologies) and other DSL providers have bundled with their service for years. Models like the Comtrend AR-5381u, VR-3033, CT-5367, and several others default to 192.168.10.1. If you have CenturyLink DSL and an older modem-router combo, this is very likely your admin address.
TP-Link Deco mesh systems use 192.168.10.1 as the gateway for the mesh network they create. Popular Deco models — the Deco M4, Deco M5, Deco X20, Deco X60, and others — all default to this IP. Unlike traditional routers, Deco systems are primarily managed through the mobile Tether app rather than a browser, but the IP is still active as the network gateway.
Brands that sometimes use 192.168.10.1 (varies by model or configuration):
- Cisco (certain business-grade models)
- Linksys (some older models)
- ZyXEL (selected DSL gateway models)
- Motorola / Arris (some cable modem-router combos)
- D-Link (a few models)
Small business and custom network setups:
Network administrators sometimes manually configure the 192.168.10.x subnet for office equipment — separating it from a primary 192.168.1.x or 192.168.0.x home network. If you’re in a small office environment and hit 192.168.10.1, your IT administrator may have intentionally set this range.
Major US ISPs and their standard default gateway IPs (for comparison):
- CenturyLink / Lumen (with Comtrend) → 192.168.10.1 ✓
- Xfinity/Comcast → 10.0.0.1
- AT&T → 192.168.1.254
- Verizon FiOS → 192.168.1.1
- Spectrum/Charter → 192.168.0.1
If your ISP is Xfinity, AT&T, Verizon, or Spectrum, their standard gateways are listed above. 192.168.10.1 is most relevant if you’re on a CenturyLink/Lumen DSL connection with a Comtrend unit, or if you have a TP-Link Deco mesh system.
FAQ — 192.168.10.1
What’s the difference between my Wi-Fi password and my router admin password?
These are two completely separate passwords. Your Wi-Fi password is what you enter on a phone, laptop, or tablet to join the wireless network. Your router admin password is what you enter at 192.168.10.1 to access the router’s configuration dashboard. Changing one has zero effect on the other. On a Comtrend router, the Wi-Fi password is often printed on the device label — the admin password also defaults to admin unless it’s been changed.
I have a CenturyLink Comtrend router. Why can’t I reach 192.168.10.1?
First, make sure your computer is connected to the Comtrend’s network — via Wi-Fi or Ethernet. CenturyLink sometimes delivers devices with a customized firmware that changes the default admin IP. If 192.168.10.1 doesn’t load, run ipconfig on Windows and check the “Default Gateway” field — that’s the address you actually need.
My TP-Link Deco system shows 192.168.10.1 as the gateway. Can I log in through a browser?
You can reach a basic status/info page at 192.168.10.1 in a browser, but full Deco configuration is designed to be done through the TP-Link Tether app. The browser interface for Deco is intentionally limited compared to TP-Link’s traditional router admin panels.
I reset my Comtrend router and now I have no internet. What do I do?
A factory reset also clears your PPPoE connection credentials (the DSL username and password CenturyLink gave you). You’ll need to re-enter those at 192.168.10.1 under Advanced Setup → WAN → DSL Settings or PPPoE. If you don’t have the PPPoE credentials, contact CenturyLink/Lumen support — they can look them up for your account.
Someone changed my router admin password and I can’t get in. What now?
A factory reset is the only path forward if you don’t know the current password. See the factory reset section above. After resetting, you’ll be able to log in with the factory defaults and set a new password right away.