Here’s something that trips people up with 192.168.1.3 that most guides don’t bother explaining: this IP address is a little different from something like 192.168.1.1 or 192.168.0.1. While those are almost always router gateway addresses, 192.168.1.3 is more commonly a device IP — assigned by your router to a specific device on your network like a laptop, printer, smart TV, or even a secondary router or access point. Some routers do use it as their admin login address, but it’s less common. This guide covers all the scenarios, so you’re in the right place regardless of which situation you’re in.
192.168.1.3 – Router Admin Login Page
What Is 192.168.1.3?
192.168.1.3 is a private IPv4 address in the 192.168.x.x range — a block set aside for local networks under the RFC 1918 private address ranges standard. It’s not publicly accessible. Nobody outside your home or office network can reach it, and it doesn’t work over the internet.
In most home networks, your router sits at a “gateway” address — typically 192.168.1.1, 192.168.0.1, or similar — and assigns IP addresses to every device that connects to it. That process, called how DHCP assigns IP addresses, is automatic. Your phone might get 192.168.1.2. Laptop might get 192.168.1.3. Your smart TV might get 192.168.1.4. And so on.
So when you type 192.168.1.3 into a browser, one of three things is happening:
- Your router uses this as its default gateway IP (less common, but possible with certain brands)
- A device on your network has been assigned this IP and you’re trying to reach its web interface (a printer, NAS device, access point, IP camera, etc.)
- You’re troubleshooting a network issue and need to understand what’s sitting at this address
Understanding which situation you’re in is the key to getting this right. More on that below.
Here’s something most people don’t realize: 192.168.1.3 is an entirely valid admin address for some router models — particularly certain older Cisco, Linksys, and SMC devices that have been configured to use it, either by default or by a previous user or technician.
How to Find Out What’s Actually at 192.168.1.3
Before you try logging in, it helps to know what device you’re even trying to reach. Here’s how to check.
On Windows:
- Press
Windows + R, typecmd, and hit Enter. - Type
ping 192.168.1.3and press Enter. - If you get replies, something is there. If you get “Request timed out,” nothing is active at that address right now.
- For more detail, type
arp -aand look for 192.168.1.3 in the list — you’ll see the MAC address of the device at that IP, which can help identify what it is.
On Mac:
- Open Terminal (Applications → Utilities → Terminal).
- Type
ping 192.168.1.3and press Enter. - Run
arp -ato see device details.
iPhone or Android: Use a free network scanner app like “Fing” — it’ll show you every device on your network with their IP addresses, device names, and manufacturer info. It takes about 30 seconds and tells you exactly what’s at 192.168.1.3.
Default Credentials for Routers That Use 192.168.1.3
If you’ve confirmed your router’s gateway is 192.168.1.3, here are the default credentials for common brands. As always, check the label on the back or bottom of your router first — the sticker there is more reliable than any table online.
| Brand | Default Username | Default Password |
|---|---|---|
| TP-Link | admin | admin |
| Asus | admin | admin |
| Linksys | admin | admin |
| Cisco | cisco | cisco |
| Netgear | admin | password |
| D-Link | admin | (blank) |
| Tenda | admin | admin |
| Belkin | admin | (blank) |
| SMC | admin | smcadmin |
| Zyxel | admin | 1234 |
| Huawei | admin | admin |
If you’re trying to access a non-router device at 192.168.1.3 (like a network printer, NAS, IP camera, or managed switch), consult that device’s manual — the credentials and login interface will be completely different from a router.
How to Log In on a PC or Mac
Works in Chrome, Firefox, Safari, Edge — any browser will do.
- Make sure your computer is connected to the same network (Wi-Fi or Ethernet cable works).
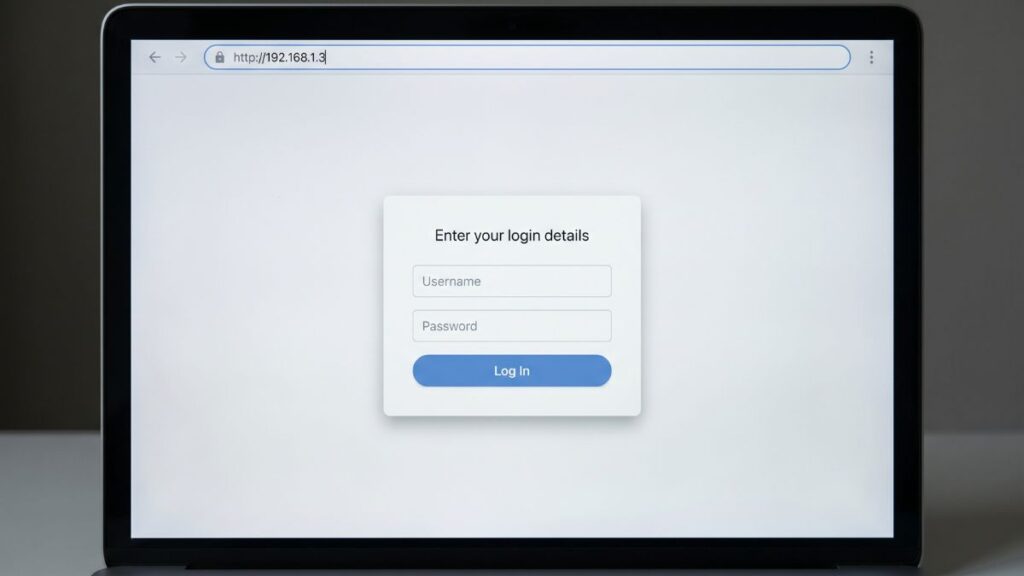
- Open your browser and click the address bar at the top of the window — where the current page URL is shown.
⚠️ Critical: Type 192.168.1.3 into the address bar, not the search bar. If you type it into Google or Bing, you’ll get search results instead of your device’s login page. The address bar is where you’d normally see something like “google.com” or “youtube.com.”
- Type
192.168.1.3and press Enter. - If a login page appears, enter your username and password from the table above.
- Click Login or Sign In.
If the page doesn’t load at all, see the troubleshooting section below — it may simply mean no device is configured to use 192.168.1.3 as its admin address.
How to Log In on Mobile
Again, most guides give you one generic set of steps. Here’s how it actually works on each platform.
iPhone (iOS)
- Go to Settings → Wi-Fi → make sure you’re connected to your home network (not cellular).
- Open Safari. Safari handles local IPs better than other iOS browsers.
- Tap the address bar at the top and type
192.168.1.3, then tap Go. - If nothing loads, try typing the full URL:
http://192.168.1.3 - Enter your login credentials if prompted.
Android
- Swipe down from the top and confirm Wi-Fi is connected to your home network.
- Open Chrome or any browser.
- Tap the address bar, type
192.168.1.3, then tap Go or the Enter key. - Log in with your username and password.
On both platforms: If you’re on cellular data (4G/5G) and not on your Wi-Fi, you won’t reach 192.168.1.3 at all — it’s a local address. Turn off mobile data temporarily if the page won’t load.
Troubleshooting: 5 Common Problems and Fixes
If you’re trying to access 192.168.1.3 and the page won’t load or behaves strangely, you’re not alone. Below are the most common issues and how to fix them quickly. [web:40][web:43]
1. The page just won’t load — “This site can’t be reached”
Cause: Nothing is configured to use 192.168.1.3 as its admin IP, or you’re on the wrong network. [web:43][web:48]
Fix: First, confirm your device is connected to your home network (not a hotspot or neighbor’s Wi‑Fi). Then check your actual router’s gateway IP by running ipconfig (Windows) or looking in System Settings → Network → your connection (Mac). If the Default Gateway shows something like 192.168.1.1 instead of 192.168.1.3, that’s your router’s real login address. Use that instead. Your router at 192.168.1.1 assigned 192.168.1.3 to a device on your network — they’re not the same thing.
2. Login page loads, but credentials are rejected
Cause: Default credentials were changed, or this device uses ISP‑specific or custom credentials. [web:40][web:43]
Fix: Try every default combination from the table above. If you’re trying to reach a non‑router device (printer, camera, NAS), check that device’s manual or look up its default credentials by model number. If it’s definitely a router and nothing works, a factory reset is your path forward (see below).
3. Page loads but looks completely wrong or blank
Cause: Browser cache is stale, you’re connecting to the wrong device, or the device has an old web interface that conflicts with your browser. [web:41][web:48]
Fix: Open an incognito/private window and try again. Clear your browser cache. Try a different browser entirely. If you use a VPN, turn it off — VPNs commonly block access to local IP ranges.
4. I got to 192.168.1.3 but it’s a printer/camera, not my router
Cause: Your router assigned 192.168.1.3 to a device on your network via DHCP. You’re reaching that device, not your router. [web:43][web:48]
Fix: Don’t panic — this is exactly what’s supposed to happen. Your router’s admin IP is almost certainly something different, like 192.168.1.1. Run ipconfig (Windows) or check System Settings → Network (Mac) to find your actual gateway IP. That’s the one you want for router settings.
5. The IP worked before, now it doesn’t
Cause: DHCP leases expire and get reassigned. The device that was at 192.168.1.3 may have a new IP now. Or the device is offline. [web:41][web:48]
Fix: Run arp -a in the command prompt to see the current list of active devices and their IPs. Or use a network scanner app like Fing. If you want a device to always be at 192.168.1.3, you’ll need to assign it a static IP or set a DHCP reservation in your router settings — more on that below.
How to Factory Reset a Router Using 192.168.1.3
If 192.168.1.3 is confirmed as your router’s gateway and you’re locked out, a factory reset is the solution. Do this only as a last resort — it erases everything.
Back up first: Most router admin panels have a Backup/Restore or Export Settings option under Administration or Advanced. Use it before resetting if you can still log in at all.
To reset:
- Find the Reset button on the back or bottom of the router. It’s usually recessed — you’ll need a paperclip or pin.
- With the router powered on, press and hold the Reset button:
- TP-Link: Hold 10 seconds
- Linksys: Hold 10–15 seconds
- Cisco: Hold 10–15 seconds until the LED flashes
- Netgear: Hold 7–10 seconds
- Asus: Hold 10 seconds until all LEDs flash
- D-Link: Hold 10–30 seconds
- Release and wait 2–3 minutes for the router to fully reboot.
- Log in with the factory default credentials printed on the router’s label.
What to Do After You Log In
Whether you’re managing a router or another networked device, here’s what actually matters once you’re inside.
1. Change the Admin Password
This is step one. Default credentials are publicly known — if someone gets on your network, they’ll try them immediately.
- Find Administration, System, Management, or Account Settings in the menu.
- Look for Admin Password or Change Password.
- Pick something strong — a passphrase works well. NIST password guidelines actually favor longer, memorable phrases over short, complex strings. Something like
BlueMapleDesk2026!is genuinely stronger thanR@nd0m#5. - Save it somewhere safe and log back in with the new password.
2. Change Your Wi-Fi Password
Navigate to Wireless or Wi-Fi Settings, find your network, and update the WPA Pre-Shared Key or Password. If you have 2.4GHz and 5GHz bands, update each one separately.
3. Set WPA2 or WPA3 Security Mode
Under Wireless Security, make sure you’re on WPA2-PSK (AES) at a minimum. If your router and devices support it, WPA2 vs WPA3 is worth reading — WPA3 is significantly harder to crack and is becoming the standard on newer hardware. WEP and original WPA are outdated and shouldn’t be used.
4. Assign a Static IP or DHCP Reservation
Here’s the feature most home users never touch but really should know about. If you want a specific device — say, your printer, a security camera, or a NAS — to always have the same IP address (like 192.168.1.3), you have two options:
DHCP Reservation (recommended): In your router’s admin panel, find DHCP Settings or LAN Settings. Look for “Address Reservation” or “Static DHCP.” Enter the device’s MAC address and assign it 192.168.1.3 permanently. The device still gets its IP from the router, but it’ll always be the same one. This is what is a MAC address is useful for — every device has a unique hardware identifier you can use for this.
Static IP on the device itself: Configure the device directly to use 192.168.1.3 instead of requesting one automatically. This works but can cause conflicts if you’re not careful.
5. Check Connected Devices
Under DHCP Client List or Connected Devices, you’ll see everything on your network with its current IP. This is a great way to spot unauthorized devices — if you see something you don’t recognize, change your Wi-Fi password immediately.
6. Set Up a Guest Network
If visitors connect to your home network regularly, a guest network isolates them from your main devices. They get internet access, but can’t reach your printer, smart home gear, or anything else on your primary network. How to set up a guest network takes about five minutes in your router’s Wireless settings.
7. Update Your Router Firmware
Find Firmware Update under Administration or Advanced. Some routers check automatically; many don’t. Doing it once a year catches security patches that protect your whole network. Never unplug the router while an update is in progress.
Common Misspellings of 192.168.1.3
These will all fail to load:
192.168.l.3
192.168.1.3.
192.168 1.3
19216813
192.168.1.3/
192.168.13
1.192.168.1.3
192.168.1,3
Correct address:
192.168.1.3
— four numbers, three dots, nothing else.
Which Brands and Scenarios Use 192.168.1.3?
As a router gateway address:
192.168.1.3 is an uncommon but valid choice for a default gateway. You’ll see it on:
- Certain Cisco and Linksys devices when configured by a network technician
- SMC Networks hardware
- Routers where the previous owner or ISP technician manually changed the gateway from 192.168.1.1 to 192.168.1.3
As a device IP on the 192.168.1.x network:
This is far more common. In any network where the router uses 192.168.1.1 as the gateway, devices get assigned sequential addresses starting from 192.168.1.2. The third device to connect — or the device specifically reserved at .3 — gets 192.168.1.3. This could be:
- A laptop or desktop PC
- A network printer (very common — printers are often given reserved IPs)
- A NAS (network-attached storage) drive
- An IP camera or smart home hub
- A secondary Wi-Fi access point
- A network switch with a management interface
ISP context:
Most major US ISPs use different default gateways on their hardware. Xfinity defaults to 10.0.0.1, AT&T to 192.168.1.254, Spectrum to 192.168.0.1, and Verizon Fios to 192.168.1.1. None of them use 192.168.1.3 as a gateway by default — but devices behind any of these routers could easily be assigned 192.168.1.3 by DHCP.
Frequently Asked Questions
Is 192.168.1.3 a router IP or a device IP?
It can be either. In most home networks, it’s a device IP assigned by DHCP — meaning a laptop, phone, printer, or other gadget on your network has that address. Less commonly, a router itself uses 192.168.1.3 as its admin gateway. Run ipconfig (Windows) or check Network settings (Mac) and look at the Default Gateway field. If it says 192.168.1.1 or 192.168.0.1, that’s your router — 192.168.1.3 belongs to some other device.
What’s the difference between my Wi-Fi password and my admin password?
These are completely separate things and confusing them is one of the most common mistakes people make. Your Wi-Fi password (also called the WPA passphrase or network key) is what you type on your phone or laptop to join the Wi-Fi network. Your admin password is what you enter at the router’s IP address to access settings. Changing one does not change the other.
Why can’t I reach 192.168.1.3 from outside my home?
Because it’s a private IP address. It only exists inside your local network. The public internet has no way to route traffic to 192.168.1.3 — that’s the whole point of private address ranges. If you need to access a device at 192.168.1.3 remotely, you’d need to set up a VPN or port forwarding on your router.
I can reach a login page at 192.168.1.3, but it’s not my router — it’s my printer. How do I get to my router?
Your router’s gateway is something different — likely 192.168.1.1 or 192.168.0.1. Run ipconfig on Windows or check System Settings → Network on a Mac and look for “Default Gateway.” That’s your router’s admin IP.