I’ve helped a lot of people troubleshoot their home networks, and 192.168.12.1 tends to come up specifically when someone has an ISP-supplied gateway — the type of modem/router combo your phone or internet provider hands you when you sign up. This address is the default for Sagemcom and Technicolor routers used by ISPs like CenturyLink, Lumen, and Frontier, and a handful of other brands including Buffalo. This guide covers how to log in on a PC, how to do it from your phone (iPhone and Android, separately), what to do when the page won’t cooperate, and the settings worth changing once you’re in — including the ISP-locked ones that often frustrate people.
192.168.12.1 – Router Login Admin Page
What Is 192.168.12.1?
192.168.12.1 is a private IP address — the local admin address for your router or gateway device. When you type it into a browser while connected to your home network, you’re not visiting a website. You’re connecting directly to the device in your home that routes your internet traffic. It only responds when you’re on the same network, either over Wi-Fi or via an Ethernet cable.
The address belongs to the 192.168.0.0/16 private range — one of three blocks reserved for internal network use by RFC 1918 private address ranges. These addresses are never routed on the public internet, which means no one outside your home can reach 192.168.12.1 no matter what. Your neighbor can’t get to it. Neither can anyone else.
Here’s something most people don’t know: the 192.168.12.x subnet is relatively uncommon in the consumer router world, which is exactly why manufacturers like Sagemcom and Technicolor favor it for ISP-provisioned hardware. Using a non-obvious subnet like .12.x reduces the chance of IP conflicts when their devices are deployed in complex network environments — like when a user connects a secondary router or a business installs multiple devices. You’re unlikely to run into it on a router you bought at Best Buy, but if your ISP handed you a gateway, there’s a good chance this is your address.
Default Login Credentials for 192.168.12.1
Before logging in, grab the sticker on the back or bottom of your router — it’s your single most reliable source, since ISP-provisioned devices often have unique per-unit passwords printed there. That said, here are the known defaults for brands associated with 192.168.12.1:
| Brand / Model | Default Username | Default Password |
|---|---|---|
| Sagemcom (most ISP models) | admin | admin |
| Sagemcom F@ST series | admin | admin |
| Technicolor / Thomson | admin | admin |
| Technicolor TG series | admin | admin |
| Buffalo (AirStation series) | admin | password |
| Buffalo (older models) | root | (blank) |
| Cisco (select SOHO/ISP) | admin | admin |
| D-Link (select ISP models) | admin | (blank) |
| Netgear (ISP provisioned) | admin | password |
| Generic ISP gateway | admin | admin |
A critical note for Sagemcom and Technicolor users: your ISP may have set a custom password during provisioning, different from the factory default. If admin / admin doesn’t work, check the sticker on the back of the device very carefully — ISPs like CenturyLink/Lumen and Frontier often print a unique per-device admin password there. It won’t be the same as your Wi-Fi password, but it’s almost always on that label somewhere.
How to Log In on a PC or Laptop
- Make sure your computer is connected to the router — via Wi-Fi or an Ethernet cable into one of the LAN ports (not the WAN port, which connects to the incoming internet line).
- Open any web browser: Chrome, Firefox, Edge, or Safari all work.
- Click into the address bar at the very top of the browser window — the long bar that shows the current URL, not the search box on a new tab page.
- Type
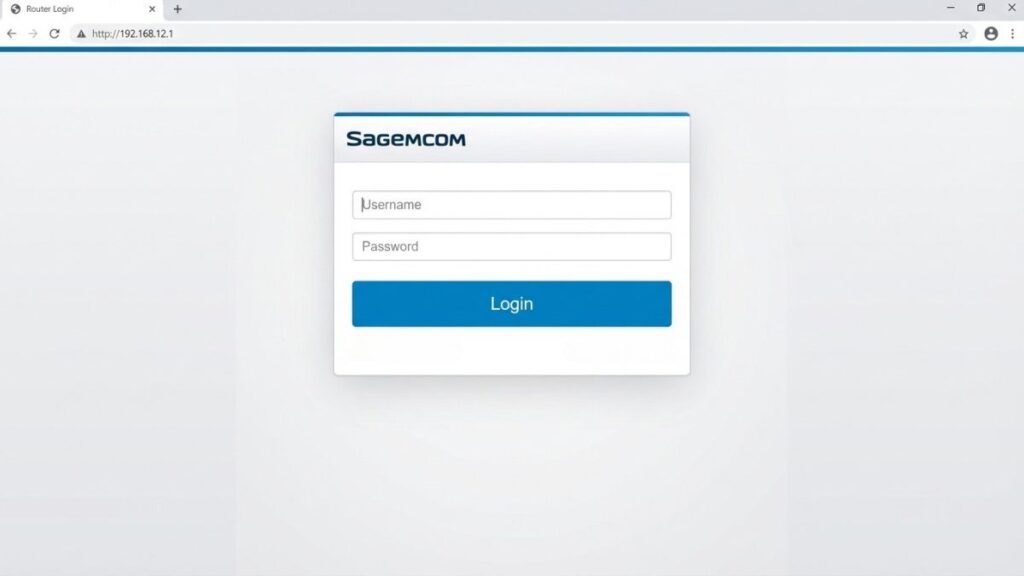
http://192.168.12.1and press Enter. - A login screen should appear. Enter your username and password.
- Click Login, Sign In, or OK — the label varies by device.
⚠️ Address bar, not search bar: If you type 192.168.12.1 into a Google or Bing search box, you’ll get search results — not your router. The address bar is the long field at the very top of the browser where the current page’s URL appears. Click directly into that bar, clear any text, type http://192.168.12.1, and press Enter.
If you get a “This site can’t be reached” error or the page just spins, don’t give up yet. Jump to the Troubleshooting section below — the fix is usually simple.
How to Log In on Your Phone
This is where most competing guides fall flat — they give you a single paragraph covering “mobile” without any platform detail. Here are the actual steps for both iPhone and Android, because they behave differently.
iPhone (Safari)
- Open Settings → Wi-Fi and confirm you’re connected to your home network — not cellular data. Look for the checkmark next to your network name and verify the signal bars show a Wi-Fi connection.
- Open Safari.
- Tap the address bar at the top of the screen. If a URL is already showing, tap once to highlight and clear it.
- Type
http://192.168.12.1and tap Go on the keyboard. - The login screen should load. Enter your credentials and tap the login button.
💡 iPhone tip: Safari sometimes interprets a bare IP address as a search query rather than a URL. Including the full http:// prefix tells Safari it’s a direct address. If you still get search results, tap the address bar, type the IP, and look for the “Go to 192.168.12.1” suggestion that appears above the keyboard — tap that directly instead of the regular search key.
Android (Chrome)
- Swipe down from the top and confirm Wi-Fi is active and connected to your home network. Make sure you’re not accidentally on mobile data — local IP addresses won’t load over cellular.
- Open Chrome or your default browser.
- Tap the address bar at the top of the screen.
- Type
http://192.168.12.1and tap the Go key or Enter. - The router login page should appear. Enter your credentials to access the admin panel.
💡 Android tip: Chrome on certain versions strips the http:// and sends your input as a search. If that happens, add a trailing slash: http://192.168.12.1/ — the slash signals to Chrome that this is a direct URL. Alternatively, type the address and tap the “Navigate to 192.168.12.1” autocomplete suggestion below the bar, if it appears.
Troubleshooting: 5 Problems and How to Fix Them
1. The Page Won’t Load At All
Cause: You’re either not connected to the right network, 192.168.12.1 isn’t your device’s actual gateway, or the router is temporarily unresponsive.
Fix: First, verify your Default Gateway. On Windows, open Command Prompt (Win+R → type cmd → Enter) and run ipconfig. Look for “Default Gateway” under your active network adapter. On Mac, go to System Preferences → Network → select your connection → the “Router” field shows your gateway. On iPhone, go to Settings → Wi-Fi → tap your network name → look for “Router.” If your gateway shows something other than 192.168.12.1 — like 192.168.1.1 or 192.168.0.1 — use that address instead. Also try restarting the router: power it off, wait 30 seconds, and power back on. Sometimes that’s all it takes.
Fix: First, verify your Default Gateway. On Windows, open Command Prompt (Win+R → type cmd → Enter) and run ipconfig. Look for “Default Gateway” under your active network adapter. On Mac, go to System Preferences → Network → select your connection → the “Router” field shows your gateway. On iPhone, go to Settings → Wi-Fi → tap your network name → look for “Router.” If your gateway shows something other than 192.168.12.1 — like 192.168.1.1 or 192.168.0.1 — use that address instead. Also try restarting the router: power it off, wait 30 seconds, and power back on. Sometimes that’s all it takes.
2. Login Page Loads But Credentials Are Rejected
Cause: Your ISP provisioned the device with a custom password, or someone changed the default at some point. This is especially common with Sagemcom and Technicolor gateways supplied by CenturyLink, Frontier, or similar ISPs.
Fix: Check the label on the back of the router very carefully. ISP-supplied devices often have a unique admin password printed there — it might be labeled “Admin Password,” “Gateway Password,” or something similar. It won’t be the same as your Wi-Fi password. If the label doesn’t help, check your ISP’s support documentation — some providers list the default admin credentials for their specific gateway model on their website. As a last resort, the factory reset section below will restore defaults. Don’t panic — you’re not the first person to be caught out by an ISP custom password.
Fix: Check the label on the back of the router very carefully. ISP-supplied devices often have a unique admin password printed there — it might be labeled “Admin Password,” “Gateway Password,” or something similar. It won’t be the same as your Wi-Fi password. If the label doesn’t help, check your ISP’s support documentation — some providers list the default admin credentials for their specific gateway model on their website. As a last resort, the factory reset section below will restore defaults. Don’t panic — you’re not the first person to be caught out by an ISP custom password.
3. Login Page Loads But Looks Broken, Blank, or Garbled
Cause: Browser cache corruption or compatibility issues with the device’s admin interface. ISP-provisioned Sagemcom and Technicolor units often have firmware built for older browsers, and modern Chrome in particular can struggle to render them cleanly.
Fix: Try a hard refresh: Ctrl+F5 on Windows, Cmd+Shift+R on Mac. If the page still looks wrong, switch to Firefox — it tends to handle older gateway interfaces more reliably than Chrome. Temporarily disabling browser extensions (especially ad blockers and privacy shields) can also fix this, since some of these tools interfere with local network admin pages. If you’re on Edge, try enabling Internet Explorer mode under Settings → Default browser → Internet Explorer compatibility.
Fix: Try a hard refresh: Ctrl+F5 on Windows, Cmd+Shift+R on Mac. If the page still looks wrong, switch to Firefox — it tends to handle older gateway interfaces more reliably than Chrome. Temporarily disabling browser extensions (especially ad blockers and privacy shields) can also fix this, since some of these tools interfere with local network admin pages. If you’re on Edge, try enabling Internet Explorer mode under Settings → Default browser → Internet Explorer compatibility.
4. You Can Reach the Admin Panel But the Internet Is Down
Cause: The admin panel at 192.168.12.1 exists on your local network and works independently of your internet connection. Reaching it just means your LAN is functional — it tells you nothing about whether the WAN connection to your ISP is up.
Fix: In the admin panel, navigate to Status, WAN Status, or Broadband and look at your connection status. It should show “Connected” and display a public IP address. If it shows disconnected or no IP, try restarting the gateway (full power cycle — off for 30 seconds, then back on). For DSL connections, check that the phone line cable is securely connected to the DSL port. If the WAN connection stays down after a full restart, call your ISP — the issue is on their side, not yours.
Fix: In the admin panel, navigate to Status, WAN Status, or Broadband and look at your connection status. It should show “Connected” and display a public IP address. If it shows disconnected or no IP, try restarting the gateway (full power cycle — off for 30 seconds, then back on). For DSL connections, check that the phone line cable is securely connected to the DSL port. If the WAN connection stays down after a full restart, call your ISP — the issue is on their side, not yours.
5. You’re Stuck in a Login Loop — It Keeps Kicking You Back
Cause: A stale session cookie or authentication token in your browser is conflicting with the gateway’s login system. This is particularly common with ISP-provisioned gateways after firmware updates are applied automatically overnight.
Fix: Open an incognito or private browsing window (Ctrl+Shift+N in Chrome, Cmd+Shift+N on Mac) and navigate to http://192.168.12.1 from scratch. Incognito windows don’t carry over existing cookies, giving you a completely clean session. If that gets you in, go back to your regular browser and clear cookies for this specific site: in Chrome, go to Settings → Privacy and security → Cookies → See all cookies → search “192.168.12.1” → delete all entries for that address.
Fix: Open an incognito or private browsing window (Ctrl+Shift+N in Chrome, Cmd+Shift+N on Mac) and navigate to http://192.168.12.1 from scratch. Incognito windows don’t carry over existing cookies, giving you a completely clean session. If that gets you in, go back to your regular browser and clear cookies for this specific site: in Chrome, go to Settings → Privacy and security → Cookies → See all cookies → search “192.168.12.1” → delete all entries for that address.
Factory Reset Guide
If you’re locked out or your gateway has gotten into a bad state, a factory reset returns everything to the way it was when it left the factory — or in the case of an ISP device, to the way it was when the ISP first provisioned it.
Back up your settings first — if you can still access the admin panel, look for Management → Backup, System → Save Configuration, or similar under Administration. Download the settings file. Also write down any custom configurations: PPPoE credentials, static IP settings, port forwarding rules, and DNS entries. Your ISP can supply their side of the connection settings again if needed.
How to physically reset:
- Make sure the gateway is powered on — the power LED should be solid.
- Find the Reset pinhole on the back or bottom of the device. Most ISP gateways label it “Reset” or “RST.” You’ll need a straightened paperclip, a SIM ejector pin, or a toothpick.
- Press and hold for the appropriate time:
- Sagemcom F@ST series (ISP gateways): hold for 10–15 seconds until the power LED flashes rapidly
- Technicolor / Thomson gateways: hold for 10 seconds until the status LED changes or flashes
- Buffalo AirStation: hold for 3 seconds for a soft reset, or 10+ seconds for a full factory reset
- Generic ISP gateway: hold for 15–30 seconds to be safe
- Release and wait 3–5 minutes for the full reboot cycle — ISP gateways can take longer than standard consumer routers to fully restart.
After the reset, the login credentials should revert to whatever’s printed on the device label. For ISP devices, some settings may be re-provisioned automatically by the ISP when the device reconnects.
What to Do After You Log In
Getting through the login screen is just the beginning. Here’s what’s worth doing once you’re inside.
Change Your Admin Password
Whether your gateway came from an ISP or a retailer, the default admin credentials are either printed on the device label (meaning anyone who picks it up can read them) or set to admin/admin (meaning anyone can guess them). Either way, change it.
- Look for Management, Administration, System, or Maintenance in the main menu.
- Find Admin Password, Login Password, or Change Password.
- Enter your current password to authenticate.
- Set a new password — at least 12 characters, mixing upper and lowercase letters, numbers, and a symbol. Store it in a password manager.
- Save and apply. The page will usually log you out — sign back in with your new credentials to confirm the change saved.
Change Your Wi-Fi Password
Go to Wireless, Wi-Fi Settings, or Wireless Configuration. Find the Password, Passphrase, or Pre-Shared Key field. Update it to something strong. Every device on your network will need to reconnect with the new password — account for that before hitting save, especially for smart home devices and streaming boxes that don’t have easy keyboard access.
Set Your Security Mode to WPA2 or WPA3
In Wireless Settings, look for Security Mode, Authentication Type, or Encryption. Select WPA2-PSK (AES) as the minimum acceptable setting. If your gateway offers WPA3 or WPA2/WPA3 mixed mode, select that — it’s more resistant to modern attacks. Avoid WEP and original WPA entirely; those protocols are cryptographically broken and offer no real protection. If you want the full picture on why this matters, WPA2 vs WPA3 explained is a clear, readable breakdown.
Review Connected Devices
Find DHCP Clients, Connected Devices, My Network, or Attached Devices in the menu. You’ll see a list of every device currently on your network, each with an IP address, MAC address, and sometimes a hostname or device name. Scan through it — unfamiliar entries could be old devices you forgot about, neighbors on your Wi-Fi, or smart home gadgets you didn’t realize were connecting. Most gateways let you block specific devices by MAC address from this same screen.
Set Up a Guest Network
Check under Wireless or Wi-Fi for a Guest Network option. Not all ISP-provisioned gateways expose this in the admin panel (some require going through the ISP’s app or customer portal instead), but when it’s available, enabling it takes five minutes and is one of the most practical security improvements you can make. Guests get internet access; they don’t get access to your printers, NAS drives, smart home devices, or anything else on your main network. I’ve had a guest network running for years, and I’ve never once regretted it.
Firmware Updates and Port Forwarding
On ISP-supplied gateways, the ISP usually handles firmware updates automatically – you don’t need to manually push updates the way you do on retail routers. If you do see a firmware option under Administration, check it, but expect the system to grey it out or manage it remotely.
For port forwarding — needed for gaming consoles with open NAT, home servers, security cameras, or remote desktop — look under Firewall, NAT, Port Forwarding, or Advanced Settings. Keep in mind that some ISP gateways restrict port forwarding options or require you to call the ISP to configure them. How DNS works is also worth understanding if you’re planning to set up custom DNS servers for speed or privacy filtering.
Common Misspellings of 192.168.12.1
If you searched any of these, you were looking for 192.168.12.1:
192.168.1.21
192.168.12.1.
192.168.l2.1
192.168.12.l
192 168 12 1
192.168 12.1
http//192.168.12.1
www.192.168.12.1
192.168.12.1/
https://192.168.12.1
192.168.121
Which Brands and ISPs Use 192.168.12.1?
Brands that commonly use 192.168.12.1 as their default admin gateway:
- Sagemcom — the primary brand associated with this IP. Sagemcom gateways are widely deployed by ISPs across the US and internationally. Models like the F@ST 5260, F@ST 5280, and the older F@ST 3864 series typically use 192.168.12.1. If your ISP gave you a white gateway with “Sagemcom” printed on it, this is your address.
- Technicolor / Thomson — a longtime manufacturer of ISP-provisioned gateways. Many Technicolor TG-series and Thomson SpeedTouch models use this address, particularly those deployed by Frontier and CenturyLink/Lumen in fiber and DSL markets.
- Buffalo (AirStation series) — Buffalo’s home and small business routers, popular in both the US and Japanese markets, use 192.168.12.1 as their default gateway on several models including the WSR and WXR series.
ISPs that commonly provision gateways at 192.168.12.1:
- CenturyLink / Lumen — DSL and fiber customers are often issued Sagemcom or Technicolor gateways defaulting to this address.
- Frontier — particularly Frontier fiber customers may find their ONT/gateway using this address.
- Some regional cable and DSL providers — smaller ISPs sometimes use rebranded Sagemcom or Technicolor hardware with this default.
If you’re a CenturyLink or Frontier customer and this IP isn’t working, run ipconfig on Windows or check your Wi-Fi settings on your phone to confirm the exact gateway address your device is using — ISP provisioning can vary by region and model year.
FAQ
What’s the difference between my Wi-Fi password and my router admin password?
These are two completely different credentials doing two completely different jobs. Your Wi-Fi password is what you enter on a phone or laptop to join your wireless network. Your admin password is what you enter at 192.168.12.1 to access the settings panel and configure the router. On ISP-supplied gateways, manufacturers often print the Wi-Fi password on the label alongside the admin password — both appear there, but they remain separate. Changing one doesn’t change the other.
Can I replace my ISP’s gateway with my own router?
Usually yes, though it depends on your internet service type. For most cable and fiber connections, you can put your ISP’s gateway into “bridge mode” or “IP passthrough mode” and use your own router for the Wi-Fi and local network management. For DSL connections, you typically need to keep the ISP’s modem for the DSL connection itself, but you can still add your own router behind it. Ask your ISP about bridge mode if this is something you want to do.
Can anyone outside my home access 192.168.12.1?
No. Private IP addresses like 192.168.12.1 only exist on your local network and are not routable on the public internet. No one outside your home can reach this address from outside — not through the internet, not through another network. The only way someone could access your admin panel is if they were physically connected to your network.
Conclusion
192.168.12.1 is most commonly the front door to your ISP-supplied Sagemcom or Technicolor gateway, and once you know how to get in, the process is the same as any other router. The one thing that trips people up most often is ISP-custom passwords — that label on the back of the device really is worth reading carefully before assuming the defaults. Change your admin password, check your Wi-Fi security mode, and review connected devices, and you’re in good shape. Hit a snag specific to your model or ISP? Drop it in the comments below and I’ll do my best to help.