If you’re looking at 192.168.50.1, you’re almost certainly dealing with a Peplink or Pepwave router — and that puts you in a completely different category from the average home user trying to log into a D-Link. Peplink and Pepwave routers are advanced multi-WAN devices built for RVers, boaters, remote workers, and IT professionals who need reliable connectivity from multiple sources at once. ASUS also uses 192.168.50.1 on some of its routers. This guide covers the full login process on PC and mobile, what to do when the page won’t load, how to perform a factory reset safely, and what’s worth configuring once you’re inside the Peplink admin console.
192.168.50.1 – Router Login Admin Page
What Is 192.168.50.1?
It’s your router’s local management address — the IP you type into a browser to open the admin panel where you can configure WAN connections, Wi-Fi settings, VPN, security, and more.
Every router gives itself a default gateway address that connected devices use to route traffic, and that you use to access settings. While most consumer routers choose 192.168.1.1 or 192.168.0.1, Peplink deliberately chose 192.168.50.1 to reduce the chance of IP conflicts when their routers operate in complex environments with multiple networks — a real concern when you’re running cellular failover alongside a marina Wi-Fi connection or a satellite link.
The “50” subnet — 192.168.50.x — is the Peplink/Pepwave signature. If you see this IP, the router is almost certainly a Peplink product. It’s private, defined by RFC 1918 private address ranges, and completely invisible to the public internet.
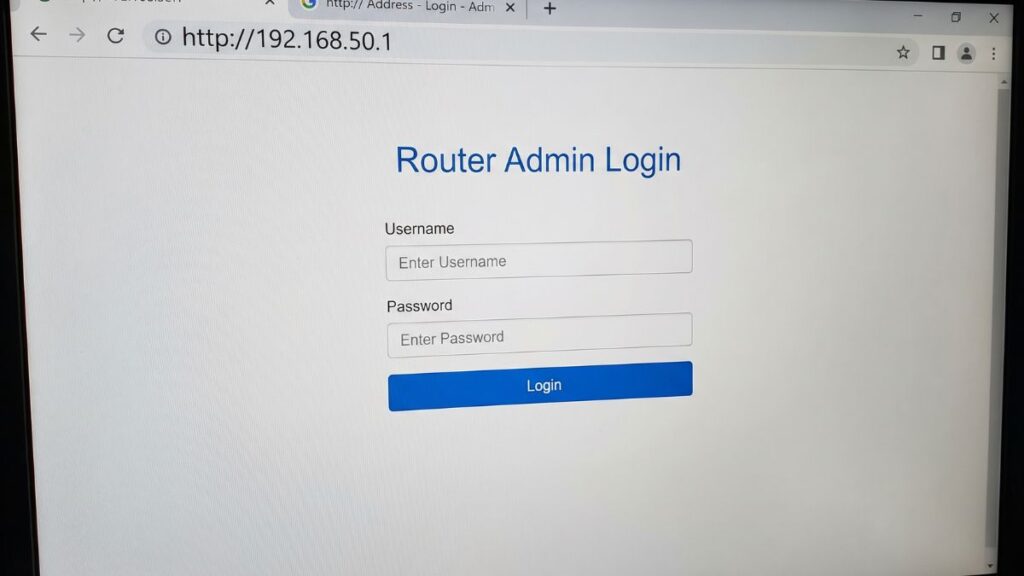
Most people don’t know this: Peplink routers enforce a mandatory password change on first login — you cannot keep the default admin password. When you first connect to 192.168.50.1 after taking a Peplink out of the box, the router will require you to set a new admin password before letting you proceed. This is a security feature most consumer router brands don’t bother with.
Default Login Credentials for 192.168.50.1
The label on the bottom of your router is always the most reliable source. That said, here are the factory defaults:
| Brand / Device | Default Username | Default Password |
|---|---|---|
| Peplink (all series) | admin | admin (forced change on first login) |
| Pepwave MAX / BR series | admin | admin (forced change on first login) |
| Pepwave Surf / AP series | admin | public (some models) |
| ASUS (some models) | admin | admin |
| ASUS (newer models) | admin | (unique, printed on label) |
Critical Peplink note: The default credentials are admin / admin, but you will be forced to change the password on your very first login. This means if someone else set up the router, the password is not admin — it was changed during setup and only the person who configured it knows it. If you’re locked out, a factory reset is your only option.
ASUS note: Newer ASUS routers ship with a unique password printed on the device label rather than a universal default. Always check the sticker on the bottom of the unit before trying anything else. ASUS routers also respond to http://router.asus.com as an alternative to the IP address.
How to Log In on a PC or Laptop (Windows & Mac)
- Connect to your router. Use an Ethernet cable plugged into one of the router’s LAN ports for the most reliable access. Wi-Fi works too — connect to the SSID the router is broadcasting (the default SSID for Peplink devices is usually
PEPWAVE_XXXXwhere XXXX are the last four characters of the serial number). - Open your browser. Chrome, Firefox, Edge, and Safari all work.
- Click the address bar at the very top of the browser window — where you normally type website URLs.
⚠️ The most common mistake: Typing 192.168.50.1 into Google’s search bar. That gives you search results — not your router. The address bar is the long bar at the top of the browser window, separate from any search box inside a webpage.
- Type
https://192.168.50.1and press Enter. Note: Peplink admin panels use HTTPS (not plain HTTP) by default. Your browser will likely show a security certificate warning — this is normal and expected for a local device, not a sign of anything malicious. - Bypass the certificate warning. In Chrome: click Advanced → Proceed to 192.168.50.1 (unsafe). In Firefox: click Advanced → Accept the Risk and Continue. In Edge: click Advanced → Continue to 192.168.50.1. This is safe — your router uses a self-signed certificate that your browser doesn’t recognize, but you’re on a private local network.
- The login page appears. Enter your username and password.
- Click Login. On first login, you’ll be prompted to set a new password — do it.
ASUS users: You can also try http://router.asus.com in the address bar instead of the IP, which takes you to the same admin panel without the certificate warning.
How to Log In on a Mobile Phone
Separate steps for each platform — because “open your browser” isn’t enough.
iPhone (iOS)
- Open Settings → tap Wi-Fi.
- Make sure you’re connected to your Peplink or ASUS network (tap the network name if not already connected).
- Tap the (i) icon next to your connected network.
- Scroll to Router — confirm it shows 192.168.50.1.
- Open Safari — it handles HTTPS certificate warnings on local devices better than Chrome on iOS.
- Tap the address bar and type:
https://192.168.50.1 - When the certificate warning appears, tap Show Details → Visit this website → Visit Website. Enter your credentials on the login page.
Android
- Open Settings → Network & Internet (Samsung: Connections → Wi-Fi).
- Tap your connected network name.
- Check Gateway or Router — confirm it reads 192.168.50.1.
- Open Chrome or your browser.
- Tap the address bar and type:
https://192.168.50.1 - When the certificate warning appears, tap Advanced → Proceed to 192.168.50.1. Log in with your credentials.
Tip for Peplink users: The Peplink admin console is a fairly dense interface designed for network professionals. On a small phone screen it can be hard to navigate. If you need to make detailed configuration changes — WAN settings, VPN, load balancing — use a laptop or desktop where you have a full view of the dashboard.
Troubleshooting: 5 Reasons 192.168.50.1 Won’t Load
If you’re unable to access the 192.168.50.1 router login page, here are the most common issues and how to fix them quickly.
1. You’re Not Connected to the Router’s Network
Cause: Your device is on a different Wi-Fi network, a cellular connection, or your laptop isn’t plugged into the Peplink’s LAN port.
Fix: Connect to the Peplink’s Wi-Fi SSID (default: PEPWAVE_XXXX) or plug an Ethernet cable directly into a LAN port on the router. 192.168.50.1 is only reachable from devices that are actually on that router’s local network.
2. You’re Getting a “Site Can’t Be Reached” Error Despite Being Connected
Cause: You may be typing http:// instead of https:// — Peplink routers redirect HTTP to HTTPS, and some browsers handle this redirect poorly, especially if there’s a cached version of the page.
Fix: Always type the full address: https://192.168.50.1. If you’ve bookmarked the page with http://, delete the bookmark and recreate it with https://. Clearing your browser cache also helps if you’ve previously visited the page unsuccessfully.
3. The Certificate Warning Is Blocking You
Cause: Peplink uses a self-signed SSL certificate for local HTTPS access. Browsers flag this as a security risk because the certificate isn’t issued by a recognized authority — but for a local private device, this is completely normal.
Fix: Manually bypass the browser warning when prompted. Each browser (Chrome, Firefox, Edge) allows you to proceed to the site. To avoid this warning permanently, you can install the router’s self-signed certificate into your browser’s trusted certificate store.
4. The Router’s IP Has Been Changed from 192.168.50.1
Cause: In managed environments — businesses, fleets, or advanced setups — a network administrator may have changed the LAN IP to avoid conflicts with other equipment.
Fix: Find the actual gateway. On Windows, open Command Prompt and type ipconfig — look for “Default Gateway.” On Mac, go to System Settings → Network → your connection → Details. On iPhone, tap (i) next to your network; on Android, check advanced Wi-Fi details. Use the how to find your router’s IP address guide if you need a platform-by-platform walkthrough.
5. You Forgot the Admin Password (and It’s Not admin)
Cause: Peplink requires a custom password on first setup. If someone else configured the router — such as a dealer, integrator, or previous owner — the password is no longer the default.
Fix: A factory reset is the only way to regain access. Be aware that resetting the router will erase all configurations, which can affect complex network setups. Review the reset instructions carefully before proceeding.
How to Factory Reset Your Router
A factory reset erases all configuration and returns the router to its out-of-the-box state. For Peplink users especially, this can mean losing complex WAN configurations, SIM settings, VPN tunnels, load balancing rules, and firewall policies. Back up your configuration first if at all possible.
To back up before resetting: Log into 192.168.50.1 → go to System → Configuration → Backup → download the config file. Store it somewhere safe.
Factory Reset Steps:
- Keep the router powered on.
- Find the Reset button:
- Peplink BR1 series: Small pinhole button on the back, labeled “Reset”
- Pepwave MAX series: Recessed button on the back or bottom
- Peplink Balance series: Recessed button, often behind a panel
- ASUS: Small pinhole on the back labeled “Reset” or “WPS/Reset”
- Press and hold using a paperclip or pin.
- Hold for the appropriate duration:
- Peplink / Pepwave (most models): Hold 10–15 seconds until the Status LED cycles — the SIM/WAN LEDs will flash
- ASUS (most models): Hold 5–10 seconds until the power LED flashes
- ASUS (some newer models): Hold the WPS/Reset button for 5 seconds
- Release and wait 2–3 minutes for the router to fully reboot (Peplink devices take longer than typical consumer routers).
- Connect to the default
PEPWAVE_XXXXorASUS_XXXXWi-Fi SSID and log in athttps://192.168.50.1usingadmin/admin. - You’ll be prompted to set a new admin password immediately.
⚠️ Peplink warning: In fleet, RV, or marine deployments, a factory reset may also clear SIM card configurations, VPN tunnels, and SpeedFusion bonding settings. If the router is managed by a network administrator or MSP, contact them before resetting — they may be able to recover the config remotely via InControl2, Peplink’s cloud management platform.
What to Do After You Log In
Once you’re in the Peplink or ASUS admin panel, here’s what’s worth doing.
1. Set a Strong Admin Password (Peplink Forces This Anyway)
Peplink mandates a custom admin password on first login — minimum 10 characters, mixing upper and lower case with at least one number. That’s a good baseline. Go further: use a passphrase like BlueLagoon!Starboard42 that’s both long and genuinely memorable. The NIST password guidelines have moved away from forced complexity rules in favor of length — Peplink’s minimum is a floor, not a ceiling. Store the password in a password manager.
2. Configure Your WAN Connections (Peplink-Specific)
This is the setting most Peplink users are here for. Under Network → WAN, you’ll see all available uplinks — Ethernet WAN, cellular SIMs, Wi-Fi WAN, and more depending on your model. For each connection:
- Set the priority or load balancing weight
- Enable health checks (Peplink pings a DNS server to verify each WAN is truly working)
- Configure failover behavior — what happens when your primary WAN goes down
Understanding how DHCP assigns IP addresses helps when you’re troubleshooting WAN connections that aren’t picking up IP addresses automatically from upstream networks.
3. Configure Wi-Fi (SSID and Password)
- Go to AP → Wireless SSID (or Network → Wi-Fi on some firmware versions).
- Select the default
PEPWAVE_XXXXSSID to edit it. - Change the SSID name to something meaningful.
- Set the Security Policy to WPA2/WPA3 – Personal.
- Enter a strong Wi-Fi password in the Shared Key field.
- Save and apply. For dual-band routers, configure the 2.4 GHz and 5 GHz bands separately.
On ASUS routers, Wi-Fi settings are under Wireless → General in the left navigation.
4. Set Security to WPA2 or WPA3
Always use WPA2-Personal (AES) at minimum. If your Peplink or ASUS model offers WPA3 or WPA2/WPA3 mixed mode, use it — the WPA3 security standard offers better protection against offline brute-force attacks, and mixed mode keeps older devices compatible. Avoid WEP and WPA-TKIP entirely.
5. Check Connected Devices
Under Status → Client List on Peplink, or Network Map on ASUS, you’ll see every device connected to your network. On a Peplink, this is especially useful for identifying which devices are consuming the most bandwidth — relevant if you’re managing a limited cellular data plan. You can also how to see who’s on your network to cross-reference any unfamiliar devices you spot.
6. Set Up a Guest Network
Peplink routers support multiple SSIDs — you can create a guest network that’s isolated from your main network. Go to AP → Wireless SSID → click New SSID. Set a different SSID name, choose your security policy, and under Network Settings, put it on a separate VLAN or subnet if you want true isolation. This is worth doing if you have crew, passengers, or guests connecting to an RV or boat router alongside your own devices. A good reference on how to set up a guest network walks through the concept clearly.
7. Update Firmware
Peplink releases firmware updates regularly, adding features and patching vulnerabilities. Go to System → Firmware to check for and apply updates. Peplink’s firmware update process is reliable — the router keeps a backup of the previous firmware version, so you can roll back if something goes wrong. For ASUS routers, look under Administration → Firmware Upgrade.
8. SpeedFusion and VPN (Peplink Advanced)
Peplink’s headline feature is SpeedFusion — a proprietary bonding technology that combines multiple WAN connections into a single resilient tunnel. If you have a second Peplink device at a fixed location (home, office, or a cloud SpeedFusion hub), you can configure SpeedFusion under Network → SpeedFusion. This enables WAN smoothing (eliminating packet loss across connections) and hot failover. It’s what separates Peplink from ordinary routers — and it’s configured entirely from the 192.168.50.1 admin panel.
Common Misspellings and Typos
If you searched for one of these, you landed in the right place:
192.168.50.l
192.168.5O.1
192.168.50.1/
192-168-50-1
192.168.50.0
192.168.5.01
http://www.192.168.50.1
168.192.50.1
Correct address:
192.168.50.1
Which Brands and Devices Use 192.168.50.1?
Peplink and Pepwave — The Primary Brand
Peplink / Pepwave is the primary — and by far the most significant — brand associated with 192.168.50.1. This IP is documented in all official Peplink product manuals as the default LAN gateway across their entire product line.
Notable models using 192.168.50.1 by default:
- Peplink BR1 series (BR1 Mini, BR1 Classic, BR1 Pro) — compact single-SIM LTE routers popular with RVers and small offices
- Peplink BR2 Pro — dual-SIM router for more demanding deployments
- Pepwave MAX series (MAX BR1, MAX HD2, MAX HD4) — high-capacity multi-SIM SD-WAN routers for fleets, yachts, and enterprise use
- Pepwave Surf series — surf-on-the-go Wi-Fi extenders and marine routers
- Peplink Balance series — enterprise load-balancing routers (some models use 192.168.1.1 instead — check your label)
- Peplink B One / B One 5G — newest generation compact routers
All Peplink routers also support InControl2, Peplink’s cloud management platform, which allows remote administration without needing direct access to 192.168.50.1.
ASUS — Secondary Brand
ASUS uses 192.168.50.1 on a subset of its consumer and gaming routers, particularly certain models in the RT-AX and RT-AC series. The majority of ASUS routers default to 192.168.1.1, but some — especially those in markets where ASUS ships with alternative firmware or ISP-specific configurations — land on 192.168.50.1. Always verify by checking the label. ASUS routers also respond to http://router.asus.com as an alternative to the IP.
Frequently Asked Questions
Why does Peplink use HTTPS instead of plain HTTP?
It’s a deliberate security decision. Plain HTTP transmits your admin password in plaintext — anyone on the same network could intercept it. HTTPS encrypts the connection even on a local network. The certificate warning you see is because Peplink uses a self-signed certificate (not issued by a public authority), but the encryption is real and protects your credentials.
I set up the router but forgot the admin password. The default
admin doesn’t work. What now? Correct — Peplink’s mandatory password change means admin is only valid for the very first login. Once changed, there’s no recovery option other than a factory reset. If the router was set up by a dealer or integrator, contact them first — they may have logged the credentials or can restore a config via InControl2.
What’s the difference between my Wi-Fi password and my admin password?
Two completely separate things. Your Wi-Fi password (Shared Key / WPA key) connects devices to the wireless network. Your admin password logs you into the management panel at 192.168.50.1. On Peplink, the Wi-Fi password is printed on the device label and is separate from the admin password. Change both.
ASUS router says it can’t connect to the internet after I reset it. What do I do?
After a factory reset, ASUS routers launch a Quick Setup wizard that helps you configure your internet connection type (DHCP, PPPoE, etc.). Walk through the wizard rather than skipping it. If your ISP requires PPPoE login credentials, have them ready — you’ll need to enter them during setup.